Anno 1800

Anno 1800

43 ratings
Achievements and tips for ANNO 1800
By Epero
Description of achievements and some tips for them and game.
2
2
2
   
Award
Favorite
Favorited
Unfavorite
Chapter 1
Prologue
Having a Blast
Select your ship, click on the lighthouse. Confirm acceptance in upper right corner and you get dynamite from the lighthouse. Click on the dynamite in your ship´s inventory and after selecting it, click on the swarm of fish to blow them up. Collect 3 tones of charred fish. Go to Packet steamer office to deliver charred fish and you get a ticket to “the Old world”. Then you go to the Old world. Achievement: “A ticket home”.

Chapter 1: A Tale of Two Brothers

A Spark Rekindled
Build 1 Marketplace, 10 farmer residences and attract 50 farmers to your island.
Build a marketplace, houses and also Lumberjack's Hut and Sawmill to have wood for building. And of course build a storage, so they have a place for products. And connect all by roads with a harbor.
The Apple Falls Not Far From the Tree
Clear ruined residence district.
When you have 50 people, you can destroy ruins near the shore. Just click on it and people will take it apart and you will get some materials from it. Like that you can take apart all other ruins. Some are limited by number of your population. For destroying some you will be prompted by the game, but others you can destroy on your own to have more space and some free materials.
Loyalty Repaid
Build 1 Fishery, attract 100 famers.
With 50 farmers you unlocked fishery. Build it and with fish and wood build more buildings to have 100 farmers.
Dull as Ditchwater
Toast to the Future
Clear abandoned market district.

Attract 150 farmers, build 1 pub, sustain for 1 minute supply of schnapps over 70%.
With 100 famers you have enough people to destroy bigger ruins, get rid of them. Build a pub for workers to be happier. To have schnapps you need to have potato farm and schnapps distillery. One farm and one distillery should be enough to satisfy around 150 farmers. And also you will have enough for your uncle.
One Final Polish
Family Bonds
Black Sheep of the Family

Clear Desolated Church District.
Have 4t of schnapps in storage.
Have 4t of work clothes in storage.

Build your city and attract more people and destroy more ruins. Your uncle Edvard Goode will let you know, that he wants you to pay for a funeral. For a start he wants 4t of schnapps. When you have them in storage, he will let you know that he will take them. Just confirm.
Then he wants 4 t of work clothes. You will need them also for your farmers as another basic need. So build a sheep farm for wool and framework knitters for clothes. As with schnapps, here you also need 1 piece of building of both for small population and your uncle. When you have them, just confirm to your uncle that you allow him to take them. You can cumulate those stocks on the fly and acquiring other quests in this time.
The Pleas of a Poor Relation
Hard Times
Freedom and the Free Press

Find your Cousin leading a mob in the vicinity of Edvard's Great Exhibition construction site.
Find 5 Rioting mobs in Edvard's City.
Select the Editor and his crew at Edvard's Harbor, Select the Editor's ship at Edvard's Harbor.

Your cousin wrote you about workers strike in Brights Sands so look for him there. He is around great construction in the middle and leading crowd of marching people. He will tell you about other rioters so you should find them. Orientate yourself by hearing and look for them in the streets. The closer you are the more you hear them shouting.
When you have them you will be contacted by the newspaper editor. He has enough of Edvards lies he had to publish, so he wants to leave, too. Simple, he is in the harbor. Just click on the group of people on the road and then click on the ship. And confirm leaving.
Then Sir Archibald Blake, queen´s ambassador, will introduce himself.
From the editor you gain your first ship.
The Debt is Official
Time For a Raise
Building from the Ashes
Working Class Heroes

Wait for Edvard to contact you about the debt to get your Shipping License.
Upgrade 1 farmer residence to worker residence.
Clear abandoned smeltery.
Attract 150 workers.

Edvard officially registered your debt for funeral at Blake´s so you will not get shipping license until you settle it. For now upgrade farmer residence to worker residence. You should have enough sources to satisfy basic needs required for upgrading.
After upgrading clear another ruin. Now you have enough able people to clear all ruins on the island.
Then build your city further to have enough farmers and workers. Build a clay pit and a brick factory for bricks needed for new buildings. Build a pig farm and a slaughterhouse for sausages, which are requested by workers.
Don´t forget to build more houses for farmers. You still need them to work on farms and also for upgrading them to workers. When you have 150 workers, you can build a church to satisfy their happiness. And also a grain farm, a flour mill and a bakery for bread.
Then you will unlock lifestyle needs. Famers can use for example flour. You can manually turn lifestyle needs on and off. They offer bonus coins and population, but they aren´t necessary.

Edvard's Lackey
Have 4t of sails in storage.
When you have 150 workers, Edvard wants another payment of your debt in a form of sails. The sails and work clothes are made from sheep wool. With bigger population you will need more sheep farms. And of course sailmakers building.

Scapegoats
Curiosity Killed the Cat
None of Your Business

Use a ship to rescue group of castaways and flotsam from the prison transport wreck.
Bring Edvard's Political Prisoners to Eli Bleakworth.
Open Sealed Document on your ship.

When you pay Edvard everything he wanted, he will send you fish out wreckage from his ship. On goal destination you will get political prisoners and a sealed document. Edvard will tell you that if you take them into prison your debt will be considered settled.
If you don´t open the letter and go directly to prison and put prisoners there, Edvard will be satisfied and debt is settled. Achievement “Discreet”.
If you open the letter you will discover that those are coworkers of your father and Edvard wants to get rid of them. After you open the letter you still can put them into prison, or you can take them to Sir Archibald. For opening the letter you gain achievement “Nosey Parker”.
After opening the letter you can still put them in prison, Edvard is satisfied and debt is settled. If you take them to Sir Archibald he will be disgusted by Edvards practices and from his power he will erase your debt.

Shipyard
Hot Off the Press

Build Sailing shipyard.
Photograph sailing shipyard.

When the debt is settled you will get a shipping license. Build Sailing shipyard. When the building is finished just make a picture of it to your newspaper.
Chapter 2
Chapter 2: A Sign of Fire

Bulk Order
Sell to Archibald Blake 1 schooner, 2 gunboats, 1 frigate.
This will have to wait because you need iron for ships and it will be unlocked in missions below.

Any Old Iron
Select iron deposit.
Moving Mountains
Select excavation site. Complete the first phase of the excavation site.
Finish the last phase with the help of a demolitions expert.

The Demolitions Expert
Search for demolition expert's explosives shop near Edvard's timber production.
Search for the demolitions expert in the stone pit at prison governors Island.
Pay 5000 coin bail at the prison governor's lighthouse.
Escort prison governor's ship to your island. Wait until the demolitions expert arrives at your harbor. Talk to the demolitions expert, who's waiting at your harbor.


For ships you need weapons and for those you need iron. Click on iron deposit on west side of island behind rock wall. Aarhant suggests digging a tunnel under rocks and blowing them up with dynamite. Choose excavation site and start digging for which you need bricks and wood. While people are working on it, your sister will send you to your uncle’s island to find demolitions expert. Quest will take you over storage surrounded by three sawmills. Slightly on the left, near the crossroad there is a Explosives shop. There is Theodora Ticker and tells you that Edvard sent her husband Thomas to prison, so he will not join you after workers and editor left to your island.
Go to prison Wormways governed by Eli Bleakworth. You must find Thomas Ticker. Quest will center you over stone quarry. You can click on all prisoners, but Thomas is up, next to the crane. When you find him you need to pay bail 5,000 for Eli to let him go. Pay and send your ship to Eli’s ship next to prison lighthouse. Escort it to your harbor. Next to your trading post just click on Thomas to talk with him.
When the first phase of excavation is finished and you have Thomas Ticker on island then start last phase of excavation. You need wool for it. When this phase is finished then just blow up the dynamite.

Industrial Evolution
Build 1 iron mine, 1 charcoal kiln, 1 furnace, 1 steelworks.
Warfare
Build weapon factory.
When you have access to iron you need to start building production chain for producing steel. Still build up your city to have more workforces. The mine requires 50 workers, charcoal kiln 10, furnace 100 and steelworks 200. When you have it, build a weapon factory which requires another 50 workers. So build city, satisfy needs and increase your number of farmers and workers.

Now it is also good time to take over some islands. On free island you just need to build trading post (10 timber, 8 steel beams) and island is yours. Unless you are in war when your enemy can try taking over your island, then you have nothing to worry. Risk of war depends on difficulty of game and difficulty of your opponents.
Also in short time you will have a way to new world opened. It is good to have a few ships with materials to build few trading posts also there. After discovering the new world just send your ships there and take over a few islands. Ideally Manola, the biggest island in the area (DLC). All other islands are very small so it is good to have a few of them.

Also you can upgrade your people to artisans and engineers which will give you other possibilities. Don´t make too many engineers, they have more needs for satisfying and for some you need materials from the new world. But artisans are okay. With 300 artisans you will unlock docklands DLC for export/ import and ways to other worlds added by DLCs. And with the first engineers you unlock Commuter pier which allows workforce to travel between islands with this pier. It is very important to make production easier so you don´t have to build all houses and satisfy all needs on every island.

Bulk Order
Sell to Archibald Blake 1 schooner, 2 gunboats, 1 frigate.
When you have enough resources and workforce, build requested ships. Take them to Sir Archibald’s lighthouse. Just going there isn´t enough, you have to sell them yourself. Just click on symbol of money on left upper corner of ship’s information panel.
Achievement: „Back In Business“.

Follow A Smuggler
Sail to Madame Kahina's lighthouse. Discreetly follow smuggler’s ship.
Murder!
Sink the ship of your father’s killer.
Lost and Found
Find useful flotsam.
Father’s diary
Open your father’s diary on your ship.
Kahina the Wordly-Wise
Deliver your father’s diary to Madame Kahina’s lighthouse.
The Pyrphorians
Deliver your father's diary to sir Archibald Blake's lighthouse.

When you sell ships to Blake then Thomas Ticker will tell you that your father was murdered and murderer is trying to escape to the new world. Go to harbor of Madame Kahina. Next to her lighthouse confirm tailing of the ship. Follow it, be close, but not too close – avoid smaller circle around this ship. Ship will take you to bay where you discover your father´s murderer. Sink his ship and take things from its wreckage.
You gain your father´s diary. To continue in the quest you only need to open it and close it again. But go through all pages of the diary and you will gain achievement “Dutiful Child”. Then take the diary to Madame Kahina who will tell you about Pyrphorians, cult from the new world. With those discoveries go to Sir Archibald, give him the diary and inform him about everything. He will send you to the new world.

Mission to the New World
Complete expedition Finding Isabel Sarmento.
Before opening the new world it is good to have function economy and production in the old world so you don´t always have to jump between worlds to take care of everything. As I mentioned before, have ready a few ships with materials to take over some free islands after you discover the new world.
When you are ready choose expedition where you need rations, navigation, naval power and hunt. When you send the ship then just take care of the old world and choose some actions for your expedition when you will be prompted to it. Simply don’t lose morale of ship to zero and then you finish expedition successfully and discover the new world.
Chaper 3
Chapter 3: Prosperity


One Hand Washes the Other
Fulfill Isabel Sarmento's demands to receive Prosperity's contract of sale.
A Home for the Rebels
Shelter 50 Jornaleros on La Isla.
Rescue and Refuge
Collect 1 group of Prosperity refugees from Prosperity Island. Deliver 1 Group of Prosperity Refugees from Prosperity Island to La Isla.
A Bastion for All
Shelter 300 Jornaleros on La Isla.
Isabela wants to protect her people tormented by Pyrphorians and you want to prove innocence of your father. She promises you that if you help her people she will give you sales contract for her island. This is just a frame quest which will be active for a long time.
You will get the small island La Isla under your rule and basically you start again same as in the old world. You have to build functioning society with enough workforce, enough production and have stable income. For starter build Lumberjack's Hut and a sawmill for timber, a market and a few houses for jornaleros – local version of farmers. Connect all by roads with the trading post.
Isabela will contact you after you have 50 jornaleros. Just go with ship to her island, load group of refugees waiting in harbor and take them to your island La Isla.
Then you have to have 300 jornaleros, so just build your island, satisfy new needs (fried bananas, ponchos) and increase your population.


Heat Wave
Put out all the fires on La Isla. Build fire station.
A Look Out
Build police station.
Wolves in Alpaca's Clothing
Find 3 Pyrphorians to stop the arson.
Release and Ease
Collect 1 group of Prosperity refugees from Prosperity Island. Deliver 1 Group of Prosperity Refugees from Prosperity Island to La Isla.
Refugees Welcome
Upgrade 1 Jornaleros residence to Obrero residence; shelter 600 Obreros on La Isla; build 1 Hospital.
Ordered Wildfire
Find 5 Pyrphorians to stop the arson.
As you build your city some fires start to shown there. Build a fire station and firefighters will put them out. When you are without fires build a police station so policemen could find arsonist. Isabela believes that Pyrphorians are behind those arsons. To unlock the police station you need to have 300 jornaleros – so basically finish above mission.
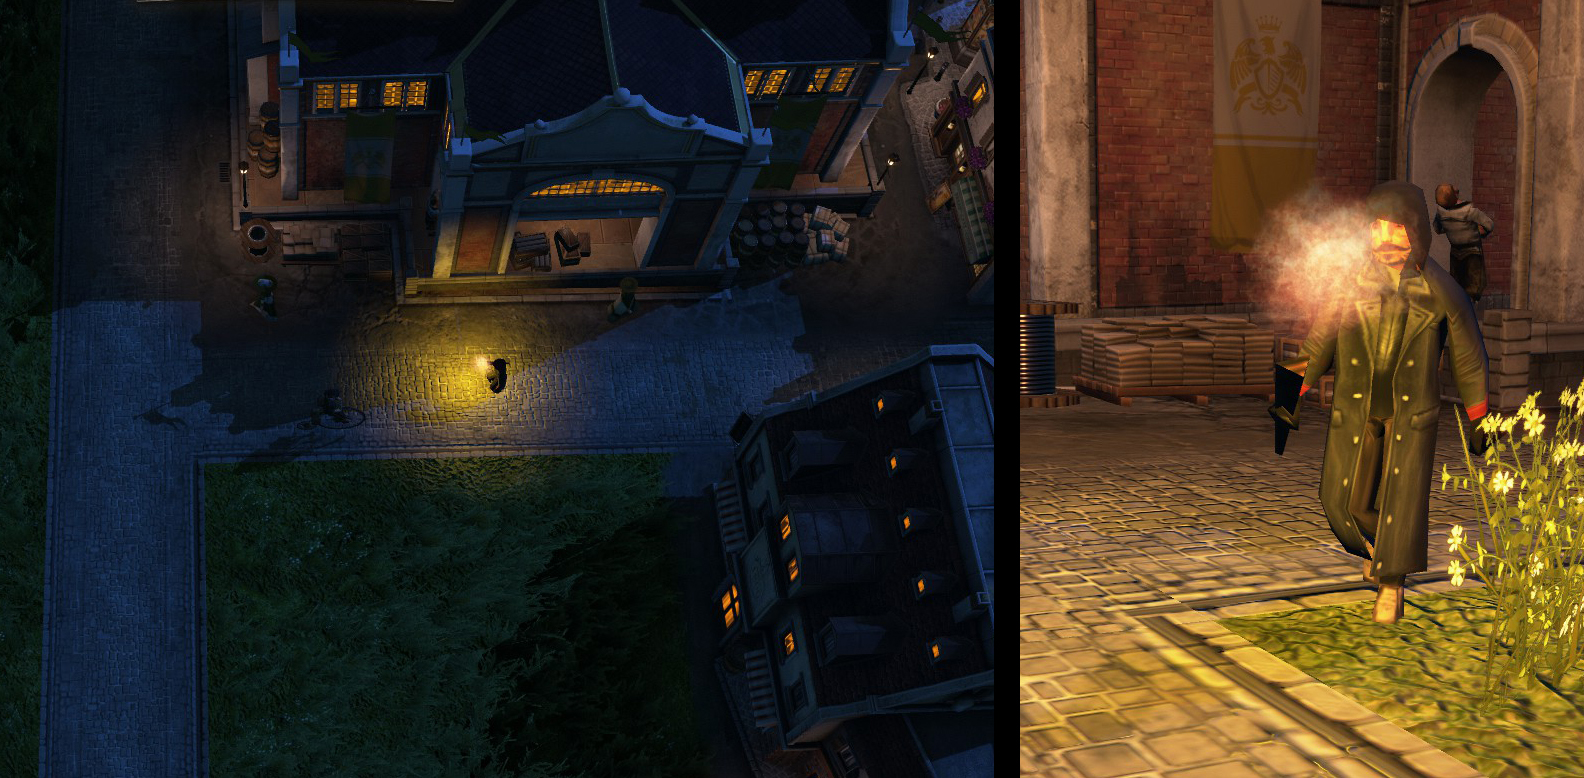
When you have the police station you have to find three arsonists. Arsonists are dark people with torches so you should identify them easily, especially with such a small city. After you catch them, then you have to repeat previous quest and bring group of refugees from Prosperity to La Isla.
Continue building your city, upgrade jornaleros to obreros and have 600 of those to unlock a hospital. Build the hospital so you can take care of refugees. During this time new arsonists will come, this time five of them. Use the same strategy as before, check closely streets, find them and catch them.

It is not needed for quest continuing, but now it is good time to secure the new world. Build on other islands to secure wide variety of new world resources. You can increase numbers of jornaleros, obreros and artists. Artists have lots of needs, so this will take some time. You don´t have to take care of all their needs, you can finish main campaign and then expand. But in the end you will need ships so it will be good to afford them.

The Best Defense is a Good Offense
Have 2 frigates in The New World.
Emergency Evacuation
Approach the fleet to begin the escort. Escort at least 1 of Isabel's schooners to La Isla.
When you are ready build two frigates in the new world, or send two from the old world. When they will be here, Isabela will ask you to escort her ships to your island because Pyrphorians level up their oppression. She has three damaged ships. Just sail to them and escort them. For mission only one of them needs to get to finish. Way is short and there will only be a few attacking ships.

Pay No Ransom
Rescue Pyrphorian hostages from Western Prison Camp.
Rescue Pyrphorian hostages from Southern Prison Camp.
Rescue Pyrphorian hostages from Eastern Prison Camp.
Deliver Pyrphorian Hostages to Isabel Sarmento's Lighthouse.

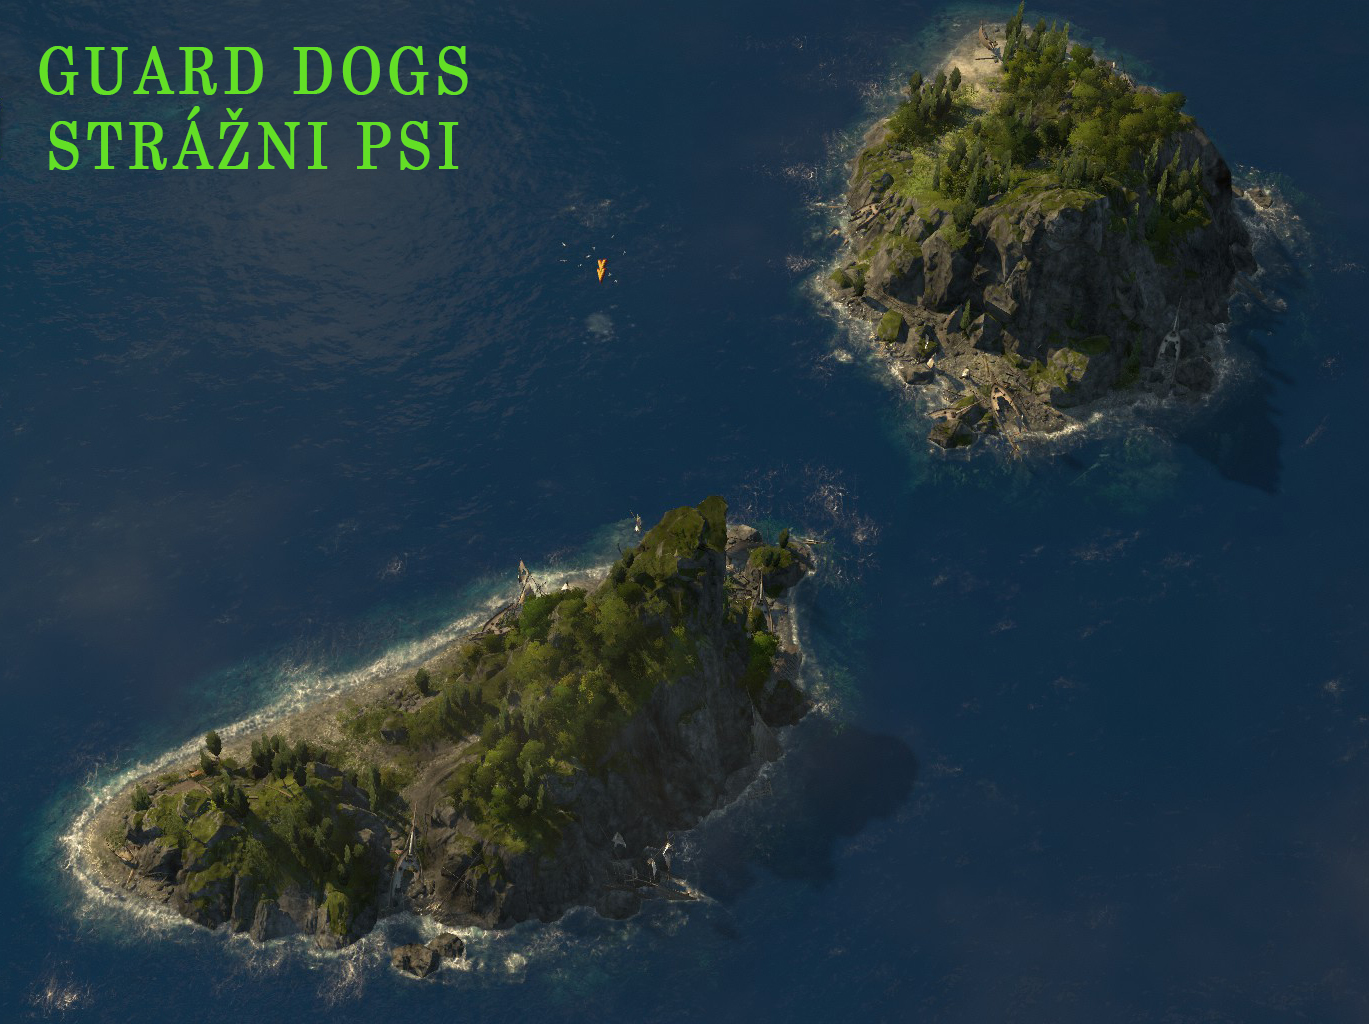
When you escort Isabela she will ask you to save her people abducted by Pyrphorians. They are on three small islands with patrolling ships. You can send a fast ship there and sail between islands and avoid patrolling ships. Or you can send a few battleships and simply destroy those enemy ships. Then just take hostages and deliver them to Isabela´s lighthouse. You will gain achievement “Special operations” and also you finish quest “One Hand Washes the Other”.
At the end of mission a few enemy ships near her lighthouse will appear.


Follow the Lead
Complete expedition The Contract.
Isabela found out that during attacking on her lighthouse Pyrphorians stole the sale contract for her Island. You need a strong ship with rations, navigation, diplomacy and power. You can gain a few bonus rewards base on your choices and resources/ items/ characters you take with you. After you finish this expedition you will gain Sales contract for Prosperity.


Chapter 4
Chapter 4: The Torch Passes

The Confrontation
Deliver Contract of Sale for the Island of Prosperity from your trading post to Edvard.
In the contract you found out that your uncle Edvard falsified your father´s signature and he sold the island of Prosperity. For this revelation you will be awarded from queen by Prosperity island.
Choose any ship in the old world and put on this ship sale contract for Prosperity. You will have it in your trade post. Take it to Edvard´s lighthouse in Bright Sands. He confesses to his crime.

Prosperity for all
Select in the New world trading post on the Island of Prosperity.
This mission is just to remind you that now you own the island of Prosperity. Simply click on the trade station on Prosperity and you are done.

Justitia
Select Court of Justice foundations. Finish the first phase of the Court of Justice. Finish the second phase of the Court of Justice. Finish the last phase of the Court of Justice.
Come What May
Build 2 Mounted Guns. Build 2 Cannon Towers. Build 1 Repair Crane.
Sir Archibald built a foundation of Court of Justice on your island, so you can host this trial. Build the whole Court of Justice through three phases. 100 timber, 50 beams and 500 workers for the first phase, 30 beams, 80 bricks and 700 workers for the second one and 30 windows, 80 bricks and 200 artisans for the third phase.
While building Court of Justice, Aarhant advises you to prepare some defense, because Edvard said that pyrphorians would surely come. Build requested buildings. You can build more, but this is the minimum for advancement.

Noblesse Oblige
Click on Her Majesty's Flagship.
Prosecution
Pick up Court Summons from The Queen's Flagship.
Just choose queen's flagship and send your ship there to take court summon order. When you take it a fleet of pyrphorians will show up and kill Edvard, so there will be no process. This leads you to final mission of this campaign.

Final Battle
Destroy 7 Pyrphorian Warships. Destroy 4 Pyrphorian Command Ships. Destroy Pyrphorian Grandmaster's Battle Cruiser.
The First Flame
Destroy 4 Pyrphorian Attack Ships approaching your Harbor. Destroy 1 Pyrphorian Command Ship approaching your Harbor.
Destroy all ships and it is over. Simple. First take care of ships that head to your harbor. Then destroy ships blocking Bright Sands. The ships near Bright Sands will wait there so you have time to build your own fleet if you don´t have enough strength to destroy them.
But you don´t need to hurry with their destroying. While waiting you will gain a few side quests. "Fire Fighting" and "Exodus" you will get once. "Pyromania" and "Sovereign Aid" will be given to you more times.

When you destroy all ships near Bright Sands the campaign is finished. Bright Sands will be given to you as a reward. And you gain achievement “For Company…” for finishing the game on normal difficulty; “…Queen…” for finishing the game on advanced difficulty; and “…and Empire” for finishing the game on hard difficulty.

Aarhant Proposes A Battle Plan
Construct 16 Frigates – or – Construct 10 Ships-of-the-line.
To be able to destroy enemies fleet Aaranth suggests building those ships. It is the side quest which you don´t have to finish. You can have already more ships of other types.

Pyromania
Find 5 Pyrphorian arsonist.
Exodus
Slip past the Pyrphorian patrols to the Bright Sands sewer exit.
In one quest you have to find 5 arsonists during 2 minutes. It is very little time and important is how big your city is. If you have skyscrapers it can be really hard to find something there. If you want just the achievement, you can destroy most of the building before getting this quest and you will find them easily. If you don´t have a megacity, you can help yourself with turning day into night. It can be done in upper right corner. Arsonists have torches and in the dark you can see little glow from their torches. But you still need to be close enough to see people in the streets. And of course set the speed of the game to minimum. They walk only by the roads, so look for them on the roads. But they can be anywhere, not just close to fires they made.
The second quest is “Exodus” and will be available after “Pyromania”. You have to save people escaping from Bright Sands. On the west side of island there is a small cove where two ships are on patrol. They can´t see you, otherwise the quest will fail. They always have the same route, so just wait in front of the cove out of their range and when they go up to north you sail into the cove. Put refugees on your ship and bring them to your island.
By completing those two quests you gain achievement “Fire and Rescue”.

Fire Fighting
Destroy 3 Pyrphorian Ships.
Sovereign Aid
Approach the ship to begin the escort.
The first quest is “Fire Fighting”. You have to destroy three patrolling ships. They don´t attack you until you are in their fire range. They just patrol on their set route. So catch them, or wait for them on their route and destroy them.
The second quest is “Sovereign aid”. You have to deliver help from queen. Go to Sir Archibald’s ship and escort this ship to your harbor. There he left Shipping document of storeship in water. Take it to queen ship and you will gain 40 sails and 40 guns.
By completing those two quests you gain achievement “Supply Chain Management”.

The End

A Dream of Our Own
Attract to Bright Sands 500 Engineers.
At the end you just have to attract engineers to Bright Sands to make this island alive again. You can destroy, or renew ruins on the island.
Achievements
A Ticket Home
Obtain a ticket home.
You will get this by finishing prologue, before real playing and obtaining your first island.

Nosey Parker
Open the letter you were asked to deliver to Eli Bleakworth.
Discreet
Deliver the letter to Eli Bleakworth unopened.
In the first chapter of campaign you will have the quest “Scapegoats” where you fish out of water some prisoners and letter. If you deliver them and unopened letter to Eli, you gain achievement “Discreet”. If you open the letter, no matter what you do next, you will gain achievement “Nosey Parker”.

Dutiful Child
Read the whole of your father's diary.
In the first chapter of campaign you will have quests “Follow a smuggler”, “Murder!”, “Lost and found” and then “Father´s Diary” and “Kahina the Worldly-Wise”. Here you gain your father´s diary. To continue in the quests you only need to open it and close it again. But go through all pages of the diary and you will gain this achievement.


Back in Business
Fulfill Sir Archibald Blake's bulk order.
In campaign finish the quest „Bulk Order“ and sell to Archibald 1 schooner, 2 gunboats, 1 frigate.

Isabel Found
Discover the New World in the campaign.
At the end of the second chapter of campaign finish expedition „Mission to the New World“ and you will advance to the third chapter by discovering the New World.

Special Operations
Rescue Isabel's comrades.
After mission “Emergency evacuation” in the third chapter you gain from Isabela mission “Pay No Ransom”. You have to save three groups of hostages from three small islands. There are patrolling enemy ships. You can take a fast ship and evade those patrols, or you can take a few ships and simply destroy patrols. Load hostages, deliver them to Isabela’s lighthouse and you gain this achievement.

The Truth Uncovered
Learn the secret behind your father's death.
You will learn this truth around end of the chapter four of campaign.

Fire and Rescue
Find all the arsonists and evacuate Bright Sands.
At the end of the fourth chapter you gain last mission “Final Battle”. For this mission you have to destroy enemy fleet. Don´t finish this mission and wait. You will gain a few side quests.
One quest is “Pyromania” and you have to find 5 arsonists during 2 minutes. It is very little time and important is how big your city is. If you have skyscrapers it can be really hard to find something there. If you want just the achievement, you can destroy most of the building before getting this quest and you will find them easily. If you don´t have a megacity, you can help yourself with turning day into night. It can be done in upper right corner. Arsonists have torches and in dark you can see little glow from their torches. But you still need to be close enough to see people on streets. And of course set the speed of the game to minimum. They walk only by the roads, so look for them on the roads. But they can be anywhere, not just close to fires they made.
The second quest is “Exodus” and will be available after “Pyromania”. You have to save people escaping from Bright Sands. On the west side of island there is a small cove where two ships are on patrol. They can´t see you, otherwise the quest will fail. They always have the same route, so just wait in front of cove the out of their range and when they go up to north you sail into the cove. Put refugees on your ship and bring them to your island.
By completing those two quests you gain this achievement.

Supply Chain Management
Defend all royal supply ships and destroy all supplies of your enemy.
At the end of the fourth chapter you gain last mission “Final Battle”. For this mission you have to destroy enemy fleet. Don´t finish this mission and wait. You will gain a few side quests.
The first quest is “Fire Fighting”. You have to destroy three patrolling ships. They don´t attack you until you are in their fire range. They just patrol on their set route. So catch them, or wait for them on their route and destroy them.
The second quest is “Sovereign aid”. You have to deliver help from queen. Go to Sir Archibald’s ship and escort this ship to your harbor. There he left Shipping document of storeship in water. Take it to queen ship and you will gain 40 sails and 40 guns.
By completing those two quests you gain this achievement.

For Company,...
Finish the campaign on normal difficulty.
...Queen,...
Finish the campaign on advanced difficulty.
...and Empire.
Finish the campaign on expert difficulty.

Winter Is Coming
Have 10t of Bread, Fish, Beer, Schnapps and Canned Food in stock.
You should get this without problems while playing as you satisfy needs of your people.

Gold Digger
Reach 100,000 coins in one company.
You get this while playing, since you need much more for later stages of the game.

No Business like Ship Business
Sell 5 Schooners.
Easy. In campaign you have to sell 1 schooner, so you will learn how to do it. Then simply make and sell more.

City Planner
Have 10 buildings planned in blueprint mode.
You can activate blueprint mode in which you only lay plans for building on ground without spending resources. Place 10 plans for building in this mode.

Chartered Company
Reach Investors using only charter routes.
Investors are last evolution phase of people in the old world (farmers, workers, artisans, engineers, investors). To get there you have to satisfy lots of needs and deliver lots of sources and products, because not everything is available on every island. For supplies you can use trade routes (by your own ship) or charter routes. So spend influence and money on charter ships until you reach investors.

Climate Change Denier
Build a power plant.
Once you reach the level of engineers in population, you will be able to build a power plant.

Full Steam Ahead!
Build a steam ship.
Once you reach the level of engineers in population, you will be able to build the power plant. Then you can build a Steam shipyard. For this achievement build any steam ship from steam shipyard.

Choo Choo!
Own your first train.
Once you reach the level of engineers in population, you will be able to build the power plant and for supplying it with oil you can build an oil refinery and an oil harbor. All those buildings have to be connected with railroad. When you have oil, your own train will start delivering it by railroad.

Great Exhibitionist
Organize an exhibition.
When you have 5,000 investors, you can build World's Fair. When it is finished, you can host exhibitions. Just make one and you get this achievement.

Party like it's 1851
Organize a truly sumptuous exhibition.
When you have 5,000 investors, you can build World's Fair. When it is finished, you can host exhibitions. To ensure satisfaction of attendants of fair, you have to deliver specific quantities of luxury goods. Higher level of exhibition, the more goods are needed. For this achievement make exhibition of highest level and reach maximum satisfaction (so deliver all needed goods).
Achievements
On a Knife Edge
Finish an expedition with morale below 15%.
Usually you want your ship to be prepared as best as you can. Now send a ship which fills at least some recommendations, but not all. Don´t give extra rations to your crew to lower their morale and loose in some choices. But of course watch out not to fall on 0. You have to be below 15%, but you have to finish the expedition.

Annoholic
Win the game with the highest possible difficulty score.
Choose your own solo game and set the highest difficulty. It is not enough to have just “hard”, but slider needs to be at the end on the right side. So you have to set everything manually to highest difficulty, deactivate neutral characters and as opponents choose the hardest characters. But you can choose winning conditions, so set it to reach 5,000 populations. So in the game you don’t need to visit other islands, just satisfy basic needs and build houses for farmers and workers.

Fake News
Swap all the articles in the newspaper and then publish it.
Before every publishing of newspaper you can check them and replace negative articles by other which will affect population in a way you want. Replacing articles costs influence. For this achievement replace all articles, whether they are negative, positive, or neutral.

Isambard's Kingdom
Build wood, stone and railway bridges.
Almost every building needs to be connected with roads. Classic road makes over the water, or rift a wooden bridge, the stone road makes a stone bridge. And when you have engineers you will connect oil refinery, oil harbor and power plant with railways. If you build only stone roads, make also one classic with bridge to have all three bridges at once and to get this achievement.

One for all, all for one.
Play a multiplayer match with 3 other players.

What's That Smell?
Have a burning sailing ship.
Your ship with sails needs to catch fire from enemy flamethrower. Flamethrowers protect harbors, so find harbor with flamethrowers declare war and send a group of your sailing ships there. If you send just one ship, protection of island will destroy it quickly. And it is not always sure whether the ship starts burning, sometimes the flamethrower destroys it sooner. So save the game before you send your ships do death and try it a few times.

Leviathan
Build a battle cruiser.
Once you reach the level of engineers in population, you will be able to build the power plant. Then you can build the Steam shipyard. And build a Battlecruiser there.

Besties
Form an alliance with both Bente Jorgensen and Princess Qing.
In order to get this achievement you have to start the game where Bente Jorgensen and princess Quing are among your enemies. Both are easy enemies, so they are nice and willing so you don´t have to do much to raise diplomacy and form alliance with both of them.

Bankster
Make someone happy by building a bank.
In order to get this achievement you have to start the game with Beryl O'Mara as your enemy. Then just build a bank, which make her happy. You can build the bank when you have 3000 engineers.

Thank you, Mr. Scrooge.
Lure Carl Leonard von Malching into gifting you money.
In order to get this achievement you have to start the game with Carl Leonard von Malching as your enemy. Try to form alliance with him, ideally before discovering the new world. Your allies will give you money from time to time. Carl isn´t very generous, but occasionally he can give you money too. But for this you will wait much longer than with Bente, or Quing.

World Peace
Form alliances with all players and pirates.
You can form alliance with anybody, but it is easier if you choose easy difficulty for the game and as enemies you choose Bente Jorgensen, Princess Quing and Willie Wibblesock. They are “easy” enemies and with them it is not so hard to form alliance. It is harder with pirates. You have to have good economy, because they often request money for rights, alliance, or just for keeping alliance going. Rise your diplomacy and save the game before every flattery or financial gift, because they can refuse it and it will lower your reputation. Make their quests, form non-aggression pact, trade rights and then form alliance. Whole thing can be hardened if other characters are in war with pirates (or among themselves). If you are allies with two characters which are in war, you have to choose which one of them you will support. If you miss only one person for this achievement and you can form alliance, just do it. Before you will be asked to choose one of enemies, you will unlock this achievement.

The Great Eastern
Obtain ship „The Great Estern“ via Archibald’s special quest „The Floating City“.
When you have 5,000 investors, you can build World's Fair. After building is finished, Sir Archibald will give you quest “The Floating City”.
1. Go to Sir Archibald Blake's lighthouse. 2. Take a picture of World's Fair. 3. Select Blake's ship. 4. Deliver 70t of steel beams to Blake's ship. 5. Take a massive propeller from shipwreck and deliver it to Sir Archibald's lighthouse. 6. Deliver 40t of steam engines to Blake's lighthouse. 7. Accept The Great Eastern.
Your reward is ship The Great Eastern with 8 cargo spaces, 3 spaces for items. You can build more through Research Institute with DLC Land of the Lions.
Another reward is character: Rohit Bhargava, the Naval Architect (for Harbormaster's Office. Construction costs -35%, workforce needed -50%, Maintenance -80%. Expedition: Crafting +50, Navigation +30).
Seat of Power - achievements
Seat of Power DLC

All Under Control
Unlock all the Departments of the Palace.
Availability of departments is related to attractiveness of your island. There are five departments in total. Administration (0), Culture (450), Labour (700), Welfare (1000) and Trade (1350).

Cultural Capitol
Have at least a Zoo, a Museum, a World's Fair and a Public Mooring within the Palace's range for 30 minutes.
Make sure, you build everything near the palace. You can remove buildings, or in hard difficulty destroy them and build anew. Or you can build some of them more than one building. Range of palace depends on number of modules (palace wings) and their number depends on global population. You have to have Public mooring. If you have upgraded it for Tourist mooring, then you will not get the achievement. In that case you need to destroy it, build Public mooring and after you gain the achievement, you can upgrade it for Tourist mooring again.

Apparatus of State
Have at least one Trade Union, Town Hall and Harbourmaster's Office with 4 item slots equipped each.
By default you have only 3 places for items in those building. By policies on palace department you can unlock the fourth place in each of those building and then place items to all those places.
On Department of trade activate Harbor stewardship act (require 5200 attractiveness) and it gives +1 place for items into Harbormaster's office.
On Department of labor activate Union subsidies act (require 6750 attractiveness) and it gives +1 place for items into Trade union.
On Department of administration activate Open minds act (require 3850 attractiveness) and it gives +1 place for items into Town hall.


Prime Minister
Unlock all the Policies of the Palace.
Higher attractiveness of your island unlocks more policies. To have all policies available you need to have attractiveness at least 7600.

Megopalace
Build 40 wings for the Palace.
The bigger population you have the more wings for the palace you can build. For 40 wings you need more than 40,000 people. And also remember, that wing costs 50,000 coins, 10 timber, 20 bricks, 20 steel beams, 15 windows and 10 pieces of reinforced concrete. So for 40 wings you need 2,000,000 coins, 400 timber, 800 bricks, 800 steel beams, 600 windows and 400 pieces of reinforced concrete.
Bright Harvest - achievements
Bright Harvest DLC

Long Term Grains
Have one working Silo in the Old World region.
This DLC adds tractors for plant farms and fatling silo for animal farms. Build one silo for animal farm and have enough grain to make the silo works.

Traction Control Have at least 10 farms with working tractors supplied by only one Fuel Station. 
Simply build 10 farms on any island. On each build a tractor barn and build a fuel station close enough to support all 10 tractor barns. Build oil harbor and upgrade it to have enough capacity for oil. Have oil wells, or deliver oil to have enough oil for producing fuel for tractors. And also destroy all other fuel stations in the game. For a bug it isn´t enough just to have 10 farms with tractors supported with 1 fuel stations. It has to be the only fuel station in the game.

Flawless Defence 
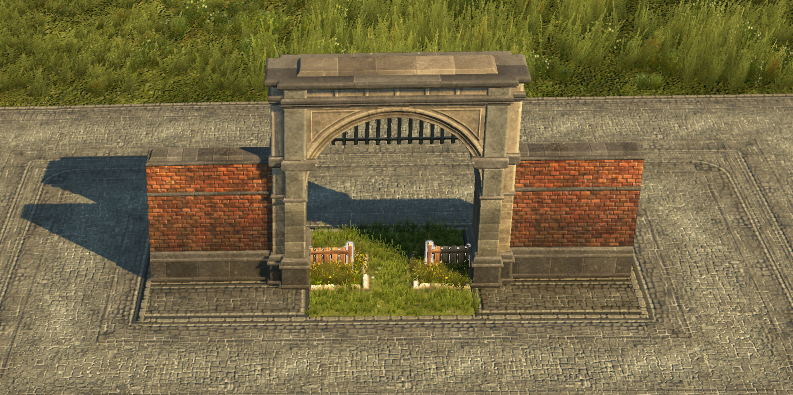
Build a Wooden Fence Entrance underneath a Brick Wall Gate.
Go to ornaments section, next to building section. There in the lower part choose “seasons” and there choose “Bright harvest” with ornaments from this DLC. Build “Brick Wall Gate” and into the gate of this brick wall build “Wooden Fence Entrance”.

Crop Rotator
Have one of every type of farms improved with a Tractor or Silo in the Old and the New World regions.
In the old world have plant farms: Potatoes, Grain, Grapes, Hops, Red pepper. Animal farms: Sheep, Pig and Cattle.
In the New world have plant farms: Banana plantation, Sugar Cane, Cotton, Caoutchouc, Corn, Coffee Beans, Tobacco, Cocoa, Herbs, and Orchid. Animal farms: Cattle, Alpaca and Nandu.
On all of them build a tractor barn and a silo. For achievement to count you need to have them also supplied. So you need grain for animal farm in the old world, corn for animal farm in the new world, fuel for tractors and ferilizer for plant farms. Their supply needs to be assured. I gained this achievement when I sent a ship with fertilizer to my vineyard and achievement popped immediately. So make sure you have a fertilizer (in the new world you can produce it right on islands with farms through hacienda and you need to send it to the old world), fatling crops (corn and grain. Either have farm with them on island with animal farms, or ensure their deliveries) and fuel (have oil for fuel stations). And also make sure that tractor barns and silos are within range of storages and fuel stations.

As Far as the Eye Can See
Build at least 350 Farm Fields on any crop farm requiring this amount.
Build a silo and a tractor barn to the farm which increases number of field modules. And then build a Trade Union within the range of farm and put items inside that increase number of modules. If you have mediocre items, but have enough attractiveness and the palace you can use policy that add the fourth place for items – see achievement „Apparatus of state“. Or use better items, which add more.
Wood ash (+15% modules); chemical fertilizer (+25% modules); expert planter (+25% modules); Superphosphate fertilizer (+35% modules); Alexander Hnacock (+35% modules); Cosmo Castelli, agronomic trailblazer (+35% modules).

Fuel Efficient
Reach a global production rate of Fuel of at least 100 tons per minute.
You need to have enough fuel stations and of course also big stock of oil. Only for achievement you can stop production, or supply of oils. Make enough stock in big oil harbor and then allow supply, or production.
Land of Lions - achievements


Land of Lions DLC

Goatberg Variations
The Goats Sing: Mi Ti So Do and ?
In the main city of Enbesa, which is managed by emperor Ketema, there is a market with a few goat dens. When you click on them, every pen makes different sound with text. Click on them in order Mi Ti So Do Laa.

Conciliator
Unify Waha Desher, Kidusi Anitoni and Angereb to Enbesa.
Emperor Ketema wants to unite whole Enbesa. Every one of three tribes has its own storyline. You can end them in a way if they do not join Ketema. If you finish them all so they will join him and whole Enbesa will be under Ketema´s rule, then you will gain this achievement.

Monumental Knowledge
Build the Research Institute.
You will have to build it in mission “The Research Institute” after you proceed through half of main storyline of this DLC.

The Wilde Ones
Reach a population of 25,000 scholars.
To have scholars you need to build scholar residences. Except building material you also need a Campus extension permit for every 5 scholar residences. In Research institute you can choose Major Discoveries and there invest research points and research this permit. You can research it over and over to have more buildings which you need to accumulate more research points. And you also need to take care of scholars. They are like new population group with their specific needs.

Major Discoverer
Research all Major Discoveries at least once.
See “The Wilde Ones” to know about scholars. They produce research points needed for discoveries in Research Institute. There are three categories (Revolutionary Concepts; Matery of Nature; Production Methodology) with their subcategories. At least once research one discovery from every category. 1 research takes 90 minutes with minimum 1000 engineers. You can assign up to 10000 engineers and then 1 research will take 10 minutes.

Stir Crazy
Reach a Seafood Stew production rate of 25 tons per minute.
This is only hard for maintaining enough population to supply enough production buildings. For seafood stew you need Teff farm (20 shepherds), Spice farm (15 shepherds), Teff mill (50 elders), Lobster fishery (35 shepherds) and Wat kitchen (70 elders). You need to have more farms, mills and fisheries to have enough resources and then have lots of kitchen to meet this requirement. Or you can have about 1800 elders for 25 kitchens, but stop productions in them. Fill storage with needed ingredients to be able to supply 25 kitchens at least for a short while and then allow production to gain this achievement.
Docklands - achievements

Docklands DLC

Each Island can have 1 Docklands Main Wharf and additional modules. Modules improve efficiency and functionality of docklands. They have to be built in the same harbor as Main wharf, but they don´t have to be connected. But if they are connected, each of them gives bonus +15 attractiveness.
Initially only limited number of modules can be built. The more items you export of the same type, you increase its export level and the more modules you unlock (until their maximum capacity).
Unlocked modules are shared between main wharfs, so if you unlock more on 1 island, you can build the same number of modules on another island if you have another Main wharf there.
Initially main wharf has only 1 place for export/ import contract. The more Export offices you build, the more contracts you can have (max 13 export offices, so 14 contracts per 1 main wharf).
There are a few import companies and each offers different types of goods, but not all goods in the game are available for importing. Not all goods from company are immediately available. First you need to meet specific criteria. For example in FEEDL fish are available immediately. For bread you need to export 360t of any good. For beer you need to import 702t of sausages. And for rum you have to have 18 active contracts.
So you need to calculate what to do in order to unlock what you want. If you produce enough sausages, simply sell them (to have place in storage) so you can import them, even if you don´t need them, but still you need to import them to unlock beer. And those 18 contracts for rum mean that you need to have more Main wharfs on more islands, since maximum of contracts per 1 main wharf is 14.
Specific of docklands is exporter level for goods. If you export enough tones of the same goods, you reach level 4 (1000t), level 3 (2500t), level 2 (4000t) and level 1 (7000t). There is a pyramid which has 4 places for level 4, 3 places for level 3, 2 places for level 2 and 1 place for level 1. You have to have exported goods in place of this pyramid to be able to reach next level of export. If you have free spots in pyramid the good will go up automatically. But if not, you have to place it manually on each level. For example if you export 1000t of goods and don´t have place on level 4, then exporting level will not increase, even if you export more tones of this goods. If you have it on level 4 and reach 2500t, again you have to move it to higher place. Higher export level of goods means it has better ratio for export/ import. Even this better ratio you have only if an item is placed in pyramid. So if you had an item in 1 place of pyramid and remove it completely, then you have no bonus for export/ import ratio.

Devil of a Deal
Establish three Export/Import contracts.
It doesn´t matter on how much goods, just have three active contracts. Have more Export offices to have more available contracts. See above.

For the Long Haul
Unlock all of a trade partner's goods.
For achievement it is enough to have available all goods of just one partner. Choose a suitable partner, some require too much effort. The easiest are Tattershire farms. Just export 180t of any goods, have 5 active export/imports contracts and import 17t of hops.

The Actual Art of the Deal
Simultaneously have goods in every specialty slot.
Check above description of pyramid of export levels of goods. You have to have globally 10 goods to fill every slot in pyramid.

The Voiceless City
Build 100 docklands modules across all islands.
Above there is description how to have more available modules. Build 100 of them, it doesn´t matter on how many islands.

Snagging the Market
Upgrade 10 goods to Household name level.
Above there is description how the pyramid of bonuses works. On the first place you have to change 10 goods, so you have to export 10x 7,000 tones. Each of those 10 items must be on the first place of pyramid. It doesn´t have to be there for any specific time, you can place it there and immediately change it for another. Just have those 10 goods on the first place to get this achievement.

Flooding the Market
Export 50000t of any goods.
You can let some cheap goods to be exported for long time. But if you collect the achievements, you will get this with “Snagging the Market” where you have to export 70,000 tones.
Tourist Season - achievements
Tourist Season DLC


By the Busload
Attract 500 Tourists.
At the beginning you can´t satisfy all their needs, so simply build more hotels. That way you can increase number of tourists even with not fully occupied hotels.

Experimental Chef
Unlock 1 Additional Recipe.
As you increase number of tourists on your island, you can acquire side quests and with them also side quests that will unlock new recipe. If you don´t take it, cancel it, or fail the quest, just open menu of food venues (restaurants, café, bars). Each of them has a list of available recipes and next to each recipe there is specified what you need to do to unlock that recipe.

Busman's Holiday
Connect a Zoo and a Museum to a Hotel by bus, and fulfill these needs to at least 50%.
Quite easy. Just have few animals in Zoo and few expositions in museum. Connect both with the hotel through bus stations. By clicking on the bus station you see green color on street showing range of bus station. If your starting and ending points are too far away, you need also station in middle if they are out of range of each other. If satisfaction is too little, try to add music pavilion, or more animals and expositions. And also check negatives that can affect tourists, like bad articles in newspaper, insufficient attractiveness, or bad satisfaction with supply of products they required.

All Inclusive
Fulfill the need for Restaurants, Bars and Cafés by 100% for at least 5 Hotels for 1 hour.
In vicinity of five hotels have food venues and close to them a storage and of course have enough sources for foods and drinks from those venues. Also have them connected with hotel through bus stations, but even though, don´t have those food venues too far away from hotel. If satisfaction is too little check negatives that can affect tourists, like bad articles in newspaper, insufficient attractiveness, or bad satisfaction with supply products they required. You can have good working food venue, but if tourists are unhappy with something other, they can´t fully enjoy those venues.

Memento Mori
Reach a souvenir demand of more than 30t/min, and then supply it.
For such demand you need about 15 hotels with enough tourists who have their basic needs satisfied. With enough demand start producing souvenirs. You have to have enough production to satisfy this need and only then you gain this achievement. 1 factory produces 4 tones.

La Dame De Fer
Construct the “Iron Tower”.
For Iron tower you need 1500 tourists and you build it for 100,000 coins, 110 timber, 40 bricks, 180 steel beams, 30 windows, 30 cements and 60 reinforced concrete. And at the end of construction you need to finish a few quests from the queen, who came to opening ceremony.

A Trifling Matter: The Eight Wonder (quest for Iron Tower)
When you have 1500 tourists, queen will ask you to build Iron Tower. Before you finish it, you need to make sure, that everything is ready for queen, who will came to opening ceremony. Firstly accommodation (A Demanding Guest: Royal Accommodations) so build a hotel near Iron Tower.

Next she wants something to read (A Demanding Guest: Royal Reading). You can give her more books. She wants something interesting and adventurous. She doesn´t like to read instructional or educational books. If you don´t have free books, Madame Kahina often sells Folk Tales, Heimskringla and Antique Novel. Otherwise you can get books from quests, expeditions, or from Research Institute.
And one free book from tourists. After you have more tourists from hotels and pier, you get a few side missions from a tourist. In one mission (Nouvelle Cuisine: Entremets) she wants you to take her to a cruise ship and then take her back. This will unlock a new recipe and you gain book 50 shades of Gravies.

I have tried few:
  • Books that will delight her and she will give you book „1800 and one night“ as a gift: Song of Illion; Atlantean Tablet; Folk Tales; Antique Novel; 50 Shades of Gravies; Song of Odysseus; Twenty-thousand Days Around The Centre Of The Earth; The Rings Of The Kings.
  • Books that she likes, even though she doesn´t find them suitable for holiday and for that she will give you “Shroud of the Great King” (item for museum) as a gift: Heimskringla; Illuminated Manuscript; Glory of Kings; Chronicles of Enbesa; Saemundar Edda; Morticromicon.
  • Books that she don´t like: The Holy Book; Ancient Manifest; The Art of Medicine; Slave Owner's Ledger; Essays on the Freedom to Love.

Next she wants a new maid (A Demanding Guest: Royal Toilet). Three of them are standing next to the Iron Tower, so choose one.
  • Sharply-Tongued Maid: This one doesn´t make queen happy, she doesn´t accept her and doesn´t reward you for this, but it will finish the quest.
  • Sharply-Dressed Maid: Queen isn’t thrilled about her, but she accepts her and gives you Bird-of-Paradise (epic bird for ZOO) as a reward.
  • Destitute Maid: Queen is happy; this is ideal maid for her. As a reward she gives you White Peacock (legendary bird for ZOO).

At the end queen wants a new and ceremonial dessert for ceremony (Culinary Contradiction). Choose: Sponge Cake, Rum, Sugar and Jelly.
When you have the dessert, helpful tourist says she heard that someone wants to harm the queen (The Price of Glory). Near the Iron tower build a police station and then interrogate a busy farmer, gang of workers and an exalted artisan. Your target is gang of workers. Interrogate one of them, but he refuses to cooperate.
If you threaten him, he will not speak. So pick him on your boat and deliver to Sir Archibald’s lighthouse. In act of vengeance he starts few fires in your island. When you deliver him, Sir Archibald will get the truth from him.
If you bribe him 10,000 coins, he discloses that they didn’t want to kill queen, just to humiliate her for badly treating her subjects (Another Conspiracy Unmasked). Find group of his conspirators in harbor, put them on ship and sail them to Sir Archibald’s lighthouse. As a reward you gain: George Smith’s Statute of Universal Collaboration (book for Town Hall, income per hour -15%, chances of riots -60%).
When everything is done and building construction has finished, finalize construction and wait for the queen (A Trifling Matter: The Tower). When the queen comes with her airship, just select the tower and then take a picture of the tower (A Day To Remember). Then choose what to serve the queen (A Trifling Matter: A Queen’s Palate). If you have prepared dessert correctly you gain reward: A Note From the Queen (rare item for Town hall, affect all Iron Tower restaurants, Maintenance cost -15%, Attractiveness +75).
After banquet bring 50t of cotton fabric (A Trifling Matter: A Royal Flavor) to the queen. The queen will reward you with “Decorated Iron Tower”. It is just new skin for the Iron tower, so not worthy reward and the fourth wall breaking thing. With this she leaves and now you can build 1 Iron tower per 1 island.
Seeds of Change - achievements

Seeds of Change DLC

El Gran Hacendado
Build all hacienda modules.
In radius of hacienda build Jornalero quarters, Obrero quarters, Artista quarters, Hacienda storeroom, Hacienda Farm, Hacienda Fertiliser Works and Hacienda Brewery. I don´t remember if you need also paving and pathway of hacienda, but they are cheap. You don´t need to have all types of brewery and farm (for that is Earthly Delights).

Earthly Delights
Have every kind of hacienda crop farm operating simultaneously on a single island.
Farms of hacienda are smaller than regular farms, but they allow you to grow plants without fertility of the Island. Build hacienda farms for caoutchouc, coffee beans, corn, cocoa, potatoes, spices and sugar cane.

Muck Spreader
Use fertilizer to boost a farm outside of the New World.
Near hacienda you can build Hacienda fertilizer works. If animal farms are in its reach, it will be producing fertilizer from their dung. Farms have to be active (production can´t be stopped because of full storage), to produce dung. You can build fertilizer silo near crop farms in the new world, the old world and Enbesa. Produce fertilizer and send it by trade route, or charter route outside the new world for using in farm with such silo.

Great Estate
Have more than 20 modules linked to a single hacienda.
It doesn´t matter which modules you build. But for this quantity and increasing radius of hacienda it will be probably living quarters. Surely you build them for achievement „Living it large“.

Living it Large
Achieve the population of 2000 on a single island, using only hacienda residence buildings.
Just build around hacienda. Its radius is increased by people living on the island (200, 400, 600, 800, 1000, 1200). It is counted by all people on island, but for this achievement don´t build other houses, only those from hacienda. If you don´t have an airship platform for workforce movement, then build different houses to have jornarelos and obreros for satisfying needs.

Lawgiver
Have every hacienda edict employed simultaneously across your islands.
Hacienda has 5 possible policies. For this achievement you have to have at least 5 haciendas in new world and on every hacienda different policy. Every policy requires different attractiveness of island (0, 100, 450, 1000, 1750). This is biggest problem because island in new world are very small. So you have to increase their beauty artificially, like adding zoo with animals, museum with exhibitions, build stadium and organize championship.
Empire of the Skies - achivements

Empire of the Skies DLC

Fully Operational
Build an airship platform with all modules.
Simply build the Airship platform which is unlocked after you have 600 obreros. And build all three modules – Item transfer depot, Airmail sorting Office, Commuter station. In the Old world you can build only two modules.

Touch the Sky
Build a rigid airship hangar and construct an airship.
Simply build the Rigid airship hangar which is unlocked after you have 600 obreros. And then build any airship in it.

Profits Rising
Have 15 active trade routes using airships.
Same as you create trade routes where you add to route your ship, you create trade route with airship. For achievement it has to be Trade route with goods, not Airship route which are only for mail.

Si Vis Pacem, Para Bellum
Have 20+ flak monitors and 20+ flak emplacements in the same region.
This is only about spending resources and influence for building. Build flak emplacements in small harbor available after having 300 workers/ 200 jornaleros – 1 for 5 influence, 20 timber, 15 bricks, 10 weapons. Build flak monitors in the old world steam shipyard – 1 for 10 influence, 35 steel beams, 25 steam motors, 10 advanced weapons.
So total you need 300 influence, 400 timber, 300 bricks, 200 weapons, 700 steel beams, 500 steam motors, 200 advanced weapons.

Make it Rain
Perform 50 airship drop runs.
Build multifactory Supply factory. You can build bombs, mines, care packages and pamphlets in it. Load them on the airship. When you select the airship, in the middle under the picture there is an icon for planning drop. Through this icon you can drop those products. Drop them 50 times.

Aerial Armada
Build 5 of each of the new rigid airships.
Just build 5 pieces of airships Colibri; Colibri (armed); Alicanto; Alicanto (armed); Atotolin, Dtundtuncan; Quetzalcoatl. For the achievement you don´t have to build variants with arctic gas.
New World Rising - achievements


New World Rising DLC

Brain Gain
Attract 100 artistas.
When you have 1000 obreros, you can upgrade their houses to houses of artistas. They have broader demands for needs, similar as engineers in the old world. So as always simply satisfy their needs to have them more.

An Outpost in Paradise
Settle on Manola.
Manola is the biggest island in the new world, where you can build a hydro-electric power plant, which doesn´t need oil. So it is a great place for building and for home of artistas. The island is free after you discover the new world, so soon send a ship with steel beams and timber to build trading post on it. If someone else takes over this island, you have to gain it through power, or money.

State of the Art
Host 50000 Artistas on Manola
The biggest island with hydro-electric power plant is great for building, as I mentioned in “An Outposts in Paradise”. It is only about micromanagement of sources and needs. You can have many buildings with mediocre satisfaction, or you can try to satisfy all basic needs – which is ideal. They demand a lot (tortillas, coffee, bowler hats, sewing machines, soccer balls, mezcal, jalea, beach, parfumes, fans, scooters) and houses from hacienda even more (electricity, glasses). The island has enough mineral resources and with a hydro power plant you can raise production. Oil you need here only for gas to tractors, if you want them. Some sources you need to get from other islands, but you learn management of needs in the old world.

Busy As a Beaver
Complete the construction of the dam.
The dam you can build only on island of Manola, if you have at least 4000 artistas. When it is finished, it covers almost whole island with electricity. It requires 1000 coins and 500 obreros, but no oil. Building has 3 phases. The first requires 60 timber, 90 bricks, 600 jornaleros, the second requires 150 bricks, 150 steel beams, 900 obreros and the last phase requires 150 windows, 150 reinforced concrete and 1500 obreros.

Powered Up
Provide electricity to 20 factories in the New World.
They can be powered up by oil power plant, or by hydro power plant from dam on Manola. New world had lots of items you will need to satisfy needs, so this should be achieved naturally by playing.

Committed To Your Goals
Construct a stadium and launch a football championship.
When you have 6000 artistas you can build grand stadium. Building has 3 phases. First requires 300,000 coins, 150 timber, 300 reinforced concrete, second requires 150 timber, 300 reinforced concrete, 500 jornaleros and last phase requires 150 reinforced concrete, 150 steel beams, 300 bricks and 1000 obreros. In finished stadium organize the championship. You don´t have to have the highest satisfaction, simply finish the championship.
Botanica - achievements
Botanica DLC


Coming Up Roses
Complete a Botanical Expedition.
Simply send a ship with good equipment and finish expedition focused on botanica. Same as you have other expeditions at disposal (zoological, rescue mission, archeological, pirate hunt).

Sounds Familiar
Equip a Music Pavilion with sheet music from Anno.
With Botanica DLC you can build Music pavilions near Zoo, botanical garden and museum. In them you can place Music sheet which increase attractiveness and can add some bonuses to specific set of animals, plants, or exhibitions. Music sheets can be obtained from quests, expeditions, bought from sir Archibald Blake, or gained as reward from botanical exhibit at World's Fair.

City in Bloom
Place the first botanical ornament in a Cultural Building.
With Botanica DLC you can build ornaments near Zoo, botanical garden and museum. For building them, you need to have a permit, which means basically obtaining this thing to place it. You can buy them from madam Kahina, obtained them as a reward for quests and expeditions, or as a reward from botanical exhibit at World's Fair.

Perambulator
Build all the botanical ornaments in any Cultural Building.
With Botanica DLC you can build ornaments near Zoo, botanical garden and museum. For building them, you need to have a permit, which means basically obtaining this thing to place it. You can buy them from madam Kahina, obtained them as a reward for quests and expeditions, or as a reward from botanical exhibit at World's Fair. They are: Iris Garden; Camellia Garden; Yellow Daisy Garden; Red White Petunia Garden; Hibiscus Garden; Gentian Garden; Lily Garden; Marigold Garden; Hedge Maze; Topiary Avenue; Topiary Garden. Last three (Hedge Maze; Topiary Avenue; Topiary Garden) can´t be bought from Madame Kahina. You can get them only fas a reward for quests and expeditions, or as a reward from botanical exhibit at World's Fair.

Gardens of Babylon
Reach 2500 attractiveness points in a Botanical Garden
Add more plants to exhibits. And you can also use some items that increase attractiveness, or by Palace policies in Departement of culture, or by specific music sheets in music pavilions. But simpler way is to add more plants. I have attractiveness about 1500 when I put there all sets (for Encyclopaedia Botanica) and they take 42 modules. So build more modules and add any plants with high attractiveness.

Encyclopaedia Botanica
Complete all the cultural sets for the Botanical Garden.
You can buy flowers from Madame Kahina, Isabela Sorento and Ketema. And also gain them from World´s Fair botany exhibitions, or from botanical expeditions. And also you can get many of them through research institute.
Sunken Treasures - achievements
Into the Depths
Use the Diving Bell for the first time.
In the quest “Rag and Bone” you meet Old Nate. And next in the quest “Immersion Test” you use the diving bell for the first time.

An Ocean of Knowledge
Complete all the cultural sets from Sunken Treasures.
You have two animal sets: Abyssal Depths (Black Swallower; Blobfish; Goblin Shark; Helmet Jellyfish; Prickly Sea-Devil; The Kraken) and Luminaries (Deep-Sea Dragonfish; Unknown Luminescent Fish; Firefly Squid).
You have two museum sets: Atlantean (Atlantean Tablet; Atlantean Wall; Court of Laws; Orichalcum Statue; Orichalcum Statue; Temple of Poseidon) and Battle of Trelawney (Admiral Nadasky's Sabre[drive.google.com]; Imperial Figurehead[drive.google.com]; Nadasky's Medal[drive.google.com]).
You can gain all of them from quests, treasures in the sea (using diving bell on places from treasures maps), expeditions, from Research institute or with museum items also as rewards from World´s fair.
Only Admiral Nadasky's Sabre and Nadasky's Medal you can have only once. You gain them from finale mission in search for scepter “Tribute to a Legend”.

The Queen's Favour
Complete the story quest "The Great Exhibition".
Simply build your city through main storyline and finish last quest with building World's Fair.

Importer
Supply a Metropolis on Crown Falls via trade routes only for 5 minutes.
You need to reach status “Metropolis” in the main storyline. Have enough people and full storages. Then make a save and destroy all your productions. Waiting 5 minutes isn´t that much so if you have big stocks you don´t need to deliver anything that you don’t produce from destroyed buildings. You just can´t produce anything on Crown Falls for 5 minutes and still be a “Metropolis”.

The Glamorous Life
Reach the Glamorous attractiveness level on a City or higher on Crown Falls.
This is the biggest place for building, so build buildings that increase attractiveness (Docklands Main Wharf with all modules; Palace with all possible modules; Iron Tower; Skyline Tower; Zoo and Botanical garden and Museum with lots animals, plants and exhibitions; World’s fair) and apply bonuses, policies and items for increasing attractiveness.

Seriously Invested
Reach 50000 Investors on Crown Falls.
This is the biggest place for building so it is good to make skyscrapers here. And for Skyline Tower (The High Life DLC) you will need a lot of them. So when you satisfy their needs, build more. Also you can build just their residences, where they have less needs. But more investors live in skyscrapers.
The High Life - achievements
Going up!
Build three Engineer and three Investor Skyscrapers.
Satisfy needs of engineers and investors and upgrade their residences to skyscrapers.

It’s Black Friday!
Achieve the Toasters, Crockery and Vacuum Cleaners bonus effect for at least 150 residences at the same time.
You need to have lots of Department stores, or move lots of houses to be in area of effect of your department stores. But still you will need to have more of them to cover 150 residences, especially since 1 department store can produce only one product. And also you need to have input materials so department stores are producing those products.

Reach for the Stars – almost!
Build the Skyline Tower.
Just check the storyline description for building your first Skyline Tower.

Better Safe than Sorry
Organize a Plan B with Miss Jenny during the Skyline Tower quest.
Help Theodora in quests Risk Assessment; The Cracks Appear; Dora's Way; Shattered Porcelain during construction of Skyline Tower.

360° Panorama!
Create Intense Panorama Effects in 10 Investor Skyscrapers at the same time.
For building Skyline Tower you will need lots of skyscrapers. So if you have a problem, you can save the game and remove them and experiment with effects. But if you go with cursor over panorama effect in description of selected skyscraper, it will show you description of modifiers, which increase and which decrease value of panorama effect. But it is always the same principle: skyscrapers of the same height, or higher skyscrapers decrease value of panorama effect; lower skyscrapers increase value of panorama effect.

Tower of Power
Have 3400 Investors living in the Skyline Tower.
Basic quantity with all needs satisfied is 2500 investors. With satisfying needs of lifestyle by specific produces (Department store: Toaster, Vacuum Cleaner, Crockery, Refrigerator, Briefcase; Furniture store: Bankers lamp, Vanity screen, Writing Desk, Four-Poster Bed, Lounge Seating; Drug store: Toothpaste, Detergent, Lipstick, Face Cream, Pomade) you will increase number of investors in tower. For every 1 product you have +100 investors. So maximum is 4000 and therefore you need only 9 products to reach minimum for this achievement.
The Passage - achievements
The Lost Expedition
Find Sir John Faithful's lost expedition to the Northwest Passage.
Finish the main storyline of this DLC.

Fuel Imports
Don't build a Charcoal Kiln in the Arctic until you pass 1000 Technicians.
You can import as many coal as needed, but from the start of this DLC you can´t build Charcoal kiln in the Arctic. Every building needs heat so you will need more ships to deliver coal so you have regular supply. Also expand your storage so you can take full load from ships and have enough until next ship comes.

Environmental Campaigner
Having passed 500 Technicians, turn off Heaters heating residences for 60 minutes.
You can save the game to finish this useless achievement and then load it back. Turn off heaters for all residences; you don’t have to destroy them. All residences, technicians and explorers, need to be freezing, you only need to have more than 500 technicians before you can start this. If you have some other things to satisfy their needs they will survive without heat, even though they won’t be happy. And with it another negatives come.

Aero Tycoon
Build one Hangar on each of the 4 Arctic Plateaus.
When you build your first airship, Old Nate will tell you that you should mine your own gas. Take 10 timber and 8 steel beams. Fly on arctic plateau and build a sky trading post. You have no way how to transfer workforce in the Arctic so you need to build small settlements on each plateau, to have workforce for mining gas there. By airships you can deliver most of the things they need. There you don't have enough places for buildings and also you don't have sources there to produce many things. It is lots of work just for mining gas. And for this achievement you need to build such small settlements on four plateaus, have more technicians to build hangars and deliver also material for building Arctic Airship Hangar on each of them.

Stick Together
Complete 10 Inuit or arctic residents' quests.
Same as in other maps, here you can accept and complete side quests from your people and from Quamaq. They appear from time to time. Some are easy, like taking a photograph, or deliver some sources, sometimes they want you to find someone the same way as you were looking for lost expedition in foggy area in the north during the main story of this DLC. Side quests from residents that require to find wreckage of lost expedition don’t count towards this achievement.

Arcticologist
Complete all the cultural sets from the Arctic.
You have two museum sets: Icebound (Collection Of Lost Expedition Relics; Frozen Woolly Mammoth; Wolf Pup Mummy) and Thule Relics (Carved Stone Bear; Igluit; Inunnguaq Inuksuk; Pirujaqarvik Inuksuk; Toy Qamutiik; Uummannaq Mummy).
You have two animal sets: Arctic Tundra (Arctic Wolf; Boreal Caribou; Musk Ox) and Polar Circle (Arctic Fox; Great Auk; Narwhal; Polar Bear; Ringed Seal; Walrus).
You can gain all of them from quests, expeditions, from Research institute or with museum items also as rewards from World´s fair. Animals and some museum items can be also bought from Quamaq. “Collection Of Lost Expedition Relics” was previously available only from expedition to discover the Arctic and was missable, but now you can buy it also from Quamaq.
Anarchist - achievements
Anarchist DLC
To start this DLC you need to select Dr. Hugo Mercier as one of your opponents.

Spread Anarchy
Publish at least one of Dr.Hugo Mercier's propaganda articles in your newspaper.
The same way as you can change articles in newspaper and choose from more options, with this DLC (Mercier as your opponent) you can use his special propaganda articles. So simply use one.

Syndicalism
Establish an alliance with Dr. Hugo Mercier.
You need to have 100% diplomacy with him and also you need to have strong economy and military. In diplomacy section you see comparison between your military/ economy and opponent you choose. I played on easy because of “Propaganda of the Deed” so there were enough 100% diplomacy and higher economy. I have only slightly weaker military. But you can save the game and build more guard towers to match his army, form alliance and then load the game to save influence and resources. Setting higher productivity can help with diplomacy, which makes people unhappy, but makes Mercier happy and from time to time it repeatedly increases his diplomacy towards you. Set trading route with his harbor and regular trades also increase his diplomacy. And of course quests.

Anarchy is Dead
Defeat Dr. Hugo Mercier.
Destroy his islands with your fleet, or buy them through shares.

The Better Anarchist
Defeat Dr. Hugo Mercier without luxury needs, public services or police stations.
You can do it in a classic way, which is harder with conditions of this achievement. So you can use a little trick. Start custom game and select “starting conditions”. Set: Starting Ships: War fleet; Starting Harbor: Off; Revealed map: On. This way you and your competitors will start with flag ship and two gun boats. Make a save and then watch on which island Mercier will build trading post. Load the game and go to shore of this island first. Wait for him till he will be near the shore. Build trading post and immediately declare him a war. There he will have only his flag ship and you three ships and your trading post, so you will destroy his ship. Then just hunt down and destroy his remaining two gun boats and achievement is yours.

Propaganda of the Deed
Complete 20 anarchy resident quests.
This is the most annoying and boring thing from all achievements. I check on web and either only a few people – me included – had problem with it, or nobody cared. Anarchist quests are those where they threaten you that if you don’t comply with their requests, they will start riots, or fire. You need to accept all refugees from Mercier’s Island and some of them can be hidden anarchists. It is not hard to complete their quests. Hard is to get them. I have no idea how to make them appear sooner. It took me almost 40 hours to have 20 quests. Of course after I have stabilized my economy, I play on faster game speed. But still it takes enormous time. First 7-9 was quite quick, but then it went very slowly. I was in alliance with him, but still slow. I tried war with him – then I got only one quest (to rise his diplomacy by 5 points, since in the war it was on 0) – and then again nothing. So I make peace with him, trading agreement but no alliance and still it hasn’t changed. I read that unhappy people can make sooner anarchists demands so for last 5 quests I set the highest productivity and banned alcohol to make them unhappy, but I don’t think it helped. Maybe a little, or maybe I was already too tired. Also from about twelfth quests I start building cities on other islands. Also tip from web, but again don’t know if it helped. So only iron nerves and patience. If you have any tips for speeding up those quests, please let us know in the comments.
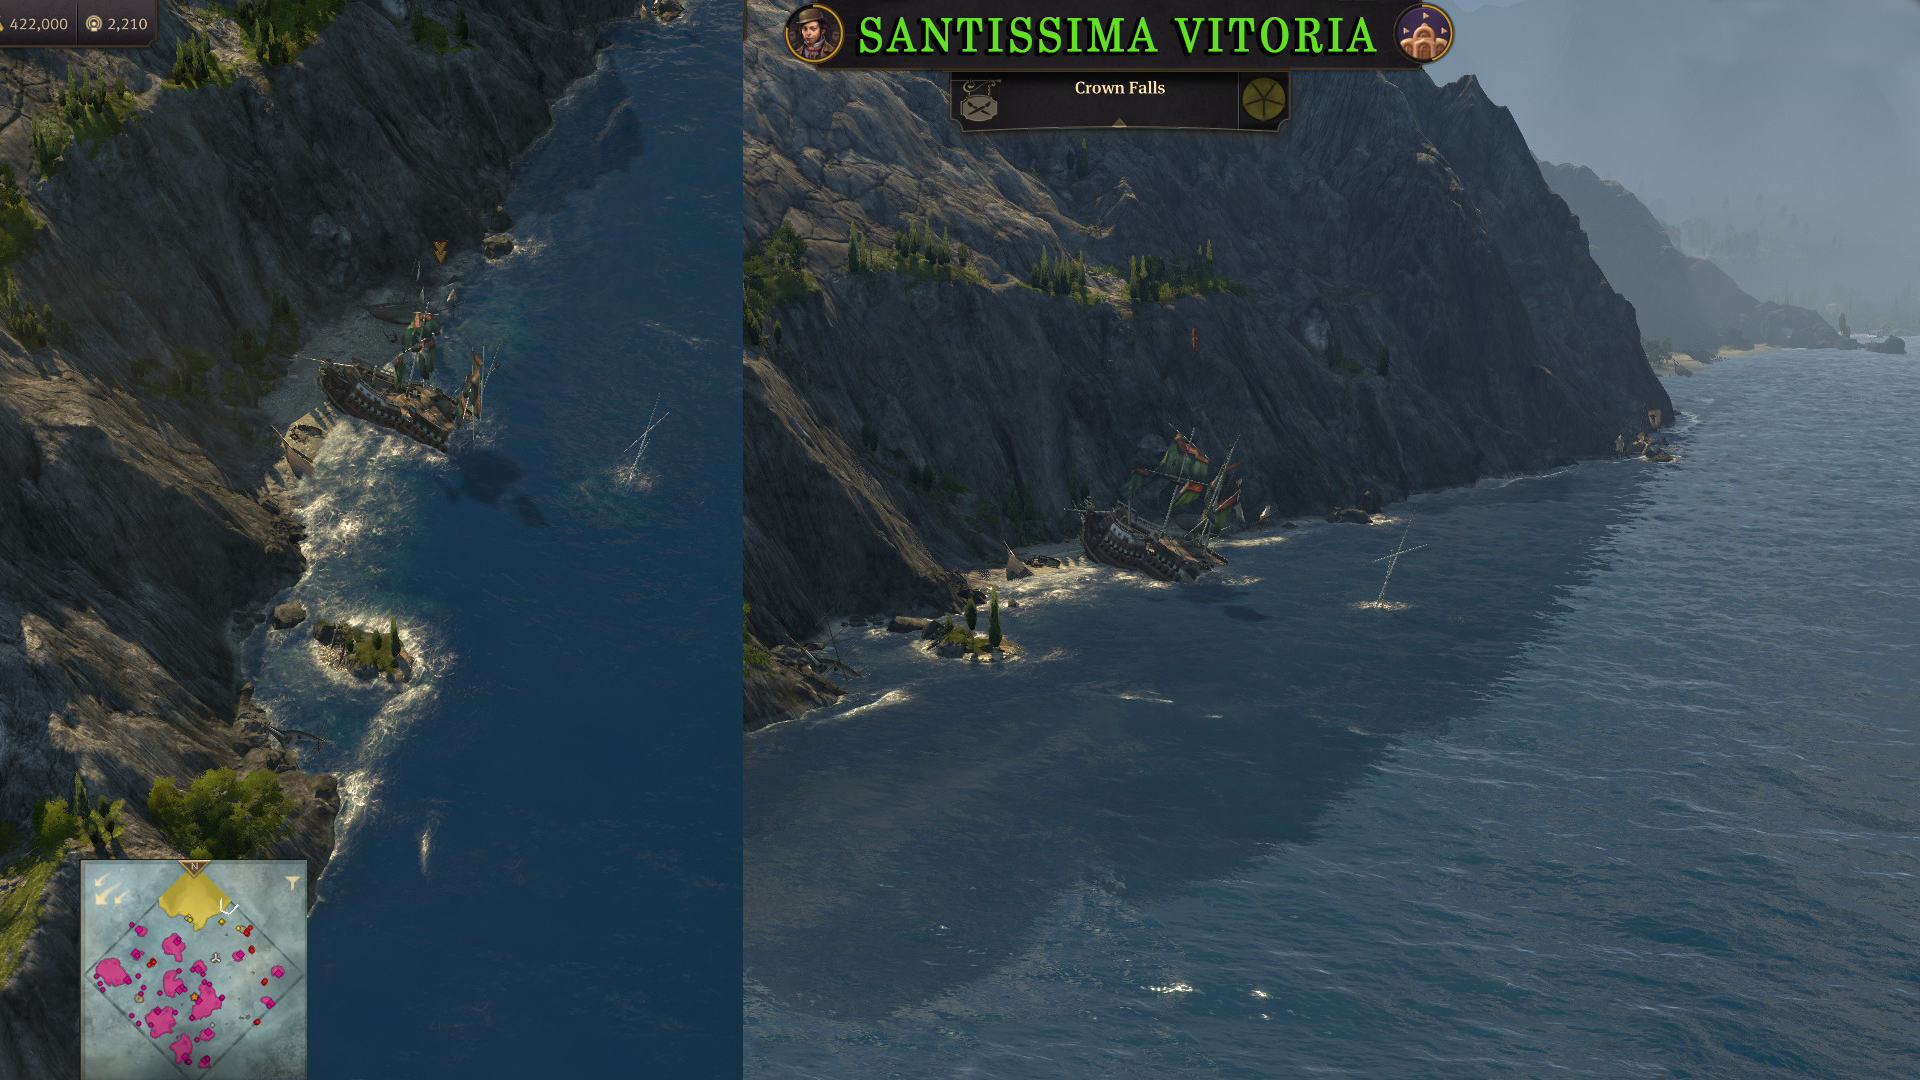

No God, No Master
Complete Dr. Hugo Mercier's Main Arc.
From the start you have to pick manually his quests from ship in his harbor. After a few hours he will start to give you quests himself. Soon quests “No God, No Master” will start.
Anarchist - No Gods, No Masters
Few quests you pick before he will give you his final quests.
The Peacock
Find and steal Sir Archibald’s peacock. Just click on him next to Archibald’s house.
Pick up Sir Archibald’s favorite peacock at Sir Archibald’s lighthouse.
Deliver Sir Archibald’s favorite peacock to Mercier’s revolutionary clipper.
Photograph Sir Archibald’s favorite peacock.
They must be Mad
Pick up extraction forceps at Sir Archibald’s lighthouse.
Deliver extraction forceps to Mercier’s revolutionary clipper.
Pick up Dr. Harriet Cotton at Madame Kahina’s lighthouse.
Deliver Dr. Harriet Cotton to Mercier’s revolutionary clipper.
Select hospital.
Dialectical Indoctrination
Photograph overjoyed Theatre-goers.
Dissidence Adrift
Pick up dissidents at your trading post.
Deliver dissidents to Mercier’s revolutionary clipper.
Conspiracy theories
Select conspirators.
Help them to escape: click on Mercier’s lighthouse.
Slip past patrols to Mercier’s lighthouse and pick up anarchist evacuees.
Deliver 3 anarchist evacuees to your trading post.
- or –
Turn them in: click on Mercier’s town hall.
I don’t buy it
Follow merchant’s clipper undetected.
Photograph merchant’s clipper.
The Anarchist Truth
Publish at least 1 anarchist propaganda article in your newspaper.
He will give you this quest himself after the previous one. It will appear simultaneously with information from your editor that new newspaper is ready to print. If you don´t click on this information to close it, in the background you can have the request from Mercier for this quest and then it will not be accepted by you. Simply put any propaganda article to your newspaper.

These last quests Mercier will offer to you directly.
No Gods, No Masters 1 – Intervention
Sail to shipwrecked traitors.
Rescue 3 castaways.
Deliver 3 castaways to Mercier’s revolutionary clipper.
No Gods, No Masters – The Beckoning
Sail to Sir Archibald’s lighthouse.
Castaways near shipwreck told you, that their ship was destroyed by ship with crown sigil. In this afterquest Archibald will only inform you that you shouldn´t trust Mercier.
No Gods, No Masters 2 – An Eye for an Eye
Destroy 1 clipper and 2 schooners.
Destroy ships as a warning for crown not to intervene to Mercier’s business and bring him proof of destruction.
No Gods, No Masters – The Admonition
Sail to Sir Archibald’s lighthouse.
Archibald is shocked that you destroyed his ships and assures you that the queen has nothing to do with attacks on Mercier’s ships.
No Gods, No Masters 3 – Trust Issues
Pick up masked stranger at Mercier’s revolutionary clipper.
Sail past patrols to Sir Archibald’s lighthouse and deliver masked stranger.

No Gods, No Masters 4 – Order
Sail to Sir Archibald’s lighthouse to defend the crown.
No Gods, No Masters 4 – Chaos
Sail to Mercier’s revolutionary clipper to side with him.

-----This is about decision. But finale is the same. Archibald’s and Mercier’s ships are fighting each other. So you will go there from Archibald’s lighthouse to defeat Mercier’s ships, or from Mercier’s clipper to defeat Archibald’s ships.
And then you will follow Pyrphorian ship after battle. You will discover that Pyrphorians were behind those attacks to weaken both the queen and Mercier. Then you can destroy 3 Pyrphorian’s ships, but you get no reward and it is not required by this quest.
Both ways finish this questline. First I have finished it for Mercier and get achievement so I can´t confirm if you finish it for Archibald it will also give you this achievement, or not. But simply make saving before the decision and try both ways for achievement and then the way you want for reward.
There are no repercussions after questline with either Archibald, or Mercier, so you can side with whom you want without any worries.


No Gods, No Masters 5 – Chaos
Destroy cruiser class battleship “Dreadnought” variant; 2 monitor class battleships “twin turret” variant; 2 gunboats.
Follow Pyrphorian ship undetected.
Sail to Mercier’s lighthouse.
  • Reward: Dr. Mercier’s Feverishly Federating Flag of the Free (allow use of flamethrower for ships. Expedition: Diplomacy +50; Faith +30).

No Gods, No Masters 5 – Order
Destroy cruiser class battleship “Dreadnought” variant; 2 monitor class battleships “twin turret” variant; 2 gunboats.
Follow Pyrphorian ship undetected.
Sail to Sir Archibald’s lighthouse.
  • Reward: Proclamation of Knighthood (All Zoos, museums, botanical gardens and public moorings have attractiveness +10% and increase visits +10%. Expedition: Diplomacy +75).
The Passage - story
On the way to the Arctic you can get a reward. First choose the way to the east. There are 2 encounters, An Arctic Welcome (Hunt; Crafting) and Huddlesome Bay (find information about the local area). Then head south where are 2 encounters, Nanuk's Way (Force; Hunting) and Ivujivik (choose “Offer to trade for the relic” and you will buy Collection of Lost Expedition Relics). Then it is just The Narrows (Navigation; Force; Hunting).

At Sir John's Camp
Clear: Abandoned Camp, Abandoned Storage Facilities, Abandoned Captain's Lodge.
Pick up: Sir John's Belongings. You will get “Sir John's Logbook”.
Sir John's Log
Read Sir John's Logbook.
A Settlement on King William Island
Build a canteen and 6 explorer shelters.
Fighting The Cold
Build Heater and Charcoal Kiln.
Sustain supply of heat for 100% for 30 seconds.
Build Lumberjack's Hut and Sawmill.
Qumaq and the Inuit
Find the Inuit by studying Sir John's log. Inuit's camp is in the north part of the area. There Quamaq will offer to take you to place where Sir John went.
Follow the Inuit boat. You will get to the place where the way is blocked by the ice.
The Ice Brigade
Sustain supply of pemmican at 80% for 1 minute.
Sustain supply of oil lamps at 80% for 1 minute.
For pemmican you need to have 100 explorers and whale oil and caribou meat. And for oil lamps you need 500 explorers and brass (from copper and zinc) and whale oil.
Pick up Ice-Breaching Brigade from your trading post.
Deliver Ice-Breaching Brigade to Ice Blockade.
Hades and Styx
Find her majesty´s ships Hades and Styx.
When Ice-Breaching Brigade destroys ice just follow free water road and at its end you find abandoned ships. Just click on them. To follow tracks of expedition you will need airship.
Take To The Skies!
Attract a technician.
Build Airship hangar.
For Arctic Airship Hangar you need 80 timber, 60 steel beams, 20 windows, 40 reinforced concrete, 10 steam motors, 30 cement, 50 sails and first 150 explorers and then 750 technicians. And of course storage and heater.
A First Airship
Pick up gas near your trading post.
Construct airship Boreas. You will need 9 timbers, 17 sails, 9 steam motors and 14 gas.
Up On The Arctic Plateau
Settle an Arctic Plateau.
Build a gas mine and 3 gas pumps.
When you build your first airship, Old Nate will tell you that you should mine your own gas. You need gas for airships, refrigerators and gas power plant in the old world. Take 10 timber and 8 steel beams. Fly on arctic plateau and build sky trading post. You have no way how to transfer workforce in the Arctic so you need to build small settlements on each plateau, to have workforce for mining gas there. By airships you can deliver most of the things they need. There you don't have enough place for buildings and also you don't have sources there to produce many things.
The Search Resumes
Fly to HMS Hades.
Journey Into Fear
Follow the path from icebreakers. ; Read the notes and follow tracks in snow. ; Read the notes and find out which way the crew went. ; Read the notes and find out what happened to crew after climbing the wall. ; Read the notes and find the bears mentioned in notes. ; Read the notes and find out which way the crew went. ; Save lost expedition.
This is just following tracks of the lost expedition. Pay close attention on the ground and when it is not clear, go closer with camera. In this area there is dense fog so you see only the area around your airship. On places where you find notes you lit signal fires – so if you get lost you can always return to last point and start tracking sings of the crew again. Notes you found will help you to indicate which way they went.
In the northern part of this foggy area, in the mountains, you will find last survivors including Sir John. Pick them up on your airship.
A Saving Grace
Sail to Lady Jane's clipper.
You will get a reward and finish storyline of this DLC.
Reward: HMS Hades Replica (legendary item for museum. Attractiveness +50).
Particularly Pull-y Pulley (legendary item for airships. Movement speed +20%; Loading speed +200%. Expedition: Force +25).
Enbesa
Welcome To Enbesa
Sail to Emperor Ketema's Lighthouse and introduce yourself.
Click on Taborime's free Trading Post to take stewardship of it.
New Taborime - Settling In
Build Marketplace and 10 shepherd residences.
New Taborime - Wanza Wizardry
Build Wanza woodcutter
New Taborime - Milk Of Kindness
Sustain across the region supply of goat milk over 80% for 1 minute.
Life-Bringing Waters
Build Water Pump. Connect to water pump 50 canal tiles.
Build on irrigated soil linseed farm with all available field modules.
Emperor's New Clothes
Sustain across the region supply of finery over 80% for 1 minute. Build Musicians Court.
Fire and Water
Build Fire Station. Connect fire station to water pump with canals.
Fascinating North - A Trade Hub
Photograph one of your trading posts in the Old World.
Fascinating North - Quizzed
Talk to Ketema about the old world.

In Enbesa you are welcomed by emperor Sahle Ketema who hires you as an architect for his new main city in region. Just go to the lighthouse near his palace and select the trading post on the other side of Island. Upper part of Taborime with palace is his domain and he serves as neutral character for quests and trading. Lower part is managed by you. And of course you can take over other islands in the area.
Next part is classical tutorial for building, same as in the old and the new world to get familiar with your surroundings. Build a market, ten buildings for shepherds and connect everything by road with trading post. Next build Wanza Woodcutter for wanza, which is local version of wood. Don´t forget the storage.
Next build a goat farm (requires 50 shepherds to unlock). Animal farms have better effectivity, if area around them is irrigated. You need to keep supply of milk, but with starting village one fully operational goat farm is enough.
Build a water pump. It is local new thing. From water pump you have water for fire station and for irrigating farms. All pumps have limited reach (300 tiles). Build 50 tiles, which isn´t problem, if you want to have irrigated farms. Build linseed farm and have all farm modules irrigated. For this mission you need to have all modules irrigated. Later it is up to you, but for animal farm it is bonus, they work better on irrigated soil, but crop farms don´t work at all on dry land.
Build a linen mill and embroiderer to have finery. And also build musicians court, which is for happiness of shepherds, as pub for farmers in the old world. When you have enough finery, Ketema will tell you that they are flammable, so build fire station. Here it needs to be connected with water canal directly to side of building with water basin.
When it is finished, Ketema would like to see your place, so make a picture of trading post in the old world.
At the end of this section you will talk about your world. The second question is what you like most about your position. Upon your answer you will receive the reward.
  • Exploring the world. Reward: Polyglot Scholar Rahim / Ship (Peace – ship can´t attack, but also can´t be attacked, movement +10%; Expedition: Faith +30, Diplomacy +50).
  • Becoming a master builder. Reward: Mosquito net / Trade union (Enbesan crop farms – productivity +20%; Expedition: Hunting +15, Medicine +20).
  • Governing my people. Reward: Elder Selassy'e / Town Hall (Enbesan residences – happiness +7, consumption of dried meat -20%; Expedition: Diplomacy +30).
  • Being a sea lord. Reward Colonel Barzagli / Harbormaster’s Office (defensive turrets in harbor - maintenance Cost -75%, attack speed +20%; Expedition: Force +20, naval power +45)


Biniam's Vision - Great Plans
Shop around for Research Institute proposals from architects at: Ketema's Harbor; Kidusi Anitoni's Harbor; Waha Desher's Harbor.
Something to Chew Over
Sustain across the region supply of dried meat over 80% for 1 minute.
Taming the Towers
Select Ketema to talk to him. Solve Ketema's enigma.
The Empress's Baths
Remove the objects blocking the bathing area: Toppled Tree, Bath-Invading Rocks, Branches and Twigs.
The Goatberg Variations
Select Ketema to talk to him. Play the Enbesan hymn using the goats.
Experience Teaches
Attract Elder.

Biniam wants to build research institute, so check offered plans with him. Just click on group in harbors of Keteam Taborime, Waha Desher and Kidusi Anitoni.
Now supply people with meat. Build salt works in harbor, sanga farm and Dry-house.
Ketema has a riddle for you. Click on him in his palace to listen to it. Then click on towers of his palace in the correct order: Zebra, Hyena, Hippo, Cheetah, Lion. Then just click on few things to clear bathing area. Ketema went to market, so speak with him there. In the market there are five goat pens. Play Enbessan hymn, so click on goats in order: Do, Mi, So, Ti, La.
If you haven´t done it yet, you need to upgrade shepherd residence to elders residence.
After all this is done, Sir Archibald Blake will sail to Enbesa and take over one island.

A Man Out Of Sorts
Sail to Blake's Enbesan Harbor
Banquet of Implications
Deliver 5t tapestries and 5t of dried meat to Ketema's Lighthouse.
Getting a Grip
Pick up Water Pump Blueprints at Ketema's Lighthouse.
Deliver Water Pump Blueprints to Blake's Enbesan Harbor.
Local Guide
Approach the ship to begin the escort. Escort Blake's Diplomatic clipper to Ketema's Lighthouse.
Banquet of Implications - Invitation
Negotiate between Archibald and Ketema.


Journey to the Frontier: Mapping Enbesa
Sail to Blake's Enbesan Harbor
Sail to the places indicated by Sir Archibald.

This is a side quest, but it brings a nice reward at the end of the main quest. You need to find a few locations according to sketch from Blake in Cartographic Sketchbook. The first is stone arch in the sea. There you can race to it with Blake’s ship (Race at the Great Arch). The second is elephant cemetery on the coast of one of the islands. There remove fallen tree to rescue baby elephant (Ashes to Ashes, Tusk to Tusk). Next there is a big rocky mountain in the middle of one of the islands with large flat cliff. Sail to the bay next to it and just take a picture of it (On Top of the World). Last there is a mountain with waterfalls on another island. There you find crates hidden in ruins near waterfall (Queen’s falls).


Official Hospitality - The Cuisine
Deliver 2t seafood stew to Blake's Enbesan Harbor.
Biniam's Vision - Great Expertise
Click on group of engineers.
The Research Institute
Build Research Institute.
Official Hospitality - The Vistas
Photograph: Kidusi Anitoni trading post; Angereb lighthouse; Waha Desher trading post.
Official Hospitality - Oneupmanship
Photograph steelworks.
Enbesa 2
Blake vs Ketema
Here you have two quests which you can finish on the behalf of Sir Archibald Blake, or emperor Ketema. It doesn´t have any influence on the rest of this main storyline of Enebesa. Final quests are always the same. This way you can get a special reward. In fact you can get all 4 unique items described at the end of the storyline. But first you have to keep people unhappy and then make them happy again to have high population. For make them unhappy simply destroy roads leading to trading post. All production will stop and happiness will go down. Then connect road to restore it, but of course it will take some time and some effort.
Taborime Dreams - Stymie
Sustain in Enbesa residents happiness below 5 for 15:00.
- or -
Taborime Dreams - Growth
Sustain in storage over 800 items for needs of elders for 15:00.
Disarming Smiles
Deliver to Blake's Enbesan harbor 20t of wanza, 15 of mud bricks, 10t of weapons.
- or -
Cannon Aid
Deliver to Ketema's lighthouse 20t of wanza, 15 of mud bricks, 10t of weapons.

After this it is just delivering things between Ketema and Blake and one small naval battle at the end.

Hospitality Wears Thin
Pick up beehive with letter at Ketema's Lighthouse.
Deliver beehive with letter to Blake's Enbesan harbor.
How Do You Like Them Apples
Pick up overripe fruit basket at Blake's Enbesan harbor.
Deliver overripe fruit basket to Ketema's lighthouse.
Cutting Off Relations
Pick up Biniam at Ketema's lighthouse.
Slip past patrols to Blake's Enbesan harbor and drop Biniam there.
Select Biniam to signal that the sabotage can begin.
Keep an eye on Biniam as he sabotages Archie's water pumps.
You don´t have to do anything here. Simply deliver things between them two and then when you bring Biniam simply click on him. He will blow up pumps and then he will be arrested.
Drums of War
Have at least 6 military ships in Enbesa.
Faith and Unity
Attract 1000 Elders.
Sustain across the region supply of Illuminated Scripts for 80% for 01:00.
Build a monastery.
A Worried Mother
Sail to Waha Desher to talk to Kyria.
Inform Kyria. Tell her the true.
Bitter Orange
Dig up three orange trees.
Sail to Waha Desher trading post and collect Kyria's Old Diary.
Read Kyria's Old Diary.
Register of the IXth Regiment
Sail to Kidusi Anitoni to get the Register of the IXth Regiment.
Read Register of the IXth Regiment.
Epiphany
Destroy 2 frigates, 2 monitors, 1 battle cruiser.
Full Disclosure
Escort Blake's Diplomatic clipper to Ketema's lighthouse.
Participate in the final negotiation.
After destroying Blake’s ships you deliver Kyria to him. As you discover, she is Biniam´s mother and Blake is his father. They reconcile, Blake frees Biniam and leaves his island (you can take it for yourself) and Enbesa. Before he leaves he will talk with Ketema last time to finalize their alliance.
Depending on your answers you can get some rewards.


Enbesa is no small empire and continues to grow! She would be an asset to the Crown. – This option is available, if you have 2200 shepherds and 1800 elders.
  • For this you get: Amadi Ilga, Ketema’s Civil Engineer (Enbesan residences – happiness +10, chances of fire -50%, bonus residents +2 for finery and illuminated scripts. Expedition: Crafting +45, Medicine +20).
Yes we can happily say that Enbesa is now a unified empire. Ketema is a leader acclaimed by all. – This option is available, if you unite Enbesa with Waha Desher, Kidusi Anitoni and Anegereb.
  • For this you get: Khadija Tsagaye, Angereb’s Market Master (Trading posts and piers - harbor activity +30%, loading speed +30%. Expedition: Crafting +20, Diplomacy +45).
Her Majesty's empire is clever in the extreme, and it is said the sun never sets on its sprawling dominions... – This option is available, if you finish quests “Taborime Dreams – Stymier” and “Disarming Smiles” for Blake.
  • For this you get: Rear Admiral Richard B.Sharpe, The Eagle-Eyed (Defense turrets – Accuracy +50%, Hitpoints +800. Expedition: Force +15, Naval Power +40).
Yes I helped! Making accurate cartographical charts is the Crown's very wise strategy. – This option is available, if you finish quest “Journey to the Frontier: Mapping Enbesa”.
  • For this you get: Ocean Plotting Sheet of the Southern Hemisphere (movement speed of ships +35%. Expedition: Navigation +55).

Biniam's Vision - Great Possibility
Attract 1500 Elders.
Build in the Old World 10 Scholar Residences.

This is just a bonus mission for the end of the storyline to remind you to pay attention also to Research Institute. From now on you can build scholar residences. 5 from the beginning and for every next 5 buildings you have to research in research institute Campus extension permit.
Islands of Enbesa
Three hearts as one
Select three lighthouses to learn more about other islands. Waha Desher, Kidusi Anitoni, Angereb.
When you will have missions in main story “Something to Chew Over” and “Taming the Towers”, Ketema will offer you this quest to learn more about three other not united islands. Just click on their lighthouses and he will tell you something about them. Then you get first quest “Where the Djat No Longer Roost”.
After few first missions in Waha Desher - when you decide whether you help them, or force them work for Ketema - Ketema will contact you again and mentioned that he has a gift for you. Epos of lions, chronicles of this land. Also he will complain about stubborn princes from Angereb. This leads to quests on Kidusi Anitoni and Angereb.

Waha Desher                                                                   Kidusi Anitoni
Angereb
Waha Desher
Waha Desher

Where the Djat No Longer Roost
Retrieve the supplies for Waha Desher at Ketema’s Clipper, headed for Waha Desher. Deliver the supplies to Waha Desher Trading Post.
The Lonely Island
Find Abel, the Overseer near the harbor on Waha Desher.
Follow Abel through the lower ksar.
Ask about Eyasu, the Herder, in charge of the awut.
Ask to enter through the door of the ksar.
Follow Abel through the upper ksar.
Ask Abel, the Overseer about the walls.
Enquire about the house at the top of the ksar.
Follow Abel to the House of Bloodlines.
Ask about Matriarch Yara, the last of the governor’s bloodline.
Ask Abel, the Overseer what „abu” means.
Follow Abel to the cliff.
Choose places you want to ask about: Oasis; Per-Iteru, oracle; ancient isshed; destroyed old-world camp; salt soaked stones.
The Sorcerer's Apprentice
Seek the source of the oasis. Enquire after the inhabitants of Waha Desher. Ask Yara.
The Sorcerer's Apprentice — Yara's Wisdom
Seek the source of the oasis. Follow and listen to Yara.
Select the wasi to find the kebeh
The Sorcerer's Apprentice — What Lies Below
Seek the source of the oasis. Remove the rubble on top of the cliff.
The Sorcerer's Apprentice — Blood of Kashta
Finish clearing the ruins on Waha Desher.
The Sorcerer's Apprentice — Ancient Shedyet
Investigate Ancient Shedyet.
A Positive Report
Take a picture of the shedyet for Ketema.
Sail to Ketema’s Clipper, headed for Waha Desher to report the good news to Ketema.
They Came With Might, Hammer And Skill
Pick up Ketema’s workers at Ketema’s Clipper, headed for Waha Desher.
Take Ketema’s workers to Waha Desher Trading Post.
The Risk of Flood
Sail to Kidusi Anitoni Trading Post to enquire about issehds.
Deliver the Kidusian trees to Waha Desher Trading Post.
The Trees of Life
Select the markers to plant the trees.
And The Waters Rose, And All Was Blessed
Select the well to order Ketema's workers to clear it.
Preparing the Festival
Deliver to Waha Desher Trading Post 12t of mud bricks for repairing water temple.


The Many or the Few
Discuss Waha Desher with Ketema.
Here you have to decide whether you want to help Waha Desher restoring their island, or if you want to help Ketema force them to cooperation. Both ways lead to unifying them with Ketema, but in one option they will become just workforce who lost their cultural roots and in second option they became self-sufficient and therefore valued part of Enbessa.


1. Restoring Waha Desher

A Time of Duress
Sail to Waha Desher Trading Post to announce the end of Ketema's deliveries of supplies.
Knife's Edge
Establish a plan with the chieftain.
People of Waha Desher are afraid of their future without resources from Ketema. You can simply promise them resources from yourself, or suggest them to start trading with salt, which will help them with economy. If you suggest salt trade, you also have to deliver them resources. You will have two more quest (White Gold, Seherut-Ships of Salt), but otherwise it is same as if you don´t suggest it.

Much-Needed Supplies
Deliver 30t of Dried Meat and 24t of Hibiscus Tea to Waha Desher.
White Gold
Speak to Abel about organizing the salt trade
Seherut-Ships of Salt
Deliver to Waha Desher Trading Post 24t of Wanza Timber for building warehouse.
Sell Seherut to Waha Desher – sell them 2 Frigates for starting salt business.


A Grand Restoration
Clear the rubble from the oracle.
Restoring the waha
Contact Kyria. This lead to quest: “Creatures Known from Nut or Acorn”.
Contact Eyasu. This lead to quest: “Dangerous Dutiful Goats”.

Creatures Known From Nut Or Acorn
Explore Kyria's Garden.
Enquire about the issehd.
Enquire about the orange trees.
Look closely at the crops.
Select Kyria to announce you're ready to restore the oasis.
Seeding Expectations
Pick up the seeds at Ketema’s Clipper, headed for Waha Desher.
Deliver the seeds to Waha Desher Trading Post.
The Fruit of Our Labours
Select the markers to regrow the oasis.
Plant the issehds.
Plant the orange trees.
Plant the crops.

Dangerous Dutiful Goats
Retrieve a goat herd at Kidusi Anitoni Trading Post.
Bring the goats to Waha Desher Trading Post.
Creatures of Sand and Sun
Find a heat-resistant animal, and take it to Waha Desher.
Optional: Consult a zoological tome in Kidusi Anitoni.
Optional: Find and observe herds of animals in the corners of Ketema's island.
Find three herds on Ketema´s island. Oryxes, Impalas and Wildebeests. Click on all three of them and Ketema will give them to you (if you aren´t in his harbor, you get additional quest “Wild Animals I Have Known” in which you just need to go for them). All three are animals for your Zoo. Oryxes are those that are needed for Waha Desher. Other two you can keep for yourself.
Flighted Heraldry
Deliver a Djat to Waha Desher.
Djat is Grey Crowned Crane, bird for Zoo. You can get it from zoological expedition, or buy it from Ketema in his harbor. If it isn´t in his offer, simply click to change offer, until he offer it for sale.

Where the Djat Fly Once More
Sail to Ketema’s Clipper, headed for Waha Desher to report your success.
The Mesyt of Waha Desher
Sail to Waha Desher Trading Post to participate in the Mesyt.
Observe the priests performing the rituals.
Where is Yara?
Observe the traditional dancing.
The Oracle's Blessing
Select the artifact.
Reward: Ancient Tabot of Waha Desher (for Museum, attractiveness +50; Expedition: Force +10, Faith +10).
Reward for unifying Waha Desher with Enbesa: Water pumps receive bonus +15 tiles.


2. Forced industrialization of Waha Desher

An Age of Iron and Industry
Sail to Waha Desher Trading Post to convey their new orders.
Point the workers to the ancient building.
Whence Change Comes
Remove the dead trees from Waha Desher.
Deliver 12t of Mud Bricks and 15t of Wanza Timber to Waha Desher.
Wait for Ketema’s men to complete the water network in Waha Desher.
Fields of Gold And Green
Point out the second ruin to Ketema's workers.
Retrieve indigo seeds from Ketema’s Clipper, headed for Waha Desher
Deliver the indigo seeds to Waha Desher Trading Post.
Fires of Industry
Select the monuments on Waha Desher to destroy them.
Retrieve flax seeds from Ketema’s Clipper, headed for Waha Desher.
Deliver the flax seeds to Waha Desher Trading Post.
Let the Waters Flow
Inaugurate the new water pump.
Reward for unifying Waha Desher with Enbesa: Water pumps receive bonus +15 tiles.

Kidusi Anitoni
The Pride of Arvurd
Sail to trade post in Kidusi Anitoni.
Tribulations of a Grantless Researcher
Select the library to examine books about history.
Find a way to access the library on Kidusi Anitoni. This goal will be completed by completing quests “On Quiet Meres” and “In Nomine Olbivionis”.
On Quiet Meres
Find in Kidusi that which is bland when floating but delicious when sunk. In upper part there is a ritual pool and next to it there are bags with hibiscus. Click on them.
Pale Altars Long-Forgotten
Select the largest structure in Kidusi. Click on ancient ruins in front of the library.
In Nomine Oblivionis
Return to the High Priestess.
The Life of a Research Assistant
Read books describing the Golden Age and the founding of Enbesa.
Things That Should Not Have Been Forgotten
Discuss the Golden Age with High Priestess.
Unlikely Allies
Recruit a group of workers on another island. Game suggests that you can hire them anywhere, but Taborime and Angereb refuse you, so hire them on Waha Desher.
The House of the Rising Excavation
Deliver 22t Wanza Timber and 7t Mud Bricks to Kidusi Anitoni.
Cornucopic Conundrums
Deliver 10t of any Enbesan food to Waha Desher for hiring the workers.
An Ill-Favoured Motley Crew
Transport the workers to the excavation site on Kidusi Anitoni.


Down, Down into the Deep
Wait until the workers discover something in the ruins.
Melancholy
Select the Melancholy Worker to see how you can assist him.
Take a picture of Ksar.
After 4 minutes of excavations will appear this quest with worker standing on west side of excavations, next to road. He misses his home, so take picture of ksar on Waha Desher. With this quest you unlock option for best ending.
Eyes That Gaze Westwards
Select the artifacts to excavate them.
Select the headstone to analyze it.
Down, Down into the Deep - continuation
Wait until the workers have reached the bottom of the library. – If you haven´t finished “Melancholy” you can´t examine the headstone. If you finish it and simply you don’t want to bother with investigation, then continue with “Way 3”, or “Way 4”.
Optional: Investigate the headstone before they reach the bottom. If you investigate it, then continue to the quest “The Strange Case of the Errant Monolith”.
The Strange Case of the Errant Monolith
Prove the findings were fraudulent.
During the quest “Down, Down into the Deep - continuation“ click on the worker standing on the west side of excavations, next to the road. It is the one you helped in the quest “Melancholy”. After talking with him click on bags with tools next to the headstone. On the cliff over the lighthouse priestess Layla has home. On the terrace of her house select table of priestess Layla. You gain incriminating letter. Select the well near the temple, over excavations. And then select the ritual pool below the well.
A Leader's Burden
Confront the High Priestess.
You can decide to inform Ketema. Way 1, quest “Ostracatastrophe”.
You can decide to stay silent for now. Way 2, quest “Down, Down into the Deep – continuation 2”.

Way 1: Inform Ketema

Ostracatastrophe
Take the proof of the priest’s manipulation to Ketema.
Deliver the ostraca to Ketema.
So Speak the Scales of Mikaeli
Discuss the fate of Kidusi Anitoni with Ketema.
A. Say that priestess had no valid reason to her actions. It leads to: The Fading of Kidusi Anitoni.
B. Say that she would rather commit perjury than see Kidusi's library destroyed. Then say that she was motivated by her love in tradition and history. And at the end say that unity can´t be achieved without tolerance and acceptance of others mistakes. It leads to: Strife is Behind, Unity Ahead.

A. The Fading of Kidusi Anitoni
Retrieve the Decree of Banishment at Ketema’s Clipper, headed for Kidusi.
Deliver Ketema's letter to Kidusi Anitoni Trading Post.
Enbesa isn´t united because island Kidusi Anitoni is exiled for lies of its priests. No one will trade with them and visits are forbidden.

B. Strife is Behind, Unity Ahead
Retrieve the Decree of Absolution at Ketema’s Clipper, headed for Kidusi.
Deliver Ketema’s letter to Kidusi Anitoni Trading Post.
You deliver letter in which emperor Ketema forgives their lies, but he warns them that such actions may lead to their exile. Priestess realizes that exile will mean basically death sentence, so she agrees with unity with Enbessa and loss of their faith.
Reward for unifying Kidusi Anitoni with Enbesa: Elders residences receive bonus of +1 research point for Research institute, if need for Illuminated Script is fulfilled.

The Epic of Lions
Chronicles of Enbesa

Sail to Kidusi Anitoni’s Trading Post.
Reward: Chronicles of Enbesa (uncommon item for museum. Attractiveness: +20. Expedition: Diplomacy +5).
Kidusi Anitoni 2
Way 2: Don’t inform Ketema, if you have discover deception of priests

Down, Down into the Deep – continuation 2
Wait until the workers have reached the bottom of the library.
A Boulder Approach
Inspect the wounded worker.
Pick up wounded worker from trading post in Kidusi Anitoni.
Deliver wounded worker to trading post in Waha Desher.
This mission will be available around minute 7 of excavations, if you completed quest “Melancholy” and discover deception of priests.
Down, Down into the Deep – continuation 2
Wait until the workers have reached the bottom of the library.
This mission was just postponed for mission “A Boulder Approach”.
The Graven Undercroft
Analyze the wall.
A Matter of Some Epigraphic Scarcity
Ask the scholar about the ancient script.
The Jinn-Stone
Take a photo of the wall to produce a transcript.
Pick up the transcript of the inscriptions at Kidusi Anitoni Trading Post.
Deliver the transcript to Biniam at Ketema’s Clipper, headed for Kidusi.
The Oathstone of Kashta
Find the stone mentioned by Biniam. The stone is on the island Waha Desher. Ancient oathstone is on the north side of the island, behind the hill.
Take a picture of the stone in Waha Desher.
Find Biniam in his home.
An Enquiry Further Muddled
Talk to the wounded worker. It’s the one you delivered in the mission “A Boulder Approach”.
Investigate the Oracle.
Retrieve the glyph etchings at Waha Desher trading post.

Codebreaker Extraordinaire: Part 1
Linguistics.
1. Plants. 2. Land. 3. Holy Goods.
Codebreaker Extraordinaire: Part 2
Linguistics.
1. To plant. 2. Four symbols/ middle answer: offers. 3. Hourglass.
Codebreaker Extraordinaire: Part 3
Linguistics.
1. Spoken. 2. Of. 3. Rich of plants.

The Lexicon Yaenbesa
Pick up the Lexicon Yaenbesa at Ketema’s Clipper, headed for Kidusi Anitoni.
Deliver the Lexicon to Kidusi Anitoni Trading Post
A Labyrinthine Undertaking
Linguistics.
1. Islands. 2. Rituals. 3. Farmers.
A Covenant Broken
Pick up the translation of the wall from trading post on Kidusi Anitoni.
Deliver your translation to Ketema.
Don’t finish this mission. Just leave the lighthouse on Kidusi Anitoni and get back. Scholar told you that if you have more sources for translation, he would like to check them. And you have another source from mission “An Enquiry Further Muddled”. When you return to lighthouse on Kidusi Anitoni, you can give him those notes from oracle and you will gain mission “Oracular Scripture”.
Oracular Scripture
Decipher the scripture of the oracle.
Answer: Granary of Kidusi Anitoni.
A Trail of Graincrumbs
Select the location where you imagine the granary was located in Kidusi Anitoni.
Granary is at the bottom of excavations. Just click on the bottom and you will find it.
A Hoarded Secret, Dust-Silenced
Analyze the artifacts in the granary.
An Evasive Inscription
Decipher the inscription on the vase.
Answer: Plants of eternal life.
When the Dust Settles
Confront the High Priestess.
The Lament for Kidusi Anitoni
Follow the High Priestess and listen to her stories.
Inspect the hibiscus flowers.
Examine the statue at Kidusi Anitoni.
Follow the High Priestess and listen to her stories.
Ask the High Priestess about the next part of the story.
Examine the wall of the old library.
Examine the burnt pots.
Examine the old library.
Examine the new library.

Sweet, Sweet Irony
Pick up the letter from High Priestess.
Deliver the letter to Ketema at Ketema’s Clipper, headed for Kidusi Anitoni.
You have united Kidusi Anitoni and Enbesa. Emperor allows them to cultivate sacred hibiscus so they can continue with their holy duty. And they swear loyalty to emperor.
Reward for unifying Kidusi Anitoni with Enbesa: Elders residences receive bonus of +1 research point for Research institute, if need for Illuminated Script is fulfilled.

The Epic of Lions
Chronicles of Enbesa

Sail to Kidusi Anitoni’s Trading Post.
Reward: Chronicles of Enbesa (legendary item for museum. Attractiveness: +50. Expedition: Diplomacy +20).
An Ancient Gift
Visit Kidusi Anitoni.
Reward for great help to Kidusi Anitoni: Vase of Sile'Amidos (legendary item for museum. Attractiveness: +50. Expedition: Strength +10, Faith +15).

Way 3: Continue with excavations if you haven’t discovered deception of priests. Correct translation.

Down, Down into the Deep – continuation 2
Wait until the workers have reached the bottom of the library.
The Graven Undercroft
Analyze the wall.
A Matter of Some Epigraphic Scarcity
Ask the scholar about the ancient script.
The Jinn-Stone
Take a photo of the wall to produce a transcript.
Pick up the transcript of the inscriptions at Kidusi Anitoni Trading Post.
Deliver the transcript to Biniam at Ketema’s Clipper, headed for Kidusi.
The Oathstone of Kashta
Find the stone mentioned by Biniam. Stone is on island Waha Desher. Ancient oathstone is on north side of island, behind the hill.
Take a picture of the stone in Waha Desher.
Find Biniam in his home.

Codebreaker Extraordinaire: Part 1
Linguistics.
1. Plants. 2. Land. 3. Holy Goods.
Codebreaker Extraordinaire: Part 2
Linguistics.
1. To plant. 2. Four symbols/ middle answer: offers. 3. Hourglass.
Codebreaker Extraordinaire: Part 3
Linguistics.
1. Spoken. 2. Of. 3. Rich of plants.

The Lexicon Yaenbesa
Pick up the Lexicon Yaenbesa at Ketema’s Clipper, headed for Kidusi Anitoni.
Deliver the Lexicon to Kidusi Anitoni Trading Post
A Labyrinthine Undertaking
Linguistics.
1. Islands. 2. Rituals. 3. Farmers.

A Covenant Broken
Pick up the translation of the wall from trading post on Kidusi Anitoni.
Deliver your translation to Ketema.
The Cowing of Kidusi Anitoni
Pick up special envoy at Ketema’s Clipper, headed for Kidusi Anitoni.
Deliver special envoy to Kidusi Anitoni Trading Post.
Enbesa isn´t united because island Kidusi Anitoni is exiled for lies of its priests. No one will trade with them and visits are forbidden. And special envoy destroyed stone discover in excavations.

The Epic of Lions
Chronicles of Enbesa

Sail to Kidusi Anitoni’s Trading Post.
Reward: Chronicles of Enbesa (rare item for museum. Attractiveness: +30. Expedition: Diplomacy +10).
Kidusi Anitoni 3
Way 4: Continue with excavations if you haven’t discovered deception of priests. Incorrect translation.

Down, Down into the Deep – continuation 2
Wait until the workers have reached the bottom of the library.
The Graven Undercroft
Analyze the wall.
A Matter of Some Epigraphic Scarcity
Ask the scholar about the ancient script.
The Jinn-Stone
Take a photo of the wall to produce a transcript.
Pick up the transcript of the inscriptions at Kidusi Anitoni Trading Post.
Deliver the transcript to Biniam at Ketema’s Clipper, headed for Kidusi.
The Oathstone of Kashta
Find the stone mentioned by Biniam. The stone is on the island Waha Desher. Ancient oathstone is on the north side of island, behind the hill.
Take a picture of the stone in Waha Desher.
Find Biniam in his home.

Codebreaker Extraordinaire: Part 1
Linguistics.
1. Plants. 2. Land. 3. Holy Goods.
Codebreaker Extraordinaire: Part 2
Linguistics.
1. To plant. 2. Four symbols/ middle answer: offers. 3. Hourglass.
Codebreaker Extraordinaire: Part 3
Linguistics.
1. Spoken. 2. Of. 3. Rich of plants.

The Lexicon Yaenbesa
Pick up the Lexicon Yaenbesa at Ketema’s Clipper, headed for Kidusi Anitoni.
Deliver the Lexicon to Kidusi Anitoni Trading Post
A Labyrinthine Undertaking
Linguistics.
1. Islands. 2. Rituals. 3. Priests.

And The Desert Will Take It All
Pick up the translation of the wall from trading post on Kidusi Anitoni.
Deliver your translation to Ketema.
Discuss the fate of Kidusi Anitoni with Ketema.
A. Say that priestess felt that being keepers of lore gave them power. It leads to: The Fading of Kidusi Anitoni.
B. Say that they were afraid that library will be lost. Then say that she was motivated by her love in tradition and history. And at the end say that unity can´t be achieved without tolerance and acceptance of others mistakes. It leads to: Strife is Behind, Unity Ahead.

A. The Fading of Kidusi Anitoni
Retrieve the Decree of Banishment at Ketema’s Clipper, headed for Kidusi.
Deliver Ketema's letter to Kidusi Anitoni Trading Post.
Enbesa isn´t united because island Kidusi Anitoni is exiled for lies of its priests. No one will trade with them and visits are forbidden.

B. Strife is Behind, Unity Ahead
Retrieve the Decree of Absolution at Ketema’s Clipper, headed for Kidusi.
Deliver Ketema’s letter to Kidusi Anitoni Trading Post.
You deliver the letter in which emperor Ketema forgives their lies, but he warns them that such actions may lead to their exile. Priestess realizes that exile will mean basically death sentence, so she agrees with unity with Enbessa and loss of their faith.
Reward for unifying Kidusi Anitoni with Enbesa: Elders residences receive bonus of +1 research point for Research institute, if need for Illuminated Script is fulfilled.

The Epic of Lions
Chronicles of Enbesa

Sail to Kidusi Anitoni’s Trading Post.
Reward: Chronicles of Enbesa (epic item for museum. Attractiveness: +40. Expedition: Diplomacy +15).


Epic of Lions
Chronicles of Enbesa
Sail to Kidusi Anitoni’s Trading Post.
Reward: Chronicles of Enbesa (item for museum. Quality depends on how you finish quests for Kidusi Anitoni).
Look at My Works, Ye Mighty
You can refuse to finish Chronicles of Enbesa and it will cancel this quest. But why would you do that?
If you agree with helping Ketema, you gain mission „An Old Friend“.
An Old Friend
Find the Scholar on Kidusi Anitoni.
The Silver Age
Find Ruins of the Seven Prince’s palaces.
Find 2 old houses. One is Ancient family house on the northwest of Waha Desher and the second is Hytia’s house on the west side in Angereb, between the castle and the market.
Find Tamborime silver age fortifications.
Find 2 parts of fortifications. In Ketema’s city on Taborime, wall north and west of market.
Silver Age Unveiled
Report to the Scholar on Kidusi Anitoni.
The Bronze Age
Find 3 Tebarok’s works. Walls of the Palace Court on Taborime; Ruins of the palace behind Angereb’s castle in Angereb; Kidusi Anitoni’s Temple in mountain on Kidusi Anitoni.
Find the hidden path through the mountains on Kidusi. On the northeastern side of mountain of Kidusi Anitoni there is a small entrance on the shore from which water is running.
Bronze Age Unveiled
Report to the Scholar on Kidusi Anitoni.
Chronicles of Enbesa – Finale
Retrieve the Epic of the Land of Lions from Kidusi Anitoni.
Reward: Epic of the Land of Lions – book you can read.
Angereb
Into the Lions’ Den
Approach Ketema’s Clipper, headed for Angereb.
Approach Angereb trading post with the white flag for parley. You get Big White Flag from Ketema. With it no one can attack on you, but also you can´t attack anyone.
The Land Where Hibiscus Blooms Red
Discover unique ceramic stalls.
Admire Angereb tapestry industries.
Learn about their military headquarters.
Hidden: Dancers and ruins. On the left of the market is a group of dancers. Behind the castle are ruins of palace. Click on both to unlock third option in “Meeting the Princes”.
Meeting the Princes
Join the negotiation table with Princes.
  • Say that you saw many struggling and craftsmen without materials and then said that emperor is willing to support their economy, if they abandon piracy. Mission: Building the Arks.
  • Say that their army is almost nonexistent and then add that emperor will grand them power to challenge foreign fleets. Mission: An Invincible Armada.
  • Say that you saw dancers and beauty and then add that emperor will restore their monuments and bring visitors. Mission: The Great Work.

Building the Arks
Deliver 30t wanza timber, 30t indigo dye and 40t of linen to Angereb.
A Street By The Walls
Give away canopies from market.
No Rest From Errandry
Find a crate of ceramics in the covered market. It is next to eastern entrance to market.
Pick up crate of ceramics from Angerb trading post.
Deliver ceramics to target place.
Deliver clothes to target place.
Return to Angereb trading post.

An Invincible Armada
Sell 2 frigates to Angereb.
A Street By The Walls
Give away canopies from market.
The Not-So-Ancient Mariner
Find a crate of repair materials in the covered market. It is next to a house over artifacts dealer.
Deliver crate of repair materials to shipwreck.
Rescue the shipwrecked sailor.
Take shipwrecked sailor to Waha Dasher.
Return to Angereb trading post.

The Great Work
Deliver 30t of mud bricks to Angereb trading post.
Pick up an architect at Ketema’s Clipper, headed for Angereb.
Transport the architect to Angereb Trading Post.
Deliver one ancient piece of armor or sword, of at least rare value, to Angereb. He wants classic item for exhibition in museum. You can often buy them from Madame Kahina in Old World. Or get them from expeditions, quests, world’s fair.
The Legacy of Hiram
Select the ruins of the palace to inaugurate the new building.
A Street By The Walls
Give away canopies from market.
Bare Bones Business
Find the artifact specialist in the covered market.
Pick up the artifact specialist at Angereb trading post.
Transport the artifact specialist to Kidusi Anitoni trading post.
Report to Angereb trading post.


A Lesson in Lore Long Lost
Listen to Angereb's story.
Select Angerb castle.
Remove the ruins from behind the fortress.
Remove the boulders to unveil secret passage.
Find Caleb in the castle to hear the rest of the story
A Fateful Spear
Contact the man you helped in Kidusi Anitoni.
Find the entrance to the cemetery.
Find the tomb of Tomasi's guard.
Consult the books in Kidusi's library.
The Wisdom Therein
Gain access to the library.
You will get this quest only if you haven’t access to library yet, which you get from Kidusi Anitoni storyline.
A Fateful Spear
Report to the Angerebian.
The Garden of Forking Alleys – Silence
Help the Angerebian figure out the location of the Spear. Answer: Eight virtues.
The Garden of Forking Alleys – Melody
Help the Angerebian figure out the location of the Spear. Answer: Not virtues, the physical Ogdoad./ The location of the book? In left wing.
The Garden of Forking Alleys – Song
Help the Angerebian figure out the location of the Spear. Answer: Perhaps each wing represents specific place on the island.
A Hallowed Secret
Find where the spear is hidden. Solution: Click on 8 pillars in front of temple entrance.

The Road Less Travelled By
Decide how you will retrieve the spear
  • Take the road. Option A.
  • Take the mountain path. Option B.

A. Take the road
Those Who Follow If They Can
Select the Angerebian to commence the infiltration.
Try to learn more about priests through talk with Teka, or Ephrem.
Watch the Angerebian sneak towards the temple.
Inquisitorial Zeal
Help the Angerebian get past the priests.
Answer: I forgot some of my belonging by the basin. / Present your wrists. / Put your hand on your heart.
The Eyes of a Hawk
Watch the Angerebian steal the spear.
Curiosity Imperiled the Thief
Help the Angerebian get past the priests.
You can say: A cane I'd forgotten by the basin. – but only if you said during “Inquisitorial Zeal” that you have forgotten something.
You can say: A cane, for Teka the Bothered. – if you click on Tekku during “Those who follow if they can”.
Like A Blade Across Troubled Waters
Wait for the Angerebian to reach Kidusi Anitoni's harbor.
Upon An Edged Blade
Pick Up the spear from Kidusi Anitoni's harbor.
You can deliver spear to Ketema. Continue through way 1.
You can deliver spear to Angereb. Continue through way 2.

B. Take the mountain path
The Winding Path

Take a picture of the pier at the entrance to the mountain path. Mission: Mind of an Athlete, Body of a Manatee.
- or –
Take a picture of the tunnel entrance into the mountain. Mission: A Walk in the Mountain Park.
Mind of an Athlete, Body of a Manatee
Wait for the Angerebian to contact you. They will catch him. Continue with Option C.
A Walk in the Mountain Park
Wait for the Angerebian to contact you.
Upon An Edged Blade
Pick Up the spear from Kidusi Anitoni's harbor.
You can deliver spear to Ketema. Continue through way 1.
You can deliver spear to Angereb. Continue through way 2.

C. If you are caught
You get mission “A Final Judgment” if you in “Option A. Take the Road” select wrong answer to priests, or if you in “Option B. Take the mountain path” choose pier and go through mission “Mind of an Athlete, Body of a Manatee”.
A Final Judgment
Select the High Priestess to face her judgment.
The Exchange
Deliver an Enbesan artifact of epic or legendary value to Kidusi Anitoni.
High priestess is willing to give you spear if you bring epic or legendary artifact. If you don’t have anything, just buy some in Ketema's harbor. Just change items he offers until he will have some (I bought Hor Statue).
Upon An Edged Blade
Pick Up the spear from Kidusi Anitoni's harbor.
You can deliver spear to Ketema. Continue through way 1.
You can deliver spear to Angereb. Continue through way 2.
Angereb 2
1. Give spear to Ketema

A Traitor's Choice
Prepare to war: Send 3 frigates to Enbesa.
You have 30 minutes to build them and send them. If you don´t make it, or just ignore it, because you have already other ships, then after time limit you go for mission “Dies Irae Imperatori”. If you get them to Enbesa in time, you get mission “The Vengeance of Selamawi”.
The Vengeance of Selamawi
Pick up bomb at Ketema’s Clipper, headed for Angereb.
Smuggle the bomb to Angereb trading post, before princes discover your betrayal.
After this mission simply goes mission “Dies Irae Imperatori”. I don´t know what the bomb does, or how to blow it. If you know, let me know in the comments.
Dies Irae Imperatori
Destroy Angereb's Harbour to make them yield to Ketema.
You don´t have to weaken the whole harbor as usually when conquering island. Here you just need to destroy harbor building.
The United Realm
Sail to Ketema’s Clipper, headed for Angereb and receive the gift.
Angereb and Embesa are united, even thou through violence, since Angereb has to yield to your power.
Reward for unifying Angereb with Enbesa: Fire stations have range +10%.
Reward from Ketema: Spear of Selamawi (legendary item for museum. Attractiveness +50. Expedition: Power +10, Faith +15)

2. Give spear to Caleb

Spirited Away – A Tale
Share your story with the Princes of Angereb.
Chasing Blood
Find where the last Elamais fled to.
Visit the harbors in Taborime, Waha Desher and Kidusi Anitoni to retrieve the harbor registries.
Find the fugitive's ship on the shores of Waha Desher. Boat wreck is on beach on southeast, next to ancient pier.
The Matriarch's Memories
Find evidence of the Elamais presence in Waha Desher. Talk to matriarch Yara.
The Matriarch's Tale
Follow Matriarch Yara to learn more about the putative heir.
Secrets of the Waha
Remove three bushes.
Investigate the old house. Specifically click on table behind the house.
A Secret Uncovered
Pick up the diary of the Old Man in Waha Desher.
Take the diary to Angereb.
The Once And Future King
Find out who is the traitor being crowned king. It is Caleb on castle courtyard.

2.1. Give spear to Caleb. Find alternative way for peace.

Research of an Alternative
Find a way to prevent Angereb's independence.
Look again to the diary from Waha Desher.
Where It All Began
Investigate nursery.
Remove canopies. Select cradle. Select box with text “To my favorite guard”.
The Boy Who Would Be King
Search for King Wag's private office.
Check castle wing right over the nursery. From other side of this wing are locked door. Just click on them and you get document proving that Ketema is offspring of Angereb ruler Selamawi.
Unsought for Kindred
Pick up king Wag's notes from trading post in Angereb.
Deliver Wag's notes at Ketema’s Clipper, headed for Angereb.
A Final Chance At Peace
Meet with the princes to acknowledge or refuse Angereb's independence.
Tell them that emperor refuse to acknowledge their independence. They threaten with war, so tell them that you have more information. Tell them that Ketema is descendant of Elemais family.
Where Dark Waters Meet
Pick up Elemais spear from trading post in Angereb.
Deliver Elemais spear at Ketema’s Clipper, headed for Angereb.
Angereb and Embesa are united in a peaceful way because in Angereb they honor bloodline of their rulers.
Reward for unifying Angereb with Enbesa: Fire stations have range +10%.
Reward from Ketema: Spear of Selamawi (legendary item for museum. Attractiveness +50. Expedition: Power +10, Faith +15)

2.2. Give spear to Caleb. Acknowledge Angereb independence.

A Final Chance At Peace
Meet with the princes to acknowledge or refuse Angereb's independence.
Tell them that emperor acknowledge their independence.
An Empire Asunder
Sail to Ketema’s Clipper, headed for Angereb and report Angereb's independence.
You have prevented the war, but there is no unity. And it is very likely that there will be war in the future. But for know Ketema respect your decision, since you was there as his envoy, even though he is not happy with this outcome.
Reward: Nothing.

2.3. Give spear to Caleb. Conquer Angereb.

A Final Chance At Peace
Meet with the princes to acknowledge or refuse Angereb's independence.
Tell them that emperor refuse to acknowledge their independence. They threaten with war, so accept it.
Dies Irae Imperatori
Destroy Angereb's Harbour to make them yield to Ketema.
You don´t have to weaken the whole harbor as usually when conquering islands. Here you just need to destroy harbor building.
Angereb and Embesa are united, even thou through violence, since Angereb has to yield to your power.
Reward for unifying Angereb with Enbesa: Fire stations have range +10%.
Sunken Treasures
The Queen Vanishes
Sail to Sir Archibald Blake’s lighthouse.
Finish expedition: Sunken treasures.
Queen is missing, so you need to find her. Prepare rations, hunting, diplomacy and navigation for expedition and finish it. It is quite easy. You find queen and new region Cape Trelawney. She reveals that she wants to find Scepter of Capon to restore pride of her people, but scepter sunk here during old naval battle. You will have to build new city here and found the scepter.
Capital of Queendom
Sail to HMS Lap of Victory and receive the gift. Queen will give you 100 timber, 100 bricks and 50 steel beams, so you can immediately start building a city.
Build small trading post.
A Fresh Start
Reach city status “Village” with 100 farmers.

You also get now mission “Rag and Bone”. I will describe in one section building city and in second looking for scepter. They are interwined sometimes, but you can find scepter much sooner than you finish building big city. Here is still “The Old World”, so same rules as in first map. So it is time consuming building big city, but easy. And same goes for looking for scepter. It is quick and easy. It is just to teach you how salvager ship works.
Worst is that you can have only 1 salvager ship. So for every treasure it needs to go to other maps which takes time. So this side activity which should be fun to entertain you while you waiting for buildings, production, or money, became very soon boring.


God´s Mandate
Build a church.
Shopping centre
Build 2 depots, 1 harbormaster´s office and 1 pier.
Capital City
Reach city status “Capital” with 500 engineers.
Capital of Culture
Build a ZOO. Build empty ZOO compound and equip it with any animal.
Build Public Mooring, or Tourist Mooring.
City of Lights
Produce 50t of light bulbs.
Mother of All Cities
Reach city status “Metropolis” with 1750 investors.
Great Exhibition
Build World´s Fair.
Sail to extravaganza steamer and receive the gift.
Reward: Fernando de Faro, Coffee-Lover and All-Round Card (legendary item for Town Hall, happiness +10 for residences and satisfy needs for coffee. Expedition: Diplomacy +50).
Susannah Brightwoman, A Glimmer In the Darkness (legendary item for Trade Union, Attractiveness +8, Clockmakers and Jewelers occasionally make extra gold. Expedition: Crafting +50).

Rag and Bone
Sail to Old Nate´s lighthouse.
Immersion Test
Deliver 20,000 coins to Old Nate´s lighthouse. For that you gain Salvager ship.
Dive at specified location. There you gain some scrap.
Lead Into Gold
Deliver 5t of scrap to Old Nate´s lighthouse. You gain Little MagN8.
X Marks the Spot
Deliver 30,000 coins to Old Nate´ lighthouse.
The Big Blue
Dive at Old Nate´s coordinates. There you will meet Vasco Oliveira, who is also looking for the scepter. After he leaves, dive at the coordinates and you get Nadasky´s Journal (unreadable).
The Journal
Attract art restorers – 500 artisans.
Deliver unreadable Nadasky´s journal to art restorers.
Binding document
Provide 2t of sewing machines and 6t of flour to artisans.
Retracing History
Build a university.
Sail to art restorers and collect your reward. You get Nadasky´s Journal (incomplete).
The Eve of War
Read incomplete Nadasky´s journal.
Find the locations mentioned in Nadasky´s journal: The Guard Dogs; The Smuggler´s Cover; The Watchtower.

The Battle of Trelawney
Deliver “Rod of the Scepter of Capon” to art restorers.
Read near complete Nadasky´ journal.
Sail to Old Nate´s lighthouse.
Jumble Tech
Deliver 5t of steel and 5t of quartz sand to Old Nate´s lighthouse.
The Sound of the Sea
Reach the diving spot using an echo-locator.
Vasco´s Covenant
Sail to Grande de Imperio.
There you will find Vasco Oliveira who already found part of the scepter. He gave you Vasco´s honorable agreement – letter in which you two agree that whoever find second piece of scepter will be winner and that the other one will give him his piece.
Nadasky´s Legacy
Sail to your trading post.
Read Nadasky´s journal.
Forgotten Heroes
Follow Nadaky´s hints to find wreckage of HMS Ajax.

The Santissima Vitoria
Use Richardson´s log to find Santissima Vitoria.
Dive at the specific location. You gain Eagle of the Specter of Capon.

Best of Three
Sail to Grande de Imperio. It is Vasco´s ship and since you have two parts of the scepter, he will give you third part as you two agreed.
The Scepter of Capon
Deliver Pommel of the Scepter of Capon; Eagle of the Scepter of Capon and Rod of the Scepter of Capon to art restorers.
Provide 6t of gold and 3t of pearls for art restorers.
Finally you gain The Scepter of Capon (museum artifact, attractiveness +50).
The Capon´s Roost
Build a museum. Equip museum with The Scepter of Capon. Museum has to be here, in Crown Falls.
Tribute to a Legend
Sail to HMS Lap of Victory to receive admiral Nadasky´s military regalia.
For you effort your received reward:
  • Admiral Nadasky´s Sabre (epic item for museum, +40 attractiveness; Expedition: Force +30)
  • Nadasky´s Medal (epic item for museum, +40 attractiveness; Expedition: Faith +30)
  • Hogarth the harbormaster, Veteran of Trelawney (Legendary item for harbormaster´s office, loading speed +100%, Harbor activity +30%; Expedition: Diplomacy +50).
A Promise Kept
Approach the ship to begin the escort.
Escort HMS Lap of Victory out of region´s waters.
The High Life
Going Up!
Build a new Assembly Line Multifactory for elevators.
Reach for the Skies
Upgrade 1 engineer residence and 1 investor residence to skyscrapers.
The Arcade
Build a Department Store
Select the Toasters product for producing in department store.
Sustain supply from department store in the region over 70% for 1:00.
Market Research: The Lab
Build 1 new skyscraper for engineers.
Place a Gazebo Plaza next to the Engineer Skyscraper. In base game ornaments choose section Luxurious park and there are only two items: Fountain Plaza and Gazebo Plaza.
Market Research: The Patent
Choose next patent. Refrigerator, Vacuum cleaner, briefcase, or crockery.
Market Research: Cold Calling
Deliver 15t of arctic gas to Miss Jenny.
Market Research: Demand Vacuum
Deliver 15t of celluloid to Miss Jenny.
Market Research: Crock of Gold
Deliver 15t of lacquer to Miss Jenny.
Market Research: Manbags
Deliver 15t of sanga cows to Miss Jenny.


Higher and Higher, Baby
Upgrade 1 engineer’s skyscraper and 1 investor’s skyscraper to skyscrapers level 2.
The Panorama Effect
Create on any 2 skyscrapers intense panorama effect.
For panorama effect skyscraper needs to have around other smaller skyscrapers. Other buildings are not enough to have bonus, it needs to be skyscrapers, but smaller than the one you want to have higher panorama effect. When you select skyscraper, other skyscrapers that are lower are green and skyscrapers of the same height, or higher are brown. The more green skyscrapers are around the selected one the higher panorama effect is. Effect can be weak, moderate, decent, strong, or intense. Basic panorama effect depends on level of buildings. So level 2 skyscraper has panorama effect 2 and lower skyscrapers increase its panorama effect and same, or higher skyscraper lower its panorama effect. So level 5 skyscraper has panorama 5 (intense), even if there are no other skyscrapers around. If you have two level 5 skyscrapers, they have panorama 4, since they both negate each other -1. If you build smaller skyscrapers around them, they will add bonus to their panorama effect.

For continuing you need more skyscrapers. Specifically 15 level 2 skyscrapers and 15 level 3 skyscrapers (you can upgrade those level 2 to level 3). After that you need to build Furniture store to satisfy needs for level 4 skyscrapers. And then you need again 15 level 4 skyscrapers.

The Survey: Subjective Feedback
When you build furniture store and start producing lamps after a while Donald will contact you with suggestion to wider your production and you get this mission.
Ask survey subjects for their opinions: Romantic survey subject; Reclusive survey subject; Cheapskate survey subject. Just click on them, all three are near furniture store.
The Survey: Analysis
Analyze the survey results. Start producing Vanity screens.
The Survey: Vanity Fair
Reach productivity from furniture store in the region over 70%.
The Survey: No Bad Press
Catch the Vandal. Someone painted your advertisement posters, so catch the vandal in 5 minutes.
Ask newspaper boy. He is highlighted so just click on him and he will tell you what he knows. Further you need to investigate yourself. Newspaper boy said that he saw a guy with paint and big moustache heading for harbor. In the harbor, near the trading post, find few crates (heap of disguises) with fake moustache. After this a group of women (envious visitor) will appear nearby. Ask them if they saw something. They didn´t see a moustached man, but the red-haired woman feeding birds. After this a flock of birds (pack of ravenous pigeons) will appear nearby. They are hard to see if they are in grass. On the ground under the pigeons you will find a note referring to furniture store. Near the furniture store find “pile of paint buckets”.
After you finish your effort, Donald uses this vandalism to make new logo for marketing.
  • Reward if you find cans with paint in time: Original Vanity Screen Advertisement (epic item for Trade union, affect drug store, furniture store and department store: workforce needed -20%, attractiveness +50).
  • Reward if you didn´t find cans with paint in time: Vandalised Vanity Screen Advertisement (rare item for Trade union, affect drug store, furniture store and department store: workforce needed -10%, attractiveness +25).

When you build first level 5 skyscrapers, you will unlock new building. To unlock them all you will need 15 level 5 skyscrapers.


Industrial Espionage: The Tail
Industrial Spying: Tailing

When you build drug store and start producing toothpaste, Donald will contact you after a while and tell you that you should investigate discrepancies in accounting.
Find Miss Jenny. Follow and eavesdrop Miss Jenny.
Industrial Espionage: Incriminating Evidence
Photograph Miss Jenny's private meeting.
Industrial Espionage: Theodora's Plea
Miss Jenny will tell you that she works on a patent that Donald doesn´t believe in, but she believes that it will be success.
Help her: A. Helping Miss Jenny.
Report her: B. Reporting Miss Jenny.

A. Helping Miss Jenny
Industrial Espionage: Double agent

Deliver 15t Fish Oil and 15t Coconut Oil to Miss Jenny.
With these deliveries she will successfully finish her patent and you can produce lipsticks.
B. Reporting Miss Jenny
Industrial Espionage: Loyalties

Pick up William Brokeman at his cruise ship. Deliver him back to harbor.
Industrial Espionage: Lawsuit
Find Mr. Brokeman's documents. They are in harbor near the trading post.
Donald threatens Miss Jenny with lawsuit so she agrees to work overtime and deliver patent for lipsticks.

Now just build more and more skyscrapers. Your goal is to build Skyline Tower. For foundations you need 25 level 5 skyscrapers, for the first phase you need 40 level 5 skyscrapers, for the second phase you need 55 level 5 skyscrapers and for the last phase you need 75 level 5 skyscrapers. And for all you also need 1,500,000 coins, 240 timber, 630 bricks, 610 steel beams, 320 windows, 890 reinforced concrete and 190 elevators.
The High Life 2
Skyline Tower: Foundations
Build Skyline Tower Foundations
Skyline Tower: First Storeys
Continue in construction the same way as with other monuments.
Skyline Tower: Vertigo
Reassure the workers. Some workers have problems with work in heights.
You can use priest (if you have this item on island). You can find daredevils – you will need to find them yourself like in similar quests with finding people/ animals. You can give them 20t of caoutchouc for safety harnesses. Or you can ignore them and they will have happiness -5 for 30 minutes.
Skyline Tower: Accident At Work
You get this mission if you ignored workers before in mission “Skyline Tower: Vertigo”. Some workers have accident. You can send a doctor there (if you have on island Punctilious Physician). You can build a hospital nearby. You can pay them risk premium 10,000 coins. Or you can ignore them again. And they will have happiness -10 for 45 minutes.
Skyline Tower: Theft On Site
Interrogate workers. Someone stole steel beams and you need to investigate. You can simply replace them from your stock and send new 30 steel beams to construction. Or you can punish random group of workers as an example and it make their happiness -15 for 45 minutes.
Skyline Tower: Risk Assessment
Theodora insists the Skyline Tower's stability is at risk. You can pay 10,000 coins for static survey, which will delay construction for 2 minutes. Or you can ignore it.
Skyline Tower: The Cracks Appear
Theodora has found cracks at the bottom of the tower. You can send 100 timber to fix it and delay construction for 5 minutes. Or you can ignore it.
Skyline Tower: Dora's Way
Theodora thinks that tower is still at risk. You can give hire 50t of quartz sand for fixing it. Or you can ignore her.
Skyline Tower: Shattered Porcelain
Donny is in panic. It seems that the Tower is collapsing. Ask Theodora for her opinion.
Skyline Tower: Where is Miss Jenny?
Skyline Tower: Revelation

Find Theodora near construction of Skyline Tower and find out what is this all about.
Skyline Tower: Deus Ex Machina
Deliver 50t Lacquer and 50t Steel Beams to Theodora.
Skyline Tower: Pioneer of a New Dawn
Photograph the Skyline Tower.
Skyline Tower: Post Mortem

  • Dedicate the monument to environmental awareness (Skyline Tower: +500 Attractiveness)
  • Dedicate the monument to an anti-consumerism campaign (Skyline Tower: -10% consumption of Carriages, Jewellery and Pocket Watches)
  • Dedicate the monument to a fair and optimistic future (Skyline Tower: +500 attractiveness, -10% consumption of Carriages, Jewellery and Pocket Watches). This option is only available if you decided to help Theodora in quests Risk Assessment; The Cracks Appear; Dora's Way; Shattered Porcelain during construction of Skyline Tower.

Donald will also give you a reward. You will receive Performance medal (for Trade Union, affects all orchards, chemical plants, assembly lines, artisans workshops: all +productivity)
Depending on how fast you build Skyline Tower, you gain one of three medals.
Gold Performance Medal (legendary item, productivity +75%)
Silver Performance Medal (epic item, productivity +50%)
Bronze Performance Medal (rare item, productivity +25%)


Skyline Tower: Sound and Fury
If you have ignored Theodora’s request for survey in “Skyline Tower: Risk Assessment” you gain this mission. Pillars are deforming so you can give them 200t of cement (construction delays 10 minutes), or pay 1,000,000 for shoring devices (construction delays 10 minutes). Or you can ignore her again. If you do what she asks you will continue again with mission “Skyline Tower: Dora's Way” and still can get the best reward.
Skyline Tower: Teetering At the Precipice
Tower makes strange sounds and now even Donald is willing to listen to miss Jenny. You can deliver 400t of cement (construction delays 20 minutes), or pay 10,000,000 for shoring devices (construction delays 20 minutes). Or you can ignore it again. If you do what she asks you will continue again with mission “Skyline Tower: Dora's Way” and still can get the best reward.
If you ignore it again, you can´t ask Miss Jenny for help in “Skyline Tower: Shattered Porcelain”. But you will still continue with quests “Skyline Tower: Where is Miss Jenny?; Skyline Tower: Revelation; Skyline Tower: Deus Ex Machina; Skyline Tower: Pioneer of a New Dawn; Skyline Tower: Post Mortem”.
4 Comments
Epero  [author] Dec 31, 2023 @ 6:30pm 
Deso: I don´t remember that there will be any problem with it, but also I had lots of bulidings working on all achievements. I don´t know if there have to be specific buildings. They needs to be all powered so if some power plants use oil, you need to have it in power plants. It seems that you have big enough economy, so make a save and try to build more type of all factory buildings close to Dam on Manola so all of them have electricity.
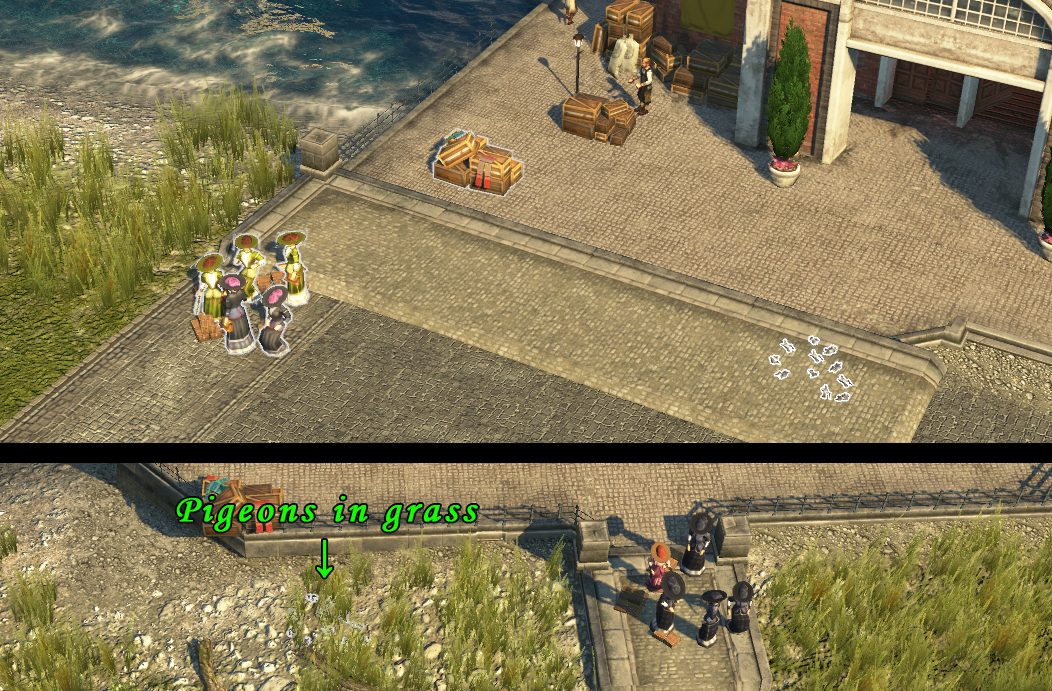
Deso Dexter Dec 31, 2023 @ 6:00am 
Great guide!

I have almost unlocked all the other achievements, but I can't unlock the 'Powered Up' achievement of the New World Rising DLC.

Powered Up
Provide electricity to 20 factories in the New World.

Is this achievement buggy or what is meant by "factories"? The dam is build, Manola is full with tens of thousands of inhabitants (including Artista) and accordingly lots of production buildings with electricity. Thank you for help.
NP Nov 23, 2023 @ 5:55am 
Thank you, very good guide, really helps me.
A note on "Environmental Campaigner". In my case, the archivment was not activated when the number of technicians fell below 500. It only worked on the third attempt when I had more than 500 technicians for the whole 60 minutes.
Бримс Nov 6, 2023 @ 9:08am 
thanks