Maestro 2055 - Help and support - Belgacom
Maestro 2055 - Help and support - Belgacom
Maestro 2055 - Help and support - Belgacom

Create successful ePaper yourself
Turn your PDF publications into a flip-book with our unique Google optimized e-Paper software.
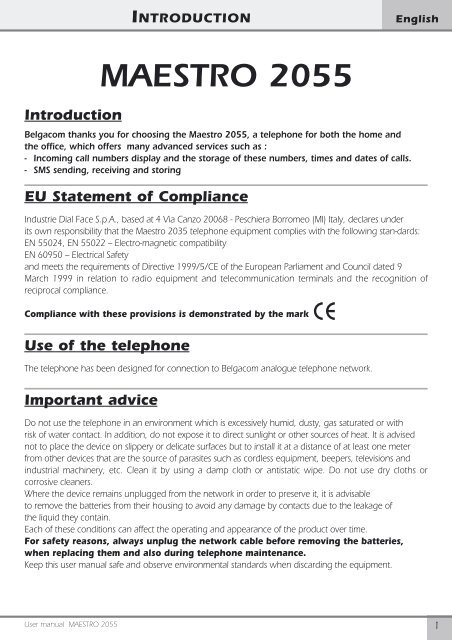
INTRODUCTIONEnglishIntroductionMAESTRO <strong>2055</strong><strong>Belgacom</strong> thanks you for choosing the <strong>Maestro</strong> <strong>2055</strong>, a telephone for both the home <strong>and</strong>the office, which offers many advanced services such as :- Incoming call numbers display <strong>and</strong> the storage of these numbers, times <strong>and</strong> dates of calls.- SMS sending, receiving <strong>and</strong> storingEU Statement of ComplianceIndustrie Dial Face S.p.A., based at 4 Via Canzo 20068 - Peschiera Borromeo (MI) Italy, declares underits own responsibility that the <strong>Maestro</strong> 2035 telephone equipment complies with the following stan-dards:EN 55024, EN 55022 – Electro-magnetic compatibilityEN 60950 – Electrical Safety<strong>and</strong> meets the requirements of Directive 1999/5/CE of the European Parliament <strong>and</strong> Council dated 9March 1999 in relation to radio equipment <strong>and</strong> telecommunication terminals <strong>and</strong> the recognition ofreciprocal compliance.Compliance with these provisions is demonstrated by the markUse of the telephoneThe telephone has been designed for connection to <strong>Belgacom</strong> analogue telephone network.Important adviceDo not use the telephone in an environment which is excessively humid, dusty, gas saturated or withrisk of water contact. In addition, do not expose it to direct sunlight or other sources of heat. It is advisednot to place the device on slippery or delicate surfaces but to install it at a distance of at least one meterfrom other devices that are the source of parasites such as cordless equipment, beepers, televisions <strong>and</strong>industrial machinery, etc. Clean it by using a damp cloth or antistatic wipe. Do not use dry cloths orcorrosive cleaners.Where the device remains unplugged from the network in order to preserve it, it is advisableto remove the batteries from their housing to avoid any damage by contacts due to the leakage ofthe liquid they contain.Each of these conditions can affect the operating <strong>and</strong> appearance of the product over time.For safety reasons, always unplug the network cable before removing the batteries,when replacing them <strong>and</strong> also during telephone maintenance.Keep this user manual safe <strong>and</strong> observe environmental st<strong>and</strong>ards when discarding the equipment.User manual MAESTRO <strong>2055</strong>1
SUMMARYEnglish3.5.12 Storing a number of the LN dialled list in the Phonebook ........................................................... 293.6 Dialling numbers of the Phonebook / VIP / Fast call . . . . . . . . . . . . . . . . . . . . . . . . . . . . 303.7 Caller identification. . . . . . . . . . . . . . . . . . . . . . . . . . . . . . . . . . . . . . . . . . . . . . . . . . . . . 313.7.1 Call a number of the "Received" call list ...................................................................................... 323.7.2 Erase numbers of the "Received" call list .....................................................................................323.8 2nd Call h<strong>and</strong>ling. . . . . . . . . . . . . . . . . . . . . . . . . . . . . . . . . . . . . . . . . . . . . . . . . . . . . . 333.9 Mute the Microphone. . . . . . . . . . . . . . . . . . . . . . . . . . . . . . . . . . . . . . . . . . . . . . . . . . . 333.10 Loudspeaker volume adjusting . . . . . . . . . . . . . . . . . . . . . . . . . . . . . . . . . . . . . . . . . . . . 343.11 Group listening mode. . . . . . . . . . . . . . . . . . . . . . . . . . . . . . . . . . . . . . . . . . . . . . . . . . . 343.12 Keyboard lock. . . . . . . . . . . . . . . . . . . . . . . . . . . . . . . . . . . . . . . . . . . . . . . . . . . . . . . . . 343.13 Reminders (alarms) . . . . . . . . . . . . . . . . . . . . . . . . . . . . . . . . . . . . . . . . . . . . . . . . . . . . . 343.14 Phone info . . . . . . . . . . . . . . . . . . . . . . . . . . . . . . . . . . . . . . . . . . . . . . . . . . . . . . . . . . . 384 NETWORK SERVICES4. Use of Network services . . . . . . . . . . . . . . . . . . . . . . . . . . . . . . . . . . . . . . . . . . . . . . . . . 394.1 Call forwarding. . . . . . . . . . . . . . . . . . . . . . . . . . . . . . . . . . . . . . . . . . . . . . . . . . . . . . . . 394.1.1 Call forwarding unconditional ...................................................................................................394.1.2 Call forwarding if not reply. .......................................................................................................404.1.3 Call foewarding when busy .......................................................................................................414.2 Fixed destination call . . . . . . . . . . . . . . . . . . . . . . . . . . . . . . . . . . . . . . . . . . . . . . . . . . . 424.3 Call waiting (2nd call). . . . . . . . . . . . . . . . . . . . . . . . . . . . . . . . . . . . . . . . . . . . . . . . . . . 434.4 Ring back . . . . . . . . . . . . . . . . . . . . . . . . . . . . . . . . . . . . . . . . . . . . . . . . . . . . . . . . . . . . 444.5 PhoneMail <strong>and</strong> services . . . . . . . . . . . . . . . . . . . . . . . . . . . . . . . . . . . . . . . . . . . . . . . . . 455 ADDITIONAL OPTIONS5.1 Options available in idle mode . . . . . . . . . . . . . . . . . . . . . . . . . . . . . . . . . . . . . . . . . . . . 475.1.1 Save a displayed number ...........................................................................................................475.1.2 Introducing a pause ..................................................................................................................485.1.3 Make a call as visible ..................................................................................................................485.1.4 Make a call as anonymous .........................................................................................................485.2 Options in conversation mode . . . . . . . . . . . . . . . . . . . . . . . . . . . . . . . . . . . . . . . . . . . . 495.2.1 Activate call-back ........................................................................................................................495.2.2 Start 2nd call .............................................................................................................................495.2.3 Accept 2nd call ..........................................................................................................................495.2.4 Alternate ...................................................................................................................................495.2.5 Conference call ..........................................................................................................................505.2.6 Call transfer ................................................................................................................................505.2.7 Reject 2nd call ...........................................................................................................................505.2.8 Terminate call ............................................................................................................................506 USE OF SMS SERVICE6.1 Configuring the SMS service . . . . . . . . . . . . . . . . . . . . . . . . . . . . . . . . . . . . . . . . . . . . . . 516.1.1 Modify the SMS center numbers ................................................................................................516.1.2 Assign a name to a SMS Box ...................................................................................................... 526.1.3 Assign a number to a SMS Box ................................................................................................... 526.1.4 Assign a PIN code to a SMS Box ................................................................................................. 536.1.5 Activate / Deactivate EATONI function ........................................................................................536.1.6 Deactivate a SMS Box .................................................................................................................536.1.7 Activate a SMS Box .....................................................................................................................546.2 SMS Sending . . . . . . . . . . . . . . . . . . . . . . . . . . . . . . . . . . . . . . . . . . . . . . . . . . . . . . . . . 546.2.1 Reading <strong>and</strong> Options of the SMS sent ........................................................................................ 556.3 SMS Receiving . . . . . . . . . . . . . . . . . . . . . . . . . . . . . . . . . . . . . . . . . . . . . . . . . . . . . . . . 566.3.1 Reading received SMS ...............................................................................................................566.3.2 Options menu “Read received” ..................................................................................................576.4 EATONI (SMS only) . . . . . . . . . . . . . . . . . . . . . . . . . . . . . . . . . . . . . . . . . . . . . . . . . . . . . 57Warranty . . . . . . . . . . . . . . . . . . . . . . . . . . . . . . . . . . . . . . . . . . . . . . . . . . . . . . . . . . . . . . . . . . 59User manual MAESTRO <strong>2055</strong>3
English1- INSTALLATION AND START-UP1.1 Description of the telephoneHANDSETDISPLAYMENU KEYSLEDUP /DOWN KEYSMAIN KEYPADMICROPHONE MUTE /ERASEHANDS-FREE /GROUP LISTENINGLAST NUMBER REDIALSWITCHING PARTIES /R2 - R3SERVICES KEY8Fig. 1FLASH1.2 Display symbolsj A/B/C New SMS received inbox A/B/Cj A/B/C SMS Memory messagesfull for box A/B/Cd New not answered incoming callsg H<strong>and</strong>s-free/Group-listeningBatteries offiRinger deactivated, Filtre VIP, Black list,hidden number, ring delayedAlarm OnAlarm not stoppedb PhoneMaili Direct call activated4User manual MAESTRO <strong>2055</strong>
1- INSTALLATION AND START-UPEnglishPlastic screw (E)Fig. 26AC/DC supplyplug inLine plug inBatteriescover (A)Batterieshousing (B)H<strong>and</strong>setplug in (C)1.3 Content of the box1 h<strong>and</strong>set1 spiral cord1 line cord1 base1 line plug in1 AC/DC supplier1 user manual(with guarantee card)All the functions are available if the telephone is supplied via AC/DC supplier <strong>and</strong>/or via 3 batteries1.5Vdc size AA. Batteries are not provided with the telephone.User manual MAESTRO <strong>2055</strong>5
English1- INSTALLATION AND START-UP1.4 Installing the telephoneProceed as follows :1)Put the shortest end of the spiral cable into the h<strong>and</strong>set connector <strong>and</strong> put the other end into thesmall socket (C) located at the bottom of the telephone base (identified by an h<strong>and</strong>set (fig.2). Placethe flat part of the cord into the groove located at the bottom of the base.2) Put one end of the line cord into the socket located at the bottom of the base (fig2). Place the flatpart of the cord into the groove located at the bottom of the base.3) Insert the four-poles plug into the telephone socket.4) Insert the AC/DC supplier plug into the connector located at the bottom of the base (supplier symbol).Insert the 230Vac plug of the supplier into the 230Vac socket.NB - To install the batteries (fig.2) remove the cover (A) located at the bottom of the base, insert thebatteries in accordance with the polarities indicated into the batteries housing (B) <strong>and</strong> close the cover.N.B. Batteries or AC/DC supplier or both may be used.Important: before to take the cover out, the ine cord MUST NOT be connected to the <strong>Maestro</strong> <strong>2055</strong>.After this operation, the <strong>Maestro</strong> <strong>2055</strong> installation is finished.1.5 Wall installationThe <strong>Maestro</strong> <strong>2055</strong> can be fixed to the wall. Before fixing it, assembly the different parts <strong>and</strong> proceedas follows:1) Drill two holes of 5mm diameter at a distance of 100 mm.2) Insert the wall plugs into the holes <strong>and</strong> screw the screws until they are at 5 mm distance from thewall.3) Turn the plastic pivot pin (posit. E on the bottom of the base) 180° on the right side. Stick the telephoneto the wall so that the screw heads fully penetrate the large buttonhole. Then block the subsetby pulling it in a downward direction.4) If not yet done, plug the four-pole plug into the telephone socket.1.6 Telephone start-upTo start the telephone, after completing its installation in accordance with the instructions, check thatthe telephone line is connected to the socket, lift the h<strong>and</strong>set up, ensure there is a tone <strong>and</strong> then hangup. This operation confirms the equipment has been correctly installed <strong>and</strong> it is then possible to proceedwith the operations explained in the following paragraphs.6User manual MAESTRO <strong>2055</strong>
1- INSTALLATION AND START-UPEnglish1.7 Replacing the batteriesWhen the batteries are discharged or taken out <strong>and</strong> if the AC/DC supplier is not used, the telephoneprovides all the basic functions. It is necessary to replace the batteries if the display shows whenthe h<strong>and</strong>set is picked up.To replace the batteries, refer to fig.2 <strong>and</strong> proceed as follows:1) Unplug the line cord by removing the connector from its socket. In order to remove the connectorcorrectly, press the safety pin towards the cord <strong>and</strong> pull without forcing it.2) Remove the battery cover3) Replace the batteries, paying attention to the polarity4) Close the cover5) Plug the line back in by putting the connector fully back into its socket (until it clicks).N.B. For safety reasons, follow the information set out in the paragraph entitled “Important Advice”.Discharged batteries are not rechargeable <strong>and</strong> should be disposed of using containers provided forthis purpose in full compliance with current environmental st<strong>and</strong>ards.WARNING : DO NOT CONNECT THE TELEPHONE TO THE TELEPHONE NETWORK WITHOUTFIRST REPLACING THE BATTERY COVER.1.8 Delivery configurationRinger volume . . . . . . . . . . . . . . . . . 3Ringer melody . . . . . . . . . . . . . . . . . . 1Loudspeaker volume . . . . . . . . . . . . level 4Date <strong>and</strong> time . . . . . . . . . . . . . . . . . . 01 Jan 05 00:00Alarm . . . . . . . . . . . . . . . . . . . . . . . . DeactivatedVIP filter . . . . . . . . . . . . . . . . . . . . . . Deactivated1st Ring deactivation . . . . . . . . . . . . . YesNo ring anonym. . . . . . . . . . . . . . . . DeactivatedBlack Liste . . . . . . . . . . . . . . . . . . . . . DeactivatedLanguage . . . . . . . . . . . . . . . . . . . . . EnglishPIN Code box SMS . . . . . . . . . . . . . . . NoPABX Prefix . . . . . . . . . . . . . . . . . . . . NoPause . . . . . . . . . . . . . . . . . . . . . . . . 1 secondService center 1 (send). . . . . . . . . . . . 1717Service center 2 (receive) . . . . . . . . . . 01717SMS Function . . . . . . . . . . . . . . . . . . ActivatedDialling mode . . . . . . . . . . . . . . . . . . DTMFUser manual MAESTRO <strong>2055</strong>7
English1- INSTALLATION AND START-UP1.9 Technical <strong>and</strong> functional features- 22 keys keyboard : 12 alphanumeric keys + 4 navigation menu keys + 6 function keys- Graphic LC display,102 x 64 pixels, 6 lines /16 alphanumeric characters each, backlight- Pre-selection- Flash : 125 +/- 5 ms- H<strong>and</strong>s-free- Group listening- 4 levels loudspeaker volume adjusting- 15 melodies (3 normal + 12 polyphonic )- Adjustable ringer volume (3 levels + not activated)- Led to indicate incoming calla <strong>and</strong> line engaged- Mute microphonePhonebook- 250 name-number (20 characters by name - 26 characters by memory number)- Classification (type) of the numbers (Internal / External / VIP / Black)- Icones (Generic - Mobile - Home - Office) of the type of number- Ringer activation for pre-defined numbers (VIP list, ring filter)- Ringer melodies associated to a stored name - number- Fast dialling (10 numbers max)- Direct key to access a 30 last numbers dialled list (32 digits each number)Caller number / name identification <strong>and</strong> presentation (CLIP/CNIP : if services available on the line)- Display the callers name / number de l’appelant (also for a 2nd incaming call when in conversation)- 50 elements CLIP/CNIP list ( name-number -date-hour)- Dialling an element of the CLIP/CNIP listNetwork Services- "Network services" h<strong>and</strong>led via menu- Dedicated key for the 2nd call function- Reminders/Clock/Conversation elapsing time- PABX prefix programmability (1 number,4 digits max.)- Automatic pause insertion after PABX prefix dialling (1,2,3,4 secondes)SMS sending <strong>and</strong> receiving- SMS sending <strong>and</strong> receiving (160 characters max. each message)- PIN Code for each Box SMS- 3 Box SMS max. availability by program- 80 messages per Box SMS max. / 20 messages of 160 characters per Box SMS- SMS Centers numbers programmability- Eatoni (predictive mode of writing SMS)- 4 languages (FR/NL/D/UK)- Wall mounting- Supply via AC/DC (230Vac main) supplier or by 3 batteries 1,5 V / type AA (not included).8User manual MAESTRO <strong>2055</strong>
2CUSTOMISATIONPROGRAMMINGPersonalization can be done when the telephone is supplied via main or via batteries or both cases.MenuMenuMain menuMessages A: Box A Write newRead receivedRead writtenErase messagesSettingsAvailanle memoryB: Box BC: Box CService center Service center 1Service center 2Call listUser manuali MAESTRO <strong>2055</strong>ReceivedPlacedErase allReceivedPlacedNetwork services Call forwarding All calls/ If not answered/ When busyFixed dest. call Activation / DeactivationCall waiting Activation / DeactivationDeact. ring backReminders ListNewSingle, Yearly, Monthly,Weekly, Daily, HourlyErase allSettings DisplayRingClockFast callDirect callPABX prefixPABX pauseFlashCLI on CWLanguageLock PINReset codeKeyboard lock - - -Phone info SMS subaddressesRing settingsDirect callSW release9
English2 - CUSTOMISATION / PROGRAMMING2.1 Setting the languageFour languages are available : English, Français, Nederl<strong>and</strong>s, Deutsch. To select a language,proceedas follows:➤ Press [Menu] key to enter in the main menu .➤ Scroll the menu items via Ωπ keys to select "Settings" <strong>and</strong> press[OK] to confirm.➤ Press Ωπ keys to select "Language" <strong>and</strong> press [OK] key to confirm.➤ Select the desired language via Ωπ, then press [OK] to confirm.➤ Press [∆] to exit the menu <strong>and</strong> to go back to idle.2.2 Setting the light on the displayThe user can choose between 3 lighting modes (Normal, Always off, Always on) <strong>and</strong> 12 levels of contrast.Proceed as follows:➤ Press [Menu] key to enter in the main menu .➤ Scroll the menu items via Ωπ keys to select "Settings" <strong>and</strong> press[OK] to confirm.➤ Press Ωπ keys to select "Display" <strong>and</strong> press [OK] key to confirm.➤ Select "Lighting" or “Contrast” via Ωπ keyes, then press [OK] key toconfirm➤ If "Lighting"has been choosen, select Normal/ Always off/Always on via Ωπ keys <strong>and</strong> press [OK] to pour confirm.Note: the option “Always on” cannot be activated if the <strong>Maestro</strong> <strong>2055</strong> issupplied via AC/DC supplier.➤ If "Contrast", select the desired level (de 1 à 12) via Ωπ keys <strong>and</strong> press[OK] key to confirm.➤ It is possible to get back by pressing [∆] key.10User manual MAESTRO <strong>2055</strong>
2 - CUSTOMISATION / PROGRAMMINGEnglish2.3 Setting time <strong>and</strong> dateProceed as follows:➤ Press [Menu] key to enter in the main menu .➤ Scroll the menu items via Ωπ keys to select "Settings" <strong>and</strong> press[OK] to confirm.➤ Press Ωπ keys to select "Clock" <strong>and</strong> press [OK] key to confirm.➤ Enter the day via numeric keys (01-31).➤ Enter the month 01 - 12).➤ Enter the year (00 - 99).➤ Enter the hour (00 - 23).➤ Enter the minutes (00-59).➤ Press [OK] key to confirm.The display will show time <strong>and</strong> date (jj -mm hh-mm) when the telephone is in idle.The clock is updated at each incoming call (if CLI/CNIP service is available <strong>and</strong>has been subscribed).If the entered data are wrong, a message of error will be displaied after theconfirmation.2.4 Setting the ringerIt is possible to choose the melody,the ringer level volume <strong>and</strong> how the ringer will react when a callincomes.2.4.1 Setting the ringer melodyIt is possible to choose between 15 melodies (3 normal + 12 polyphonic) as follows:➤ Press [Menu] key to enter in the main menu .➤ Scroll the menu items via Ωπ keys to select "Settings" <strong>and</strong> press[OK] to confirm.➤ Press Ωπ keys to select "Ring" <strong>and</strong> press [OK] key to confirm.User Manual MAESTRO <strong>2055</strong>11
English2 - CUSTOMISATION / PROGRAMMING➤ Press Ωπ keys to select “Ring melody”. Then press [OK] key toconfirm.➤ Press Ωπ keys pour to select the desired melody (de 1 à 15 ), thenpress [OK] key to confirm.2.4.2 Setting the ringer volume levelIt is possible to choose the level of the ringer volume between 3 different levels: minimum (1), medium(2), maximum (3). Proceed as follows:➤ Press [Menu] key to enter in the main menu .➤ Scroll the menu items via Ωπ keys to select "Settings" <strong>and</strong> press[OK] to confirm.➤ Press Ωπ keys to select "Ring" <strong>and</strong> press [OK] key to confirm.➤ Press Ωπ keys to select “Ring volume”. Then press [OK] key toconfirm.➤ Press Ωπ keys pour to select the desired volume level (from 1 to 3 ),then press [OK] key to confirm.2.4.3 Setting the ring modeIt is possible to set the mode the ringer will react when a call incomes, between the following modes:Off: no ring (silence)On.: immediately when the call incomes2nd ring: start ringing at 2 nd ring of the incoming callAt ring nr.: start ringing at a programmed number of rings for thatincoming call (3 - 9).Proceed as follows:➤ Press [Menu] key to enter in the main menu .➤ Scroll the menu items via Ωπ keys to select "Settings" <strong>and</strong> press[OK] to confirm.➤ Press Ωπ keys to select "Ring" <strong>and</strong> press [OK] key to confirm.➤ Press Ωπ keys to select “Ring mode”. Then press [OK] key to confirm.12User manual MAESTRO <strong>2055</strong>
2 - CUSTOMISATION / PROGRAMMINGEnglish➤ Press Ωπ keys to select the desired mode <strong>and</strong>press [OK] key to confirm.2.4.4 VIP filterVIP filter allows to activate the ringer for Calling numbers stored in the Vip list only. To activate ordeactivate the VIP filter:➤ Enter the menu item '"Ring" as described previously➤ Select the "Ring VIP only" via Ωπ keys,then press [OK] key toconfirm.➤ Choose "Activate?" or "Deactivate?" via Ωπ keys <strong>and</strong> press [OK] toconfirm.This function requires a subscription to the "CLIP/CNIP service".2.4.5 "No ringer anonimous" filterWhen this filter is active,the telephone will not ring in the event of anonimous incoming call.To activate or deactivate the filter,proceed as follows:➤ Enter the menu item '"Ring" as described previously➤ Select the "No Ring anonim."item via Ωπ keys,then press [OK] keyto confirm.➤ Choose "Activate?" or "Deactivate?" via Ωπ keys <strong>and</strong> press [OK] toconfirm.This function requires a subscription to the "CLIP/CNIP service".2.4.6 “Black list” filterWhen this filter is active,the telephone will not ring for calls incoming from numbers stored in the"Black list". To activate or deactivate the filter,proceed as follows:➤ Enter the menu item '"Ring" as described previously➤ Select the "Black list" item via Ωπ keys,then press [OK] key toconfirm.User Manual MAESTRO <strong>2055</strong>13
English2 - CUSTOMISATION / PROGRAMMING➤ Choose "Activate?" or "Deactivate?" via Ωπ keys <strong>and</strong> press [OK] to confirm.This function requires a subscription to the "CLIP/CNIP service".2.5 Setting the “Fast call”The “Fast call” function allows to call all the numbers stored in the memories associated to (0 to 9) keysby holding pressed these keys for 3 seconds. The line is automatically engaged via H<strong>and</strong>s-free <strong>and</strong> thenumber is displayed <strong>and</strong> sent on to the line.To associate a number to a (0 to 9)key, proceed as follows:➤ Press [Menu] key to enter in the main menu .➤ Scroll the menu items via Ωπ keys to select "Settings" <strong>and</strong> press[OK] to confirm.➤ Press Ωπ keys to select "Fast call" <strong>and</strong> press [OK] key to confirm.➤ Press Ωπ key to select an empty memory ( 0 to 9) to be programmed.➤ Press [Assign.] keyto confirm➤ Enter the desired number,then press [OK] key to confirm➤ Press [∆] key to go back to idleTo associate a Phonebook number to a (0 to 9) key proceed as follows:➤ Repeat the above procedure to select an empty memory ( 0 to 9) to beprogrammed➤ Press [Assign.] key to access the "Main menu"➤ Press [Ph. Book] key <strong>and</strong> select a Phonebook name/number via Ωπkeys.14User manual MAESTRO <strong>2055</strong>
2 - CUSTOMISATION / PROGRAMMINGEnglish➤ Press [Options ] key <strong>and</strong> select "Use number".➤ Press 2 times [OK] key to confirm the choice➤ Press [∆] key to go back to idleThe "Fast call" options allow the user to check (Details), to modify (Edit) <strong>and</strong> to erase (Erase) a Fast callnumber. Proceed as follows:To check details:➤ Select the Fast call memory to be visualized by pressing Ωπ keys➤ Press the [Options] key➤ Select "Details" by pressing Ωπ keys <strong>and</strong> press [OK] to confirm. Thenumber is displayed.To modify:➤ Select the Fast call memory to be modified by pressing Ωπ keys.➤ Press the [Options] key➤ Select "Edit" by pressing Ωπ keys <strong>and</strong> press [OK] to confirm.The number is displayed.➤ Erase digits at left side of undersore by pressing [Erase] or ∂ keys➤ Enter new digits <strong>and</strong> press [OK] to confirm. It is possible to enter a numberfrom the Phonebook by erasing all the digits, pressing [Ph. Book] key,selecting a name via Ωπ keys, pressing [Options] key <strong>and</strong> thenselecting "Use number". Press [OK] key to confirm.To erase:➤ Select the Fast call memory to be erased by pressing Ωπ keys.➤ Press the [Options] key➤ Select "Erase" by pressing Ωπ keys <strong>and</strong> press 2 times [OK] key toconfirm.User Manual MAESTRO <strong>2055</strong>15
English2 - CUSTOMISATION / PROGRAMMING2.6 Setting “Direct call”The "Direct call" function allows to call a pre-defined stored number (26 digits max.) by picking up theh<strong>and</strong>set or by pressing the H<strong>and</strong>s-free key. The number will be sent onto the line after a few seconds.To program a "Direct call" number proceed as follows:➤ Press [Menu] key to enter in the main menu .➤ Scroll the menu items via Ωπ keys to select "Settings" <strong>and</strong> press[OK] to confirm.➤ Press Ωπ keys to select "Direct call" item.➤ Press [OK] key to confirm. Press Ωπ keys to select "Activate?"➤ Press [OK] key to confirm.Enter the desired number <strong>and</strong> press [OK] key toconfirm.➤ Press [∆] key to get back to idle.The "Direct call" number can be modified as follows:➤ Access the "Direct call"submenu as described <strong>and</strong> press "Activate" tovisualize the number.Erase the complete number or part of it by pressing[Erase] key.➤ Enter a new number or new digits <strong>and</strong> press [OK] to confirm. It is possibleto enter a number from the Phonebook by erasing all the digits, pressing[Ph. Book] key, selecting a name via Ωπ keys, pressing [Options]key <strong>and</strong> then selecting "Use number". Press [OK] key to confirm.2.7 Setting PABX prefixIt is possible to program a PABX prefix (4 digits max.) as follows:➤ Press [Menu] key to enter in the main menu .➤ Scroll the menu items via Ωπ keys to select "Settings" <strong>and</strong> press[OK] to confirm.➤ Press Ωπ keys to select "PABX prefix" <strong>and</strong> press [OK] key toconfirm.➤ If this memory is empty, enter the prefix (1 to 4 digits) <strong>and</strong> press [OK] keyto confirm.16User manual MAESTRO <strong>2055</strong>
2 - CUSTOMISATION / PROGRAMMINGEnglish2.8 Setting PABX pauseIt is possible to program a pause (1 to 4 sec) between the PABX prefix <strong>and</strong> the number to be called.Proceed as follows:➤ Press [Menu] key to enter in the main menu .➤ Scroll the menu items via Ωπ keys to select "Settings" <strong>and</strong> press[OK] to confirm.➤ Press Ωπ keys to select "PABX pause" <strong>and</strong> press [OK] key toconfirm.➤ Select the pause time ( 1 to 4 sec.) via Ωπ keys <strong>and</strong> press [OK] keyto confirm.2.9 Setting Flash timeIt is possible to program the Flash time as "Short" or "Long".Proceed as follows:➤ Press [Menu] key to enter in the main menu .➤ Scroll the menu items via Ωπ keys to select "Settings" <strong>and</strong> press[OK] to confirm.➤ Press Ωπ keys to select "Flash" <strong>and</strong> press [OK] key to confirm.➤ Select the Flash time (Short or Long) via Ωπ keys <strong>and</strong> press [OK] keyto confirm.2.10 Setting CLI on CWIt is possible to activate or deactivate "CLI on CW" function as follows:➤ Press [Menu] key to enter in the main menu .➤ Scroll the menu items via Ωπ keys to select "Settings" <strong>and</strong> press[OK] to confirm.➤ Press Ωπ keys to select "CLI on CW" <strong>and</strong> press [OK] key to confirm.➤ Select "Activate?" / "Deactivate?" via Ωπ keys <strong>and</strong> press [OK] key toconfirm.User Manual MAESTRO <strong>2055</strong>17
English2 - CUSTOMISATION / PROGRAMMING2.11 Setting the keypad lock PINProceed as follows:➤ Press [Menu] key to enter in the main menu .➤ Scroll the menu items via Ωπ keys to select "Settings" <strong>and</strong> press[OK] to confirm.➤ Press Ωπ keys to select "Lock PIN" <strong>and</strong> press [OK] key to confirm.➤ Enter 4 digits for Lock PIN <strong>and</strong> press [OK] key to confirm.N.B. If a lock PIN is already existing, the telephone will immediately ask forit.➤ Repeat the 4 entered digits of the Lock PIN <strong>and</strong> press [OK] key to confirm.To erase the Lock PIN proceed as follows:➤ Repeat the above mentioned procedure <strong>and</strong> insert a Lock PIN.➤ The telephone will ask for a new PIN code.➤ Press 2 times the [OK] key. The Lock PIN code is erased.2.12 Reset codeThe Reset code is a 4 digits number to set the telephone back to manufacturing configuration.Proceed as follows:➤ Press [Menu] key to enter in the main menu .➤ Scroll the menu items via Ωπ keys to select "Settings" <strong>and</strong> press[OK] to confirm.➤ Press Ωπ keys to select "Reset code" <strong>and</strong> press [OK] key to confirm.➤ Enter a 4 digits Code <strong>and</strong> press [OK] key to confirm.Reset Code1234 . . . . . . . to go back to manufacturing condition0710 . . . . . . . to go back without erasing Phonebook, Lists, Messages18User manual MAESTRO <strong>2055</strong>
3USE OF THE TELEPHONE3.1Connecting <strong>and</strong> disconnecting from the telephonenetworkIt is possible to obtain a line in two different ways:1) By picking up the h<strong>and</strong>set.2) By pressing the ∑ key (the display will show the g icon). In both cases,after 10 seconds, the display will shows the time elapsed since the line wasengaged.The release of the line is possible as follows:1) By hanging up the h<strong>and</strong>set2) By pressing the ∑ key again (the g icon will disappear from the display).The telephone will return to idle mode <strong>and</strong> the display will show the currenttime <strong>and</strong> date.3.2 H<strong>and</strong>s-free modeThe H<strong>and</strong>s free mode enables the telephone to be used without the h<strong>and</strong>set. In this case, it is possibleto hear via a loudspeaker located inside the telephone housing. To answer in H<strong>and</strong>s free mode, pressthe ∑ key when a call incomes. The display will shows the g icon <strong>and</strong> the elapsing time.3.3 Answering to an incoming callWhen a call incomes, the telephone start ringing following the programmed melody.➤ The writing “Call” is displayed on the top side of the display until the call isanswered.If the caller line identification servise is activated <strong>and</strong> available, thenumber of the caller is displayed after the 1st ring. If the calling number isstored in the Phonebook, the stored name is displayed.➤ Pick up the h<strong>and</strong>set or press the ∑ key.The display will show the timeelapsed since the line has been engaged (after 10 secs) <strong>and</strong> the menu"Ph. Book".➤ Release the line at the end of the conversation.User manuali MAESTRO <strong>2055</strong>19
English3 - USE OF THE TELEPHONE3.4 Making a call3.4.1 Normal callProceed as follows :➤ Pick up the h<strong>and</strong>set or press the ∑ key,then wait for dial tone. Thedisplay will show the menu keys “Redial” <strong>and</strong> “Ph. Book”.➤ Enter the number to be called. The display will show the time elapsed sincethe line has been engaged (after 10 secs) <strong>and</strong> the menu keys “Redial” <strong>and</strong>“Ph. Book”.➤ Replace the h<strong>and</strong>set or press the ∑ key at the end of the conversation.The display will show the time elapsed since the line has been engaged(after 10 secs) then it goes back to idle mode.3.4.2 Call with pre-selectionPre-selection allows the user to compose the number to be dialled out before to engage the line.➤ When in idle,enter the number to be called. Pauses may be entered via the∏ key. In the event of errors, erase (one by one)the digits at the left sideof the underscore by pressing the ∂or the [Erase] keys.➤ When the number has been entered, pick the h<strong>and</strong>set up (or press the∑ key). The number is sent. The display will show the communicationelapsed time (mm: ss).➤ Replace the h<strong>and</strong>set (or press the ∑ key) at the end of thecommunication. The display will show the communication elapsed time(mm: ss) then it goes back to idle mode.3.4.3 Calling a last number dialledThe last 30 called numbers are stored in the telephone memory. It is possible to call any of these numbersas follows:➤ Press ∏ key to access the last called numbers memory. The list of the lastcalled numbers is displayed.➤ Scroll the numbers of the list via Ωπ keys to select the name-numberto call.20User manual MAESTRO <strong>2055</strong>
3 - USE OF THE TELEPHONEEnglish➤ Engage the line via h<strong>and</strong>set (or by pressing the ∑ key). Theselected number is displayed <strong>and</strong> dialled out. The display will show thecommunication elapsed time (mm: ss).➤ Replace the h<strong>and</strong>set (or press the ∑ key) at the end of thecommunication. The display will show the communication elapsed time(mm: ss) then it goes back to idle mode.If the line has been engaged (via h<strong>and</strong>set or by pressing ∑ key), <strong>and</strong> if [Redial] is displayed, it ispossible to call one of the last dialled numbers as follows:➤ Press the [Redial] key.The list of the last dialled numbers will be displayed.➤ Select the name-number to be called via Ωπ keys➤ Press the [Call] key. The selected number will be immediately dialled outIf the line has been engaged (via h<strong>and</strong>set or by pressing ∑ key),it is possible to call the very lastcalled number as follows:➤ Press the ∏ key.3.5 The PhonebookThe <strong>Maestro</strong> <strong>2055</strong> has a phonebook of 250 name - number (max: 20 characters <strong>and</strong> 26 digits).It is possible to store up to 3 numbers per name.Options of the Phonebook menu:- Call To call a number of the Phonebook- Show numbers To see a number of the Phonebook- Insert new To store a name/number in the Phonebook- Edit numbers To modify a number of the Phonebook- Edit name To modify a name of the Phonebook- Ring melody To associate a melody to a number of the Phonebook- Ring filter To associate a type of filter to a number of the Phonebook (Normal/VIP/Black)- Erase To erase a number of the Phonebook- Show VIP list To access to the VIP list- Show black list To access to the Black list- Available memory To check the available memoryUser manual MAESTRO <strong>2055</strong>21
English3 - USE OF THE TELEPHONE3.5.1 Storing in the PhonebookProceed as follows:➤ Press the [Ph. Book] key to access the Phonebook. The last number storedor used is displayed.➤ Press the [Options] key <strong>and</strong> select the option “Insert new” via Ωπkeys.➤ Press [OK] key to confirm.➤ Enter the name of the number to be stored <strong>and</strong> confim via [OK] key. If theentered name is already used, a message will inform us about this.➤ Enter the number (errors may be corrected via [Erase] or ∂ keys).➤ Press the [Save] key.The number is stored.3.5.2 Show numbers of the PhonebookThe option "Show numbers" allows the user to display numbers associated to a name of the Phonebook.Proceed as follows:➤ Press the [Ph. Book] key to access the Phonebook. Select a name viaΩπ keys.➤ Press the [Options] key. Select the option "Show numbers" via Ωπkeys.➤ Press [OK] key to confirm. The name <strong>and</strong> its associated numbers (max 3)are displayed. Select one of the numbers via Ωπ keys.➤ Press the [Options] to access the following menu:CallDetailsCall showing nr.Call anonymousto make a call by pressing [OK] or ∑ keys or pickingthe h<strong>and</strong>set upto display the parameters of that numberto show the number in the event of incoming callto not show the number in the event of incoming call➤ Choose one of the 4 options <strong>and</strong> confirm via [OK] key.22User manual MAESTRO <strong>2055</strong>
3 - USE OF THE TELEPHONEEnglish3.5.3 Modify numbers of the PhonebookIn the "Edit numbers" sub-menu, it is possible to display <strong>and</strong> to personalize a Phonebook number.Proceed as follows:➤ Press the [Ph. Book] key. Select a name to be modified via Ωπ keys.➤ Press the [Options] key. Select "Edit numbers" via Ωπ key.➤ Press [OK] key to confirm. The name <strong>and</strong> its numbers (max. 3)are displayed.To modify the number :➤ Select one of the 3 numbers associated to that name <strong>and</strong> press [Options]key.➤ Select "Edit" via Ωπ keys <strong>and</strong> press [OK] to confirm.➤ Erase digits at left side of the cursor via [Erase] or ∂ keys, insert themodifications <strong>and</strong> then press [Save].Setting as “Main number”:➤ Select one of the 3 numbers associated to that name <strong>and</strong> press [Options]key.➤ Select "Main number" via Ωπ keys <strong>and</strong> press [OK] to confirm. (Thesymbol is displayed at its left side).Note: this number will be placed at 1st position when making a call.To set the type (icon) of number :➤ Select one of the 3 numbers associated to that name <strong>and</strong> press [Options]key.➤ Select "Type" via Ωπ keys <strong>and</strong> press [OK] to confirm. .User manual MAESTRO <strong>2055</strong>23
English3 - USE OF THE TELEPHONE➤ Choose one of the 4 types (Generic, Mobile, Home, Office)<strong>and</strong> press 2 times the [OK] key to confirm the choice.To set the type of call (External / PABX):➤ Select one of the 3 numbers associated to that name <strong>and</strong> press [Options]key.➤ Select "External/PABX" via Ωπ keys <strong>and</strong> press [OK] to confirm.➤ Press the [Intern.] key to change to internal or press [∆] key to notchange.To program a SMS Box number (see "Use of SMS service”):➤ Select one of the 3 numbers associated to that name <strong>and</strong> press [Options]key.➤ Select "SMS Box number" via Ωπ keys <strong>and</strong> press [OK] to confirm.➤ Select a number from 0 to 9 via Ωπ keys <strong>and</strong> press [OK] key toconfirm.To associate a number to a “Fast call” memory :➤ Select one of the 3 numbers associated to that name <strong>and</strong> press [Options]key.➤ Select "Fast call" via Ωπ keys <strong>and</strong> press [OK] to confirm.➤ Select a Fast call memory key (a number from 0 to 9) via Ωπ keys <strong>and</strong>press the [Assign] key to confirm.24User manual MAESTRO <strong>2055</strong>
3 - USE OF THE TELEPHONEEnglish3.5.4 Modify names of the PhonebookIn the "Edit name" sub-menu, it is possible to display <strong>and</strong> to modify the name of anumber of the Phonebook. Proceed as follows:➤ Press the [Ph. Book] key.➤ Select a name to be modified via Ωπ keys.➤ Press the [Options] key.➤ Select "Edit name" via Ωπ keys.➤ Press [OK] key to confirm. The name is displayed.➤ Erase (modify) the name by pressing the [Erase] or ∂keys. Enter thenew name (part of it) <strong>and</strong> press the [Save] to confirm the changes.3.5.5 Modify a Ring melody associated to a name of the PhonebookIn the "Ring melody" sub-menu, it is possible to display <strong>and</strong> to modify the melody associated to aname of the Phonebook. Proceed as follows:➤ Press the [Ph. Book] key.➤ Select a name, with the melody to be modified, via Ωπ keys.➤ Press the [Options] key.➤ Select "Ring melody" via Ωπ keys.➤ Press [OK] key to confirm.➤ Press the Ωπ keys to select the new number of melody (from 0 to 15),with 0 corresponding to the default melody .➤ Press [OK] key to confirm.User manual MAESTRO <strong>2055</strong>25
English3 - USE OF THE TELEPHONE3.5.6 Ring filterIt is possible to add a Phonebook number to the VIP list or to the Black list: by default, a number is notlinked to a list (Normal). Proceed as follows:➤ Press the [Ph. Book] key.➤ Press the Ωπ keys to select the name to be added to the VIP or Blacklist.➤ Press the [Options] key.➤ Select "Ring filter" via Ωπ keys.➤ Press [OK] key to confirm.➤ Select "No filter" or "VIP Ring" or "No ring" via Ωπ keys.➤ Press [OK] key to confirm.This function can operate on the Ring if "Ring VIP only" or "Black list" have been activated inthe Settings menu (Ring sub-menu).If no filter has been activated, the telephone will ring for any incoming call. If "Ring VIP only" has beenactivated, the telephone rings for calls incoming from numbers of the VIP list. If "Black list"has beenactivated, the telephone will not ring for calls incoming from numbers of the Black list.3.5.7 Erase a name of the PhonebookTo erase a name (<strong>and</strong> the associated numbers) of the Phonebook, proceed as follows :➤ Press the [Ph. Book] key.➤ Select the name (to be removed) via Ωπ keys.➤ Press the [Options] key.➤ Select "Erase" via Ωπ keys <strong>and</strong> press [OK] to confirm.➤ Press [OK] key to confirm. The name <strong>and</strong> its numbers are removed.26User manual MAESTRO <strong>2055</strong>
3 - USE OF THE TELEPHONEEnglish3.5.8 VIP listThe VIP list is a list of names-numbers stored in the VIP memory. To add or to erase an element of thislist proceed as follows:➤ Press the [Ph. Book] key.➤ Press the [Options] key.➤ Select “Show VIP list” via Ωπ keys.➤ Press [OK] key to confirm.If the VIP list is empty:➤ Press the [Add] key, choose a name-number of the Phonebook to beadded via the Ωπ keys, then press [OK] to confirm.If the VIP list is not empty:➤ The names in the list are displayed.➤ Press the [Options] key.➤ Press the Ωπ keys to select "Add" or "Remove".➤ If "Remove" has been selected, press 2 times the [OK] key to confirm thechoosen number of the "VIP list"has been removed.➤ If “Add" has been selected, press the [OK] key to confirm, choose a namenumberof the Phonebook to be added via the Ωπ keys, then press[OK] to confirm.3.5.9 Black listThe Black list is a list of names-numbers stored in the Black memory. To add or to erase an element ofthis list proceed as follows:➤ Press the [Ph. Book] key.➤ Press the [Options] key.➤ Select “Show black list” via Ωπ keys.➤ Press [OK] key to confirm.User manual MAESTRO <strong>2055</strong>27
English3 - USE OF THE TELEPHONEIf the Black list is empty:➤ Press the [Add] key, choose a name-number of the Phonebook to beadded via the Ωπ keys, then press [OK] to confirm.If the Black list is not empty:➤ The names in the list are displayed.➤ Press the [Options] key.➤ Press the Ωπ keys to select "Add" or "Remove".➤ If "Remove" has been selected, press 2 times the [OK] key to confirm thechoosen number of the "VIP list"has been removed.➤ If “Add" has been selected, press the [OK] key to confirm, choose a namenumberof the Phonebook to be added via the Ωπ keys, then press[OK] to confirm.3.5.10 Free memoryTo check the amount of the Phonebook available memory, proceed as follows :➤ Press the [Ph. Book] key.➤ Press the [Options] key.➤ Press the Ωπ keys to select "Available memory".➤ Press [OK] key to confirm. The % of the free memory <strong>and</strong> the numbers ofthe stored elements will be displayed.3.5.11 Storing a number of the CLI list in the PhonebookThe numbers of the callers, stored in the CLI list, may be stored in the Phonebook as follows:➤ Press the [Menu] key.➤ Press the Ωπ keys to select "Call list".➤ Press [OK] key to confirm.➤ Press the Ωπ keys to select "Received".28User manual MAESTRO <strong>2055</strong>
3 - USE OF THE TELEPHONEEnglish➤ Press [OK] key to confirm. The list of the callers is displayed.➤ Scroll the list via Ωπ keys <strong>and</strong> select a name-number.➤ Press the [Options] key.➤ Press the Ωπ keys to select "Save".➤ Press [OK] key to confirm.➤ Enter the name (press [Erase] or ∂keys to erase).➤ Press [OK] key to confirm.3.5.12 Storing a number of the LN dialled list in the PhonebookOne of the last dialled numbers can be stored in the Phonebook as follows:➤ Access the list of "Placed" calls in the sub-menu "Call list" by pressing the∏ key .or :➤ Press the [Menu] key.➤ Press the Ωπ keys to select "Call list".➤ Press [OK] key to confirm.➤ Press the Ωπ keys to select "Placed".➤ Press [OK] key to confirm. The list of the last dialled numbers is displayed.➤ Press Ωπ keys to select the last dialled number to be stored in thePhonebook.➤ Press the [Options] key.➤ Press Ωπ keys to select "Save".➤ Press [OK] key to confirm.➤ Enter the name (press [Erase] or ∂ keys to erase).➤ Press [OK] key to confirm.User manual MAESTRO <strong>2055</strong>29
English3 - USE OF THE TELEPHONE3.6 Dialling numbers of the Phonebook / VIP / Fast callProceed as follows:➤ Press the [Ph. Book] key.➤ Select a name-number to be called via Ωπ keys.➤ Pick the h<strong>and</strong>set up or press the ∑ key to engage the line.The numberwill be displayed <strong>and</strong> then dialled out.Or:➤ Press the [ O p t i o n s ] key then select the option "Call".The number will be displayed <strong>and</strong> then dialled out.To dial "VIP list" numbers :➤ Press the [Ph. Book] key.➤ Press the [Options] key, then select "Show VIP list" via the Ωπ keys<strong>and</strong> press the [OK] key to confirm.➤ Select the name-number to be dialled out via the Ωπ keys.➤ Pick the h<strong>and</strong>set up or press the ∑ key to engage the line.The numberwill be displayed <strong>and</strong> then dialled out.To dial “Fast call” numbers:➤ Once the telephone is in idle mode, press <strong>and</strong> hold pressed for a seconda key (from 0 to 9) associated to the Fast call number to be dialled. Thenumber will be displayed <strong>and</strong> then dialled out.30User manual MAESTRO <strong>2055</strong>
3 - USE OF THE TELEPHONEEnglish3.7 Caller identificationThe <strong>Maestro</strong> <strong>2055</strong> offer the CLIP <strong>and</strong> CNIP services ( provided by <strong>Belgacom</strong> under subscription).➤ When a call incomes, the h<strong>and</strong>set icon (d) is displayed if the call has notanswered.The name-number of the caller is automatically stored at 1st placeof the “Received” list (Call list submenu).➤ This icon disappears after the user accesses the list by pressing the[Show] key <strong>and</strong> if all the new unanswered calls have been read byusing Ωπ keys.To display the names-numbers of the list,proceed as follows::➤ Press the [Menu] key.➤ Press the Ωπ keys to select "Call list". Press [OK] key to confirm.➤ Press the Ωπ keys to select "Received".Press [OK] key to confirm.➤ The list of the "Received" calls is displayed. The names-numbers of thereceived unansvered calls are indicated by the symbol . Select a namenumbervia Ωπ keys. Press the [Options] key.A list of 7 options is displayed:“Call”, “Details”, “Save”, “Erase”, “Send SMS”, “Call showing nr.”, “Call anonymous”.- select “Call” via Ωπ keys <strong>and</strong> confirm via [OK] to call the choosennumber.- select “Details” via Ωπ keys <strong>and</strong> confirm via [OK] to see Name -number - hour - date.- select “Save” via Ωπ keys <strong>and</strong> confirm via [OK] to save the number inthe Phonebook.- select “Erase” via Ωπ keys <strong>and</strong> confirm via [OK] to erase the number.- select “Send SMS” via Ωπ keys <strong>and</strong> confirm via [OK] to use thenumber as SMS destination number (see SMS: chapter 6).- select “Call showing nr.” via Ωπ keys <strong>and</strong> confirm via [OK] to callautomatically your partner showing him your number.- select “Call anonymous” via Ωπ keys <strong>and</strong> confirm via [OK] to callautomatically your partner showing him your number.User manual MAESTRO <strong>2055</strong>31
English3 - USE OF THE TELEPHONE3.7.1 Call a number of the "Received" call listProceed as follows:➤ Visualize the "Received" calls in the "Call list" as described before (3.7).➤ Select the number to be called via Ωπ keys.➤ Pick the h<strong>and</strong>set up or press the ∑ key to engage the line.The numberwill be displayed <strong>and</strong> then dialled out.Or:➤ Press the [Options] key,select "Call" via Ωπ keys <strong>and</strong> confirm via[OK] key. The line is engaged in H<strong>and</strong>s-free mode <strong>and</strong> the choosennumber will be displayed <strong>and</strong> then dialled out..3.7.2 Erase numbers of the "Received" call listProceed as follows:➤ Visualize the "Received" calls in the "Call list" as described before (3.7).➤ Select the number to beerased via Ωπ keys.➤ Press the [Options] key.➤ Select the option "Erase" via Ωπ. Press [OK] to confirm.➤ Press [OK] to erase.To erase all the numbers in the list proceed as follows:➤ Press [Menu] key.➤ Select "Call list" via Ωπ keys. Press [OK] to confirm.➤ Select "Erase all" via Ωπ keys. Press [OK] to confirm.➤ Select "Received" via Ωπ keys. Press [OK] to confirm.➤ Press [OK] to erase the "Received" call list.32User manual MAESTRO <strong>2055</strong>
3 - USE OF THE TELEPHONEEnglish3.8 2nd Call h<strong>and</strong>lingWhen in conversation an acoustic signal will be heard in the event a 2nd call incomes. The 2nd incomingcall number is displayed, if the service is available <strong>and</strong> if the telephone is set properly. To answerto to this 2nd call without releasing the current conversation:➤ Press ≥ key to put the 1st call on hold <strong>and</strong> to answer to the 2 nd call.➤ Press ≥ key to switch between the 2 parters.➤ Press ≈ followed by "3" (or press <strong>and</strong> hold pressed a few seconds the≥ key) to pass to conferene mode with the other partners➤ Press ≈ followed by "1" to end the current conversation <strong>and</strong> to carry onthe other one.➤ To end the other conversation too, release the line.Note: When a 2nd call incomes, the user may press the [Options] key to use a list of optionsthat can semplify the automatic h<strong>and</strong>ling of this function (see chapter 5.2).3.9 Mute the Microphone➤ When in conversation, the user can deactivate the microphone bypressing the ∂key. The display will show “Microphone off”. To makethe microphone working, press the ∂ key again. “Microphone off” willdisappear.User manual MAESTRO <strong>2055</strong>33
English3 - USE OF THE TELEPHONE3.10 Loudspeaker volume adjustingWhen in conversation, the user can modify the LSP receiving volume level.H<strong>and</strong>s.free mode (from 1 to 4 levels):➤ Press the Ω key to set the LSP volume up (maximum = 04). Press the π keyto set the volume down (minimum = 01).3.11 Group listening modeWhen in h<strong>and</strong>set mode, the user can press ∑ key to activate the loudspeaker , allowing the peopleclose to the telephone to listen to the conversation .The user can then go back to h<strong>and</strong>set mode bypressing again ∑ key or switching to h<strong>and</strong>s-free mode by pressing <strong>and</strong> holding pressed the ∑key, replacing the h<strong>and</strong>set down<strong>and</strong> then releasing the ∑ key.3.12 Keyboard lock➤ Press the [Menu] key.➤ Press the Ωπ keys to select "Keyboard lock".Press [OK] key toconfirm. The keyboard is immediately locked.➤ To unlock the keyboard, press the [Unlock] key <strong>and</strong> quickly the [OK]key. The keyboard is immediately unlocked. If a keyboard lock PIN has beenprogrammed, the telephone will ask for it.3.13 Reminders (alarms)The user may choose between 6 types of reminders:- Single it beeps once at the programmed time.- Yearly it beeps each year at the programmed time.- Monthly it beeps each month at the programmed time.- Weekly it beeps each week at the programmed time.- Daily it beeps each day at the programmed time.- Hourly it beeps at time intervals equal to programmed numbers of hours.34User manual MAESTRO <strong>2055</strong>
3 - USE OF THE TELEPHONEEnglishTo program a reminder, proceed as follows:➤ Press the [Menu] key.➤ Select "Reminders" via Ωπ keys <strong>and</strong> press [OK] key to confirm.➤ Select "New" via Ωπ keys <strong>and</strong> press [OK] key to confirm.➤ Select a reminder via Ωπ keys <strong>and</strong> press [OK] key to confirm.➤ Enter the reminder activation time <strong>and</strong> press [OK] key to confirm.The data to be entered have they own data fields. Press the Ωπ keys to pass from afield to another one.Reminder - Single :Enter Day, Month, Year, Hours, Minutes as dd-mm-yy hh:mm.Reminder - Yearly :Enter Day, Month, Hours, Minutes as dd-mm hh:mm.Reminder - Monthly :Enter Day, Hours, Minutes as dd hh:mm.Reminder - Weekly :Enter Day, Hours, Minutes as ddd hh:mm.Enter the day by selecting ddd field <strong>and</strong> entering a digit from 1 to 7.(1=Sun 2=Mon, 3=Tue, 4=Wed, 5=Thu, 6=Fri, 7=Sat).Reminder - Daily :Enter Hours, Minutes as hh:mm.User manual MAESTRO <strong>2055</strong>35
English3 - USE OF THE TELEPHONEReminder - Hourly:Enter hourly interval, Hours, Minutes as ff hh:mm.The entered numeric data must be in the following ranges:dd > 01-31 (depending on the month)mm > 01-12yy > 05 ,06, ...etchh > 00-23mm > 00-59ff > 1-23For all the cases:➤ If the entered data are wrong, a message error will be displayed.➤ Press [OK] key to confirm the entered data. Write a note to be displayed atthat reminder time .➤ The user may write the note <strong>and</strong> press [OK] key to confirm. The reminderis automatically activated. The Reminders list will be displayed <strong>and</strong> theReminders activated will have a melody icon ≠ on their left side.➤ When in idle mode, if a reminder has been activated,the icon .is displayed.To see the Reminders list <strong>and</strong> all their associated notes:➤ Press the [Menu] key.➤ Select "Reminders" via Ωπ keys <strong>and</strong> press [OK] key to confirm.➤ Select "List" via Ωπ keys <strong>and</strong> press [OK] key to display the Reminderslist.➤ Select a Reminder of the list via Ωπ key <strong>and</strong> press [Show] key todisplay the associated note.To Deactivate /Activate a Reminder:➤ Press the [Menu] key.➤ Select "Reminders" via Ωπ keys <strong>and</strong> press [OK] key to confirm.➤ Select "List" via Ωπ keys <strong>and</strong> press [OK] key to display the Reminderslist.➤ Select the Reminder to be deactivated / activated via the Ωπ keys <strong>and</strong>press the [Show] key. The note is displayed.36User manual MAESTRO <strong>2055</strong>
3 - USE OF THE TELEPHONEEnglish➤ Press the [Options] keys, select "Deactivation"/ "Activation" via Ωπkeys <strong>and</strong> press [OK] key to confirm. That Reminder is deactivated /activated <strong>and</strong> the icon ≠ is not displayed / displayed.To modify or to erase a Reminder.1) To modify the time of a Reminder,proceed as follows:➤ Select "Edit date" via Ωπ keys <strong>and</strong> press [OK] key to confirm.➤ Enter the new date <strong>and</strong> press [OK]key to confirm.2) To modify the note of a Reminder,proceed as follows:➤ Select "Edit text" via Ωπ keys <strong>and</strong> press [OK] key to confirm.➤ Erase the text via [Erase] or ∂keys, enter the new text via thealphanumeric keys <strong>and</strong> press [OK] key to confirm.3) To erase a selected Reminder,select "Erase" via Ωπ keys <strong>and</strong> press 2times the [OK] .To erase all the Reminders.To erase all the Reminders list,proceed as follows:➤ Press the [Menu] key.➤ Select "Reminders" via Ωπ keys <strong>and</strong> press [OK] key to confirm.➤ Select "Erase all" via Ωπ keys <strong>and</strong> press 2 times the [OK] key.All the Reminders are erased.At the programmed time of a Reminder, the telephone beeps <strong>and</strong> the associated note is displayed.Any action of the user on the telephone, will stop the alerting signal. If no action will be done, thetelephone will beep for 1 minute, then the icon will be displayed.When the alert signal beeps, it is possible to press [Répéter] to repeat the Reminder5 minutes later.User manual MAESTRO <strong>2055</strong>37
English3 - USE OF THE TELEPHONE3.14 Phone infoThe sub-menu “Phone info" allows to display the following infos: "SMS Subaddresses", "Ring settings","Direct call", "SW release". Proceed as follows:➤ Press the [Menu] key.➤ Select "Phone info" via Ωπ keys <strong>and</strong> press [OK] key to confirm.➤ Select "SMS Subaddresses" via Ωπ keys <strong>and</strong> press [OK] key toconfirm. The Boxes <strong>and</strong> their subaddresses are displayed.➤ Press [∆] key to go back.➤ Select "Ring settings" via Ωπ keys <strong>and</strong> press [OK] key to confirm. Theringer settings will be displayed.➤ Press [∆] key to go back.➤ Select "Direct call" via Ωπ keys <strong>and</strong> press [OK] key to confirm. Thedirect number <strong>and</strong> its activated / deactivated setting will be displayed.➤ Press [∆] key to go back.➤ Select "SW release" via Ωπ keys <strong>and</strong> press [OK] key to confirm. TheSW version with its date an time of generation will be displayed.38User manual MAESTRO <strong>2055</strong>
4NETWORK SERVICES4. Use of Network servicesThe telephone provides a Network services menu to use in easy mode services as the Call forwarding,the Fixed destination call, the h<strong>and</strong>ling of the Call Waiting <strong>and</strong> the Ring back (CCBS). A few servicesmay be not available on the telephone line; please contact <strong>Belgacom</strong> to ask for more infos.4.1 Call forwardingThe service allows the user to forward an incoming call to another telephone number. 3 types offorwarding are offered by <strong>Belgacom</strong> :➤ Call forwarding unconditional (CFU)➤ Call forwarding if no reply (CFNR)➤ Call forwarding if busy (CFB)4.1.1 Call forwarding unconditionalAll the incoming calls are forwarded to another telephone number. To activate the service, proceed asfollows:➤ Press the [Menu] key.➤ Select "Network services" via Ωπ keys <strong>and</strong> press [OK] key to confirm.➤ Select "Call forwarding" via Ωπ keys <strong>and</strong> press [OK] key to confirm.➤ Select "All calls" via Ωπ keys <strong>and</strong> press [OK] key to confirm.➤ Select "Activation" via Ωπ keys <strong>and</strong> press [OK] key to confirm.➤ Enter the number the incoming calla will be forwarded to.User manual MAESTRO <strong>2055</strong>39
English4 - NETWORK SERVICES➤ Press [OK] to confirm. The activation code followed by the entered numberare displayed, the line is engaged in H<strong>and</strong>s-free mode <strong>and</strong> the displayedsequence is dialled out.➤ Press the ∑ key to go back to idle.To deactivate the service, proceed as follows:➤ Press the [Menu] key.➤ Select "Network services" via Ωπ keys <strong>and</strong> press [OK] key to confirm.➤ Select "Call forwarding" via Ωπ keys <strong>and</strong> press [OK] key to confirm.➤ Select "All calls" via Ωπ keys <strong>and</strong> press [OK] key to confirm.➤ Select "Deactivation" via Ωπ keys <strong>and</strong> press [OK] key to confirm.The deactivation code is displayed,the line is engaged in H<strong>and</strong>s-free mode<strong>and</strong> the displayed sequence is dialled out.➤ Press the ∑ key to go back to idle.4.1.2 Call forwarding if not reply.The incoming calls,if not answered,are forwarded to another telephone number. To activate theservice,proceed as follows:➤ Press the [Menu] key.➤ Select "Network services" via Ωπ keys <strong>and</strong> press [OK] key to confirm.➤ Select "Call forwarding" via Ωπ keys <strong>and</strong> press [OK] key to confirm.➤ Select "If not answered" via Ωπ keys <strong>and</strong> press [OK] key to confirm.➤ Select "Activation" via Ωπ keys <strong>and</strong> press [OK] key to confirm.➤ Enter the number the incoming call will be forwarded to.➤ Press [OK] to confirm. The activation code followed by the entered numberare displayed, the line is engaged in H<strong>and</strong>s-free mode <strong>and</strong> the displayedsequence is dialled out.➤ Press the ∑ key to go back to idle.40User manual MAESTRO <strong>2055</strong>
4 - NETWORK SERVICESEnglishTo deactivate the service, proceed as follows:➤ Press the [Menu] key.➤ Select "Network services" via Ωπ keys <strong>and</strong> press [OK] key to confirm.➤ Select "Call forwarding" via Ωπ keys <strong>and</strong> press [OK] key to confirm.➤ Select "If not answered" via Ωπ keys <strong>and</strong> press [OK] key to confirm.➤ Select "Deactivation" via Ωπ keys <strong>and</strong> press [OK] key to confirm.The deactivation code is displayed,the line is engaged in H<strong>and</strong>s-free mode<strong>and</strong> the displayed sequence is dialled out.➤ Press the ∑ key to go back to idle.4.1.3 Call forwarding when busyIf your telephone is busy <strong>and</strong> the CW service has not been activated, all the incoming calls will beforwarded to another telephone number.To activate the service, proceed as follows:➤ Press the [Menu] key.➤ Select "Network services" via Ωπ keys <strong>and</strong> press [OK] key to confirm.➤ Select "Call forwarding" via Ωπ keys <strong>and</strong> press [OK] key to confirm.➤ Select "When busy" via Ωπ keys <strong>and</strong> press [OK] key to confirm.➤ Select "Activation" via Ωπ keys <strong>and</strong> press [OK] key to confirm.➤ Enter the number the incoming call will be forwarded to.➤ Press [OK] to confirm. The activation code followed by the entered numberare displayed, the line is engaged in H<strong>and</strong>s-free mode <strong>and</strong> the displayedsequence is dialled out.➤ Press the ∑ key to go back to idle.User manual MAESTRO <strong>2055</strong>41
English4 - NETWORK SERVICESTo deactivate the service, proceed as follows:➤ Press the [Menu] key.➤ Select "Network services" via Ωπ keys <strong>and</strong> press [OK] key to confirm.➤ Select "Call forwarding" via Ωπ keys <strong>and</strong> press [OK] key to confirm.➤ Select "When busy" via Ωπ keys <strong>and</strong> press [OK] key to confirm.➤ Select "Deactivation" via Ωπ keys <strong>and</strong> press [OK] key to confirm.The deactivation code is displayed,the line is engaged in H<strong>and</strong>s-free mode<strong>and</strong> the displayed sequence is dialled out.➤ Press the ∑ key to go back to idle.4.2 Fixed destination callThe service allows to call a pre-defined number after a few seconds the line has been engaged viah<strong>and</strong>set or by pressing the ∑ key. To activate the service, proceed as follows:➤ Press the [Menu] key.➤ Select "Network services" via Ωπ keys <strong>and</strong> press [OK] key to confirm.➤ Select "Fixed dest. call" via Ωπ keys <strong>and</strong> press [OK] key to confirm.➤ Select "Activation" via Ωπ keys <strong>and</strong> press [OK] key to confirm.➤ Enter the Fixed destination number.➤ Press [OK] to confirm. The activation code followed by the entered numberare displayed, the line is engaged in H<strong>and</strong>s-free mode <strong>and</strong> the displayedsequence is dialled out.The service is activated.➤ Press the ∑ key to go back to idle.42User manual MAESTRO <strong>2055</strong>
4 - NETWORK SERVICESEnglishTo deactivate the service, proceed as follows:➤ Press the [Menu] key.➤ Select "Network services" via Ωπ keys <strong>and</strong> press [OK] key to confirm.➤ Select "Fixed dest. call" via Ωπ keys <strong>and</strong> press [OK] key to confirm.➤ Select "Deactivation" via Ωπ keys <strong>and</strong> press [OK] key to confirm.The deactivation code is displayed,the line is engaged in H<strong>and</strong>s-free mode<strong>and</strong> the displayed sequence is dialled out.➤ Press the ∑ key to go back to idle.4.3 Call waiting (2nd call)When in conversation mode, if a 2nd call incomes, an acoustic signal is heard (at the earpiece inHanset mode or at the loudspeaker in H<strong>and</strong>s-free mode). The calling number is displayed, if the Callername-number identification <strong>and</strong> presentation service is available <strong>and</strong> if the function is properly activatedin the telephone. The user can then:➤ Press the ≥ key to switch to the 2nd partner <strong>and</strong> to put the 1stconversation on hold.➤ Press the ≥ key to switch between the two partners➤ Press R <strong>and</strong> 1 keys to end the on going conversation <strong>and</strong> to continue theconversation with the other partner.➤ Release the line to end this conversation too.To activate the CW service, proceed as follows:➤ Press the [Menu] key.➤ Select "Network services" via Ωπ keys <strong>and</strong> press [OK] key to confirm.➤ Select "Call waiting" via Ωπ keys <strong>and</strong> press [OK] key to confirm.➤ Select "Activation" via Ωπ keys <strong>and</strong> press [OK] key to confirm.The activation code is displayed, the line is engaged in H<strong>and</strong>s-free mode<strong>and</strong> the displayed sequence is dialled out.The service is activated.User manual MAESTRO <strong>2055</strong>43
English4 - NETWORK SERVICES➤ Press the ∑ key to go back to idle.To deactivate the service, proceed as follows:➤ Press the [Menu] key.➤ Select "Network services" via Ωπ keys <strong>and</strong> press [OK] key to confirm.➤ Select "Call waiting" via Ωπ keys <strong>and</strong> press [OK] key to confirm.➤ Select "Deactivation" via Ωπ keys <strong>and</strong> press [OK] key to confirm.The deactivation code is displayed,the line is engaged in H<strong>and</strong>s-free mode<strong>and</strong> the displayed sequence is dialled out.➤ Press the ∑ key to go back to idle.4.4 Ring backThe service allow to ask for an automatic call to a called number found busy,when the line will returnto be free.To activate the service:➤ Press the ≈ <strong>and</strong> 5 keys,then release the line.To deactivate the service :➤ When in idle,press the [Menu] key.➤ Select "Network services" via Ωπ keys <strong>and</strong> press [OK] key to confirm.➤ Select "Deact. ring back" via Ωπ keys <strong>and</strong> press [OK] key to confirm.The deactivation code is displayed,the line is engaged in H<strong>and</strong>s-free mode<strong>and</strong> the displayed sequence is dialled out.➤ Press the ∑ key to go back to idle.44User manual MAESTRO <strong>2055</strong>
4 - NETWORK SERVICESEnglish4.5 PhoneMail <strong>and</strong> ServicesThe telephone allows to access easily <strong>and</strong> quikly to the following list :Service No ServicePhoneMail 12301920 19201930 19301940 19401950 19501919 1919100 100101 101112 112Service No ServiceEcoute Enfants 103Croix rouge 105Rode kruis 105Tele-onthaal 106Télé-accueil 107Telefonhilfe 108Child Focus 110Antipoison 070245245Antigift Centrum 070245245Service No ServiceMétéo 090027003Weerbericht 0900270021207 12071307 13071407 1407Horloge 1300Tijdmelding 1200Zeitansage 1400The ≤ key can operate with or without supply. If supplied,the key can operate in both, idle or lineengaged modes.When in idle :➤ Press the ≤ key <strong>and</strong> select the desired service via Ωπ keys.➤ Press the [Options] key to confirm.➤ Select the option “Call” <strong>and</strong> press [OK] key to confirm.➤ The line will be engaged in H<strong>and</strong>s-free mode <strong>and</strong> the code of the selectedservice is dialled out.If the telephone has no supply:➤ Engage the line via h<strong>and</strong>set➤ Press the ≤ key <strong>and</strong> scroll the list via Ωπ keys to select the desiredservice.➤ Press the [Options] key to confirm.➤ Select the option “Call” <strong>and</strong> press the [OK] key to confirm.➤ The number of the selected service is dialled out.User manual MAESTRO <strong>2055</strong>45
English4 - NETWORK SERVICESThe following Options are available :Callto call the service numberDetailsto show the service numberEdit name to change the service name.Erase via "Erase" or ∂keys..Insert the new name.Edit number to change the service number.Erase via "Erase" or ∂keys.Insert the new number.Eraseto remove the service.To check the PhoneMailWhen in idle mode,if a new message is in thePhoneMail, the display will showthe icon b <strong>and</strong> the number of messages to be checked.Check the Phonemail (in both cases : idle or line engaged)as described before.After all the messages have been heard, when in idle the icon <strong>and</strong> the informationswill disappear.46User manual MAESTRO <strong>2055</strong>
5ADDITIONAL OPTIONS5 Additional OptionsThe telephone provides additional options to make easier a few operations.5.1 Options available in idle modeWhen in idle, if a choosen number is displayed, the user can press the [Options] key. The optionswill be displayed as follows:- Save- Pause- Call showing nr- Call anonimous5.1.1 Save a displayed numberThis option allows the user to store in the Phonebook a displayed number. Proceed as follows:➤ Display a number.➤ Press the [Options] keys.➤ Select "Save" via Ωπ keys➤ Press [OK] key to confirm.➤ Enter the name➤ Press [OK] key to confirm. The name-number is stored in the Phonebook.User manual MAESTRO <strong>2055</strong>47
English5 - ADDITIONAL OPTIONS5.1.2 Introducing a pauseThis option allows the user to insert a pause when editing a number . Proceed as follows :➤ Edit a number.➤ Press the [Options] key.➤ Select "Pause" via Ωπ keys.➤ Press [OK] key to confirm. The number followed by the pause will bedisplayed .5.1.3 Make a call as visibileThis option allows the user to insert a code before the called number, to be identified by the calledpartner.Proceed as follows:➤ Enter a number.➤ Press the [Options] key.➤ Select "Call showing nr " via Ωπ keys.➤ Press [OK] to confirm. The line is engaged in H<strong>and</strong>s-free mode <strong>and</strong> thecode #31* followed by the number is displayed <strong>and</strong> dialled out.5.1.4 Make a call as anonymousThis option allows the user to insert a restriction code to mask the number to the called user. Proceedas follows:➤ Enter a number.➤ Press the [Options] key.➤ Select "Call anonymous " via Ωπ keys.➤ Press [OK] to confirm. The line is engaged in H<strong>and</strong>s-free mode <strong>and</strong> thecode *31* followed by the number is displayed <strong>and</strong> dialled out.48User manuali MAESTRO <strong>2055</strong>
5 - ADDITIONAL OPTIONSEnglish5.2 Options in conversation modeWhen in conversation, by pressing the [Options] key, the following options will be available:- Act. call-back- Start 2nd call- Accept 2nd call- Alternate- Conference call- Call transfer- Reject 2nd call- Terminate call5.2.1 Activate call-backThis option allows to call automatically the number of an user called <strong>and</strong> found busy, when the linebecomes free.To activate the service press ≈ <strong>and</strong> 5 keys,then release the line or:➤ Press the [Options] key, select "Act. call-back" via Ωπ keys <strong>and</strong> press[OK] key to confirm.This operation sends the code R5 onto the line.5.2.2 Start 2nd callWhen in conversation mode, the user can:➤ Press the [Options] key, select "Start 2nd call" viaΩπ keys <strong>and</strong>press[OK] to confirm. The R code is sent onto the line <strong>and</strong> it is possible tomake a new call.5.2.3 Accept 2nd callWhen in conversation mode,if a 2nd call incomes,the user can:➤ press the ≥ key➤ or press the [Options] key, select "Accept 2nd call" via Ωπ keys,pressthe [OK] key to confirm <strong>and</strong> to connect the second partner <strong>and</strong> puttingthe first one on hold.5.2.4 AlternateWhen the user is in conversation with one of two partners,it can:➤ press the ≥ key➤ or press the [Options] key, select "Alternate" via Ωπ keys,press the[OK] key to confirm <strong>and</strong> to switch from one to the other parner.User manual MAESTRO <strong>2055</strong>49
English5 - ADDITIONAL OPTIONS5.2.5 Conference callWhen in conversation, the user can activate a 3 party conference as follows:➤ Press the ≈ key followed by the a 2nd party telephone number.➤ Talk with the called party➤ Activate the conference by presing [Options] key ,select "Conference call"via Ωπ keys <strong>and</strong> press [OK] key to confirm (or press <strong>and</strong> hold pressedfor a few seconds the ≥ key). This operation sends the R3 code onto theline <strong>and</strong> starts the 3 party conference.5.2.6 Call transferWhen t in conversation with two partners, one of the two on hold, the user can put the 2 inconnection <strong>and</strong> leave the conversation as follow:➤ Activate the Call transfer by pressing [Options], select "Call transfer" viaΩπ keys <strong>and</strong> press [OK] to confirm. This operation sends the R4 codeonto the line.The 2 other parties are immediately connected each other <strong>and</strong>the user can leave the line.5.2.7 Reject 2nd callWhen in conversation mode <strong>and</strong> if a 2nd call incomes, the user can reject the new call by pressing≈ <strong>and</strong> 0 keys or:➤ Press the [Options] key, select "Reject 2nd call" via Ωπ keys <strong>and</strong>press [OK] key to confirm.This operation sends the R0 code onto the line.5.2.8 Terminate callWhen the user switch the conversation between 2 parties, he can ab<strong>and</strong>on the party he was talkingwith <strong>and</strong> to continue the conversation with the second one by pressing ≈ <strong>and</strong> 1 or:➤ Press the [Options] key, select "Terminate call" via Ωπ keys <strong>and</strong>press [OK] key to confirm.This operation sends the R1 code onto the line.50User manuali MAESTRO <strong>2055</strong>
6USE OF SMS SERVICEUSE OF SMS SERVICEThe MAESTRO <strong>2055</strong> can send <strong>and</strong> receive SMS in conformity to the SMS service requirements offeredby <strong>Belgacom</strong>. Three (3) SMS boxes (A,B,C) are available. Box A is available by default. Boxes B <strong>and</strong> Cmay be activated by the user. The SMS memory can h<strong>and</strong>le up to 20 messages (inbox +outbox),160alphanumeric characters for each message.The telephone allows to store up to 80 messages (sent +received) / box depending on the messages lenght. To use the SMS sercice, the <strong>Maestro</strong> <strong>2055</strong>should be set properly, as described in par. 6.1. Inside the "Messages" menu, select one of theavailable SMS boxes to make one of the following operations:Write newto write a new messageRead received to access the list of received messagesRead written to access the list of written messagesErase messages to erase received <strong>and</strong> written messagesSettingsto assign a Box name, a Box number (from 0 to 9),a PIN to access the Box,to acticate or deactivate Eatoni function,to deactivate a Boc.Available memory to check the % of free memory, the name of the messages received/written6.1 Configuring the SMS serviceThe MAESTRO <strong>2055</strong> can send <strong>and</strong> receive SMS. The function is active at delivery <strong>and</strong> it works if connectedto a SMS service center. The SMS center numbers are 1717 for outgoing SMS <strong>and</strong> 01717 forthe incoming SMS. The telephone has a SMS Box number used by the SMS service center. The SMSBox number is 0 by default.Important: if another SMS terminal is already connected to the line, it is important the terminals havedifferent SMS Box numbers.In this event you MUST change the Box A number (0 by defaukt) by following the procedure describedin par. 6.1.3. in order to receive properly the SMS messages.The user can check <strong>and</strong> modifythe SMS parameters as follows:6.1.1 Modify the SMS center numbersProceed as follows:➤ Press the [Menu] key.➤ Selectr “Messages” via Ωπ keys. Press [OK] key to confirm.➤ Select "Service center" via Ωπ keys. Press [OK] key to confirm.User manual MAESTRO <strong>2055</strong>51
English6 - USE OF SMS SERVICE➤ Select "Service center 1" or "Service center 2" via Ωπ keys <strong>and</strong> press[OK] key to confirm.➤ Modify the Service center number (erase via [Erase] or ∂ keys <strong>and</strong> enterthe new number)➤ Press [OK] key to confirm.6.1.2 Assign a name to a SMS BoxProceed as follows:➤ Press the [Menu] key.➤ Select “Messages” via Ωπ keys. Press [OK] key to confirm.➤ Select a Box via Ωπ keys. Press [OK] key to confirm.➤ Select "Settings" via Ωπ keys. Press [OK] key to confirm.➤ Select "Name" via Ωπ keys. Press [OK] key to confirm.➤ Modify the SMS Box name (erase via [Erase] or ∂keys) <strong>and</strong> enter a newname.➤ Press [OK] key to confirm.6.1.3 Assign a number to a SMS BoxProceed as follows:➤ Press the [Menu] key.➤ Select “Messages” via Ωπ keys. Press [OK] key to confirm.➤ Select a Box via Ωπ keys. Press [OK] key to confirm.➤ Select "Settings" via Ωπ keys. Press [OK] key to confirm.➤ Select "SMS Box number" via Ωπ keys. Press [OK] key to confirm..➤ Choose a Box number (from 0 to 9) via Ωπ keys or by pressing a 0 to9 key of the keyboard. Press [OK] key to confirm..52User manual MAESTRO <strong>2055</strong>
6 - USE OF SMS SERVICEEnglish6.1.4 Assign a Pin code to a SMS BoxProceed as follows:➤ Press the [Menu] key.➤ Select “Messages” via Ωπ keys. Press [OK] key to confirm.➤ Select a Box via Ωπ keys. Press [OK] key to confirm.➤ Select "Settings" via Ωπ keys. Press [OK] key to confirm.➤ Select "PIN" via Ωπ keys. Press [OK] key to confirm.If no PIN has been entered yet "New :" is displayed. Enter a PIN (from 1to 4 digits) <strong>and</strong> press [OK] key to confirm.➤ The message "Repeat:" will be displayed. Enter the PIN again <strong>and</strong> press[OK] key to confirm.6.1.5 Activate / Deactivate EATONI functionEatoni function (predictive - text system for letters choice) helps the user to write SMS messages.To activate / deactivate this function, proceed as follows:➤ Press the [Menu] key.➤ Select “Messages” via Ωπ keys. Press [OK] key to confirm.➤ Select a Box via Ωπ keys. Press [OK] key to confirm.➤ Select "Settings" via Ωπ keys. Press [OK] key to confirm.➤ Select "Eatoni" via Ωπ keys. Press [OK] key to confirm.➤ Select "Activate?" or "Deactivate?" via Ωπ keys.➤ Press [OK] key to confirm the choice.6.1.6 Deactivate a SMS BoxProceed as follows:➤ Press the [Menu] key.➤ Select “Messages” via Ωπ keys. Press [OK] key to confirm.➤ Select a Box via Ωπ keys. Press [OK] key to confirm.➤ Select "Settings" via Ωπ keys. Press [OK] key to confirm.➤ Select "Box deactivation" via Ωπ keys. Press [OK] key to confirm.User manual MAESTRO <strong>2055</strong>53
English6 - USE OF SMS SERVICE6.1.7 Activate a SMS BoxProceed as follows:➤ Press the [Menu] key.➤ Select “Messages” via Ωπ keys. Press [OK] key to confirm.➤ Select a not enabled Box via Ωπ keys. Press [OK] key to confirm.➤ "SMS box not enabled. Enable?" is displayed. Press [OK] key to confirm.Note : An activated SMS Box will have the symbolits name.displayed at left side of6.2 SMS SendingProceed as follows:➤ Press the [Menu] key.➤ Select “Messages” via Ωπ keys. Press [OK] key to confirm.➤ Select an activated Box via Ωπ keys. Press [OK] key to confirm.➤ If a PIN code has been programmed, the telephone will ask for it. Enter thePIN, press [OK] key to confirm <strong>and</strong> to access the SMS messages menu . Thelist of "Messages" options is displayed.➤ Select "Write new" via Ωπ keys <strong>and</strong> press [OK] key to confirm.➤ Enter the text via the alphanumeric keyboard by pressing a few times thekeys to choose the characters you need. A counter on the top of the screendiplays the number of entered characters (see table of characters at chapter6.4.).➤ When entering the text it is possible to erase the characters at left side ofthe cursor via ∂ <strong>and</strong> [Erase] keys.➤ After the text has been entered, press the [Options] key to display theoptions list.➤ Select "Send" via Ωπ keys <strong>and</strong> press [OK] key to confirm.54User manual MAESTRO <strong>2055</strong>
6 - USE OF SMS SERVICEEnglish➤ Enter the destination phone number:1) ManuallyOr2) Press the [Ph.Book] key <strong>and</strong> select a Phonebook name-number.➤ Press the [Options] key, select "Send" <strong>and</strong> press [OK] key to confirm.➤ Select the SMS Box number (from 0 to 9) of the user you want to send themessage via Ωπ keys.➤ Press [Send] to confirm. The telephone connects automatically the SMSservice center to send the message out. The result of the SMS sending willbe displayed.6.2.1 Reading <strong>and</strong> Options of the SMS sentProceed as follows:➤ Press the [Menu] key.➤ Select “Messages” via Ωπ keys. Press [OK] key to confirm.➤ Select an activated Box via Ωπ keys. Press [OK] key to confirm.➤ If a PIN code has been programmed, the telephone will ask for it. Enter thePIN, press [OK] key to confirm <strong>and</strong> to access the SMS messages menu . Thelist of "Messages" options is displayed..➤ Select "Read written" via Ωπ keys <strong>and</strong> press [OK] to confirm. The listof the destination numbers of the written SMS will be displayed.➤ Select a destination number via Ωπ keys <strong>and</strong> press [OK] to confirm.The message is displayed.➤ Press the [Options] key to access the "Options" sub-menu.User manual MAESTRO <strong>2055</strong>55
English6 - USE OF SMS SERVICE➤ Press the Ωπ keys to select the desired option :EraseSendEditDetailsUse number.to erase the displayed message <strong>and</strong> its parametersto send out the displayed messageto modify the displayed messageto display info of the message (destination number, box destinationnumber, date <strong>and</strong> hour of message sending)to save in the Phonebook or to call the number6.3 SMS ReceivingIn the event of a call incoming from a SMS center, the <strong>Maestro</strong> <strong>2055</strong> answer automatically to receivethe message (if the box of destination has been activated). The icon j is displayed when amessage has been received. If the memory of the receiving box cannot contain a new message, theicon j will be displayed.The user can erase some message received or tend some message written <strong>and</strong> stored but not yet sentout.6.3.1 Reading received SMSProceed as follows:➤ If displayed, press the [Show] key to access “Messages” menu➤ If [Show] is not displayed, press the [Menu] key. Select “Messages” viaΩπ keys <strong>and</strong> press [OK] key to confirm.➤ Select the desired Box via Ωπ key. Press [OK] key to confirm.➤ If a PIN code has been programmed, the <strong>Maestro</strong> <strong>2055</strong> will ask for it.➤ Enter the PIN code, press [OK] key to confirm <strong>and</strong> to access the SMSmenu. The list of "Messages" options is displayed.➤ Select "Read received" via Ωπkeys <strong>and</strong> press [ O K ]key to confirme. The list of received messages is displayed.The last received message is displayed at 1st place.56User manual MAESTRO <strong>2055</strong>
6 - USE OF SMS SERVICEEnglish➤ Select the desired number via Ωπ key <strong>and</strong> press [OK] key. Themessage is displayed.➤ Press the Ωπ keys to scroll the complete message.6.3.2 Options menu “Read received”After a message has been received, press the [Options] key to access sub-menu "Options". The usercan tpress Ωπ keys to select:EraseReplyForwardEditDetailsUse numberto erase received messagesto write a new SMS <strong>and</strong> to send it to the displayed numberto forward the received message to a new user numberto modify the received SMS <strong>and</strong> its parameters via [Erase] <strong>and</strong>∂keys. The new message may then be sent out or saved.to show infos concerning the SMS (sender number, sender boxnumber, date <strong>and</strong> hour of sending))to save the number into the Phonebook or to call the number.6.4 EATONI (SMS only)Eatoni (predictive method for the letters choice ) is a function that make easier a SMS message writing.The function can be activated/deactivated when configuring a SMS box (see chapter 6.1.5). Whenthe user writes a SMS message by pressing an alphanumeric key, the display shows the most probableletter related to that key <strong>and</strong> to the text of the message.If the letter shown is not the good one, press # key to change it.The * key allows to enter many characters an symbols.The 0 key allows to enter a space between characters.Starting to write a new message, the alphanumeric keys generate small letters.It is possible to generatecapital letters, digits <strong>and</strong> symbols by selecting the desired function in the "Options" menu.User manual MAESTRO <strong>2055</strong>57
English6 - USE OF SMS SERVICEPressing the [Options] key, the display shows:- Send- Save- Numbers- Uppercase- Symbols- ExitThe user can choose the desired item of the "Options" menu. If "Numbers" has been chosen, “Letters”will take its place. If “Uppercase” has been chosen, "Lowercase" will take its place.If “Symbols” has beenchosen, the user can select the desired symbol via Ωπ keys ant to confirm it via [OK] key.The association key - characters is described in the following table:Keyalphanumeric characters1 . , ! ¡ 12 A B C 2 a b c Æ Ç à æ ? ¿ € £ $3 D E F 3 d e f É é è % “ ‘4 G H I 4 g h i _5 J K L 5 j k l - + =6 M N O 6 m n o Ñ ñ ( < ^7 P Q R S 7 p q r s / \8 T U V 8 t u v Ü ù ü : ; & §9 W X Y Z 9 w x y z ) >0 space @ 0# If the letter is not the good one, press # key to change it@ . , ! ¡ ? ¿ € £ $ % “ ‘ _ - + =* ( < ^ / \ : ; & § ) > * # { } [ ]~The equipment that you bought has required the extraction <strong>and</strong> use of natural resources for its production.It may content hazardous substances for the health <strong>and</strong> the environment.In order to avoid the dissemination of those substances in our environment<strong>and</strong> to diminish the pressure onthe natural resources, we encourage you to use the appropriate take-back systems. Those systems will reuseor recycle most of the materials of your end life equipment in a sound way.The crossed-bin symbol invites you to use those systems.If you need more information on the collection, reuse <strong>and</strong> recycling systems, please contact your local orregional waste administration.You can also contact us for more information on the environmental performances of our products.58User manual MAESTRO <strong>2055</strong>
WARRANTYEnglishPlease keep in a safe place➤ Equipment.. . . . . . . . . . . . . . . . . . . . . . . . . . . . . . . . . . . . . . . . . . . . . . . . . . . . . . . . . . . . . . . . . . . . . . . . . . . . . . . . . . . . . . . . . . . . . . . . . . . . . . . . . . . . . . . . . . . . . . . . . . . . . . . . . . . . . . . . . . . . . . . .➤ Series Number. . . . . . . . . . . . . . . . . . . . . . . . . . . . . . . . . . . . . . . . . . . . . . . . . . . . . . . . . . . . . . . . . . . . . . . . . . . . . . . . . . . . . . . . . . . . . . . . . . . . . . . . . . . . . . . . . . . . . . . . . . . . . . . . . . . . . . . . . . . . . . . .➤ Date of purchase, replacement or repair *. . . . . . . . . . . . . . . . . . . . . . . . . . . . . . . . . . . . . . . . . . . . . . . . . . . . . . . . . . . . . . . . . . . . . . . . . . . . . . . . . . . . . . . . . . . . . . . . . . . . . . . . . . . . . . . . . . . . . . . . . . . . . . . . . . . . . . . . . . . . . . . .➤ Name <strong>and</strong> address of the purchaser:. . . . . . . . . . . . . . . . . . . . . . . . . . . . . . . . . . . . . . . . . . . . . . . . . . . . . . . . . . . . . . . . . . . . . . . . . . . . . . . . . . . . . . . . . . . . . . . . . . . . . . . . . . . . . . . . . . . . . . . . . . . . . . . . . . . . . . . . . . . . . . . .. . . . . . . . . . . . . . . . . . . . . . . . . . . . . . . . . . . . . . . . . . . . . . . . . . . . . . . . . . . . . . . . . . . . . . . . . . . . . . . . . . . . . . . . . . . . . . . . . . . . . . . . . . . . . . . . . . . . . . . . . . . . . . . . . . . . . . . . . . . . . . . .. . . . . . . . . . . . . . . . . . . . . . . . . . . . . . . . . . . . . . . . . . . . . . . . . . . . . . . . . . . . . . . . . . . . . . . . . . . . . . . . . . . . . . . . . . . . . . . . . . . . . . . . . . . . . . . . . . . . . . . . . . . . . . . . . . . . . . . . . . . . . . . .➤ Telephone number of the department concerned. . . . . . . . . . . . . . . . . . . . . . . . . . . . . . . . . . . . . . . . . . . . . . . . . . . . . . . . . . . . . . . . . . . . . . . . . . . . . . . . . . . . . . . . . . . . . . . . . . . . . . . . . . . . . . . . . . . . . . . . . . . . . . . . . . . . . . . . . . . . . . . .➤ Stamp. . . . . . . . . . . . . . . . . . . . . . . . . . . . . . . . . . . . . . . . . . . . . . . . . . . . . . . . . . . . . . . . . . . . . . . . . . . . . . . . . . . . . . . . . . . . . . . . . . . . . . . . . . . . . . . . . . . . . . . . . . . . . . . . . . . . . . . . . . . . . . . .*delete as appropriateUser manual MAESTRO <strong>2055</strong>59
EnglishWARRANTYWarrantySelected with care by <strong>Belgacom</strong>, the terminal equipment you have bought is coveredby a parts <strong>and</strong> labour warranty against all equipment flaws or manufacturing defectsfor a period of two years, unless any contractual provisions are made to the contrary.The warranty takes effect from the redemption or delivery date of the equipment. Anycall-out by <strong>Belgacom</strong> staff is not covered by the warranty.If you experience any difficulties with your equipment, you may give the telephonebook one of our phone shops <strong>and</strong> authorized sellersmaking sure that you are in possessionof this certificate together with the complete item of equipment in its originalpackaging or in some other that affords similar security. The addresses of our phoneshops appear in the information pages of Telephone directories.In the event of any flaw in the equipment or manufacturing defect, your equipment willbe repaired or replaced free of charge upon presentation of the ticket of purchasing.<strong>Belgacom</strong> alone shall determine what repairs <strong>and</strong>/or replacements are needed. Thewarranty period that applies to any equipment that is repaired or replaced shall expireon the expiry date of the equipment purchased, but shall not be less than 3 months.The warranty does not cover:- damage of any kind the origin of which was not occur prior to the sale;- damage, disturbances or defects that are attributed to any fault of the customer <strong>and</strong>whose cause is external to the equipment: lightening, surges in voltage, humidity,accidental damage, improper use or poor maintenance, the failure to comply withthe instructions on use as well as any kind of accident;- the repair or replacement of detachable parts (flexes, plugs, aerials, etc…), the replacementof accessories whose regular renewal is necessary (batteries, paper, ink,etc…) or the supply or cleaning products.The warranty shall not apply:- if the customer modifies or repairs the terminal equipment him/herself or via servicessupplied by persons who are not accredited by <strong>Belgacom</strong>;- if he/she removes or falsifies the manufacturer’s numbers <strong>and</strong>/or the marking on theterminal equipment.<strong>Belgacom</strong> may not be held responsible for any indirect or unsubstantial damage sustainedby the customer as a result of the incorrect functioning of the machine such asany loss in production, loss of income or loss of contracts.The general sale terms of our terminal equipment may be obtained by simplymaking a request to any <strong>Belgacom</strong> department open to the public <strong>and</strong> oninternet site www.belgacom.be.<strong>Belgacom</strong> SA under public law, Bd. du Roi Albert II 27, B-1030 BrusselsVAT BE 0202.239.951, Brussels Register of Legal Entities60User manual MAESTRO <strong>2055</strong>